Dell Powerconnect W-ClearPass Virtual Appliances W-ClearPass Guest 6.0 Deploym - Page 176
Editing Registration Properties, Configuration > Guest Self-Registration
 |
View all Dell Powerconnect W-ClearPass Virtual Appliances manuals
Add to My Manuals
Save this manual to your list of manuals |
Page 176 highlights
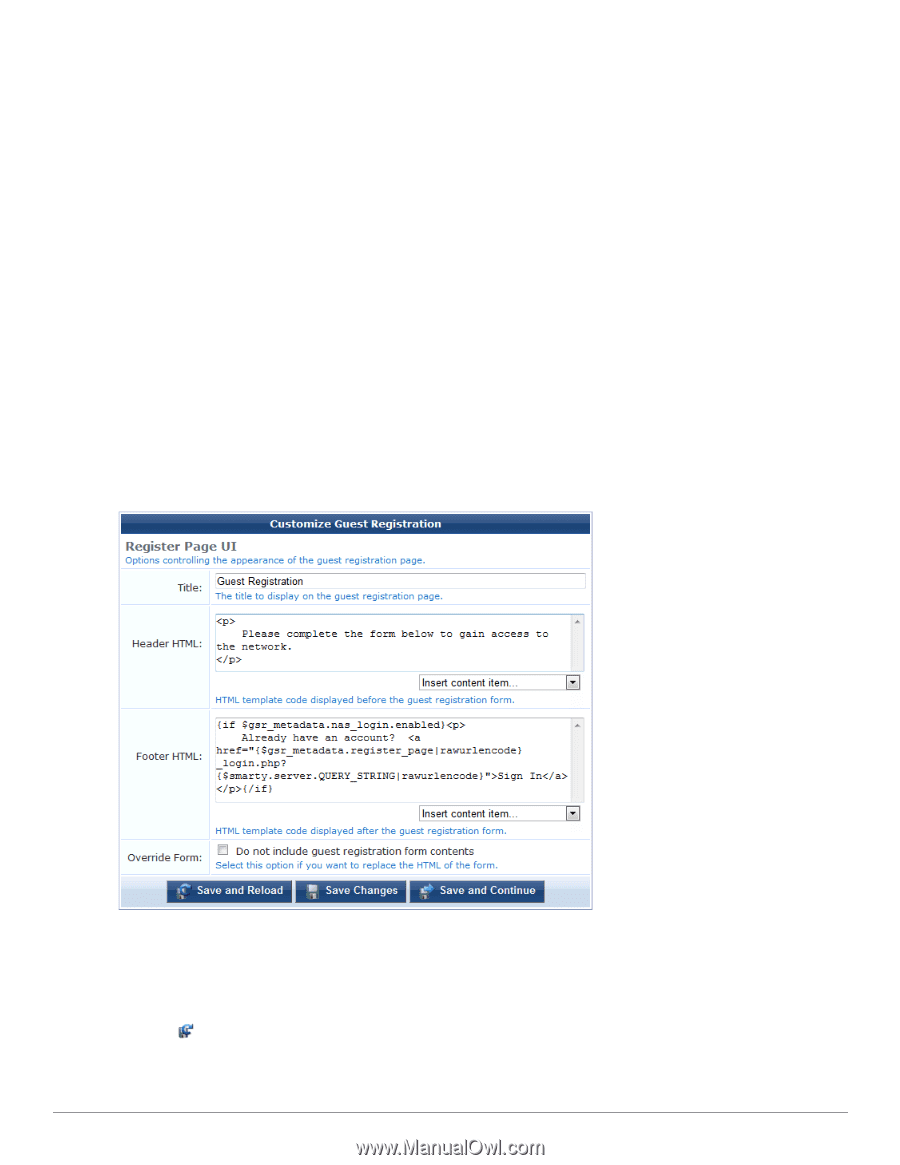
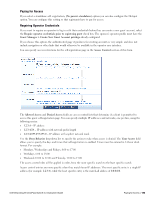
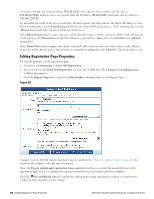
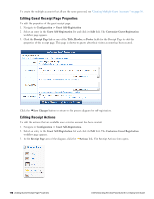
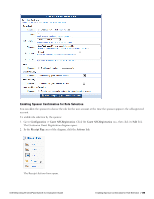
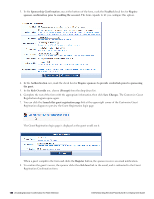
As another example, the network address 192.168.2.0/24 is less specific than a smaller network such as 192.168.2.192/26, which in turn is less specific than the IP address 192.168.2.201 (which may also be written as 192.168.2.201/32). To determine the result of the access control list, the most specific rule that matches the client's IP address is used. If the matching rule is in the Denied Access field, then the client will be denied access. If the matching rule is in the Allowed Access field, then the client will be permitted access. If the Allowed Access field is empty, all access will be allowed, except to clients with an IP address that matches any of the entries in the Denied Access field. This behavior is equivalent to adding the entry 0.0.0.0/0 to the Allowed Access field. If the Denied Access list is empty, only clients with an IP address that matches one of the entries in the Allowed Access list will be allowed access. This behavior is equivalent to adding the entry 0.0.0.0/0 to the Denied Access list. Editing Registration Page Properties To edit the properties of the registration page: 1. Navigate to Configuration > Guest Self-Registration 2. Select an entry in the Guest Self-Registration list and click its Edit link. The Customize Guest Registration workflow page appears. 3. Click the Register Page link, or one of the Title, Header, or Footer fields for the Register Page. Figure 29: Template code for the title, header, and footer may be specified. See "Smarty Template Syntax" on page 264 for details on the template code that may be inserted. Select the Do not include guest registration form contents check box to override the normal behavior of the registration page, which is to display the registration form between the header and footer templates. Click the Save and Reload button to update the self-registration page and launch or refresh a second browser window to show the effects of the changes. 176 | Editing Registration Page Properties Dell Networking W-ClearPass Guest 6.0 | Deployment Guide
-
 1
1 -
2
-
3
-
4
-
5
-
6
-
7
-
8
-
9
-
10
-
11
-
12
-
13
-
14
-
15
-
16
-
17
-
18
-
19
-
20
-
21
-
22
-
23
-
24
-
25
-
26
-
27
-
28
-
29
-
30
-
31
-
32
-
33
-
34
-
35
-
36
-
37
-
38
-
39
-
40
-
41
-
42
-
43
-
44
-
45
-
46
-
47
-
48
-
49
-
50
-
51
-
52
-
53
-
54
-
55
-
56
-
57
-
58
-
59
-
60
-
61
-
62
-
63
-
64
-
65
-
66
-
67
-
68
-
69
-
70
-
71
-
72
-
73
-
74
-
75
-
76
-
77
-
78
-
79
-
80
-
81
-
82
-
83
-
84
-
85
-
86
-
87
-
88
-
89
-
90
-
91
-
92
-
93
-
94
-
95
-
96
-
97
-
98
-
99
-
100
-
101
-
102
-
103
-
104
-
105
-
106
-
107
-
108
-
109
-
110
-
111
-
112
-
113
-
114
-
115
-
116
-
117
-
118
-
119
-
120
-
121
-
122
-
123
-
124
-
125
-
126
-
127
-
128
-
129
-
130
-
131
-
132
-
133
-
134
-
135
-
136
-
137
-
138
-
139
-
140
-
141
-
142
-
143
-
144
-
145
-
146
-
147
-
148
-
149
-
150
-
151
-
152
-
153
-
154
-
155
-
156
-
157
-
158
-
159
-
160
-
161
-
162
-
163
-
164
-
165
-
166
-
167
-
168
-
169
-
170
-
 171
171 -
 172
172 -
 173
173 -
 174
174 -
 175
175 -
 176
176 -
 177
177 -
 178
178 -
 179
179 -
 180
180 -
 181
181 -
182
-
183
-
184
-
185
-
186
-
187
-
188
-
189
-
190
-
191
-
192
-
193
-
194
-
195
-
196
-
197
-
198
-
199
-
200
-
201
-
202
-
203
-
204
-
205
-
206
-
207
-
208
-
209
-
210
-
211
-
212
-
213
-
214
-
215
-
216
-
217
-
218
-
219
-
220
-
221
-
222
-
223
-
224
-
225
-
226
-
227
-
228
-
229
-
230
-
231
-
232
-
233
-
234
-
235
-
236
-
237
-
238
-
239
-
240
-
241
-
242
-
243
-
244
-
245
-
246
-
247
-
248
-
249
-
250
-
251
-
252
-
253
-
254
-
255
-
256
-
257
-
258
-
259
-
260
-
261
-
262
-
263
-
264
-
265
-
266
-
267
-
268
-
269
-
270
-
271
-
272
-
273
-
274
-
275
-
276
-
277
-
278
-
279
-
280
-
281
-
282
-
283
-
284
-
285
-
286
-
287
-
288
-
289
-
290
-
291
-
292
-
293
-
294
-
295
-
296
-
297
-
298
-
299
-
300
-
301
-
302
-
303
-
304
-
305
-
306
-
307
-
308
-
309
-
310
-
311
-
312
-
313
-
314
-
315
-
316
-
317
-
318
-
319
-
320
 |
 |