Dell Powerconnect W-ClearPass Virtual Appliances W-ClearPass Guest 6.0 Deploym - Page 79
Configuring the User Interface for Device Provisioning
 |
View all Dell Powerconnect W-ClearPass Virtual Appliances manuals
Add to My Manuals
Save this manual to your list of manuals |
Page 79 highlights
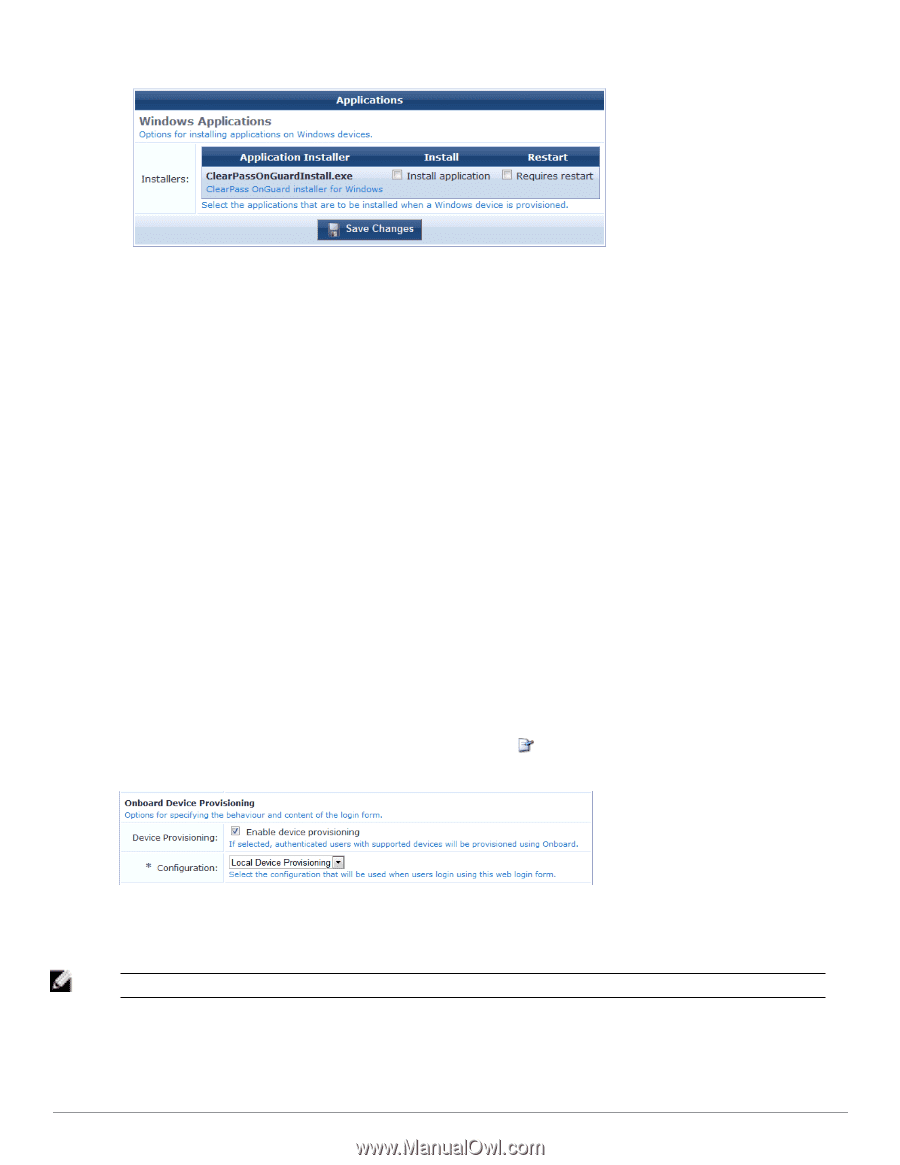
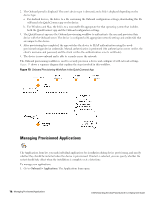
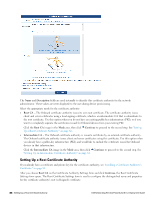
2. To upload applications, click the Content Manager link above the form. 3. To select applications to install, mark their check boxes, then click Save Changes. Configuring the User Interface for Device Provisioning The user interface for device provisioning can be customized in three different ways: l Customizing the Web login page used for device provisioning. All devices will reach the device provisioning Web login page as the first step of the provisioning process.See "Customizing the Device Provisioning Web Login Page" on page 79 to make changes to the content or formatting of this page. l Customizing the properties of the device provisioning profile for iOS and OS X devices. After starting the provisioning process, users of iOS and OS X are prompted to accept a configuration profile. See "Configuring Provisioning Settings for iOS and OS X" on page 110 to make changes to the content of this profile. l Customizing the user interface of the QuickConnect app for Windows, Mac OS X and Android devices. The provisioning process for Windows, Mac OS X and Android devices uses a separate app, which has a customizable user interface. See "Configuring Options for Legacy OS X, Windows, and Android Devices " on page 116 to make changes to the user interface. Customizing the Device Provisioning Web Login Page Onboard creates a default Web login page that is used to start the device provisioning process. To edit this page, navigate to Configuration > Start Here, then click the Web Logins command link. Click to expand the Onboard Provisioning row in the list, and then click Edit. The RADIUS Web Login Editor form for Onboard opens. Scroll to the Onboard Device Provisioning rows of the form. The Onboard-specific settings required for a device provisioning page are described below: Mark the Enable device provisioning check box to activate the Onboard features for this Web login page. NOTE: If this check box is not marked, device provisioning will be inoperative. Select the appropriate Onboard configuration from the Configuration drop-down list. Dell Networking W-ClearPass Guest 6.0 | Deployment Guide Configuring the User Interface for Device Provisioning | 79
-
 1
1 -
2
-
3
-
4
-
5
-
6
-
7
-
8
-
9
-
10
-
11
-
12
-
13
-
14
-
15
-
16
-
17
-
18
-
19
-
20
-
21
-
22
-
23
-
24
-
25
-
26
-
27
-
28
-
29
-
30
-
31
-
32
-
33
-
34
-
35
-
36
-
37
-
38
-
39
-
40
-
41
-
42
-
43
-
44
-
45
-
46
-
47
-
48
-
49
-
50
-
51
-
52
-
53
-
54
-
55
-
56
-
57
-
58
-
59
-
60
-
61
-
62
-
63
-
64
-
65
-
66
-
67
-
68
-
69
-
70
-
71
-
72
-
73
-
 74
74 -
 75
75 -
 76
76 -
 77
77 -
 78
78 -
 79
79 -
 80
80 -
 81
81 -
 82
82 -
 83
83 -
 84
84 -
85
-
86
-
87
-
88
-
89
-
90
-
91
-
92
-
93
-
94
-
95
-
96
-
97
-
98
-
99
-
100
-
101
-
102
-
103
-
104
-
105
-
106
-
107
-
108
-
109
-
110
-
111
-
112
-
113
-
114
-
115
-
116
-
117
-
118
-
119
-
120
-
121
-
122
-
123
-
124
-
125
-
126
-
127
-
128
-
129
-
130
-
131
-
132
-
133
-
134
-
135
-
136
-
137
-
138
-
139
-
140
-
141
-
142
-
143
-
144
-
145
-
146
-
147
-
148
-
149
-
150
-
151
-
152
-
153
-
154
-
155
-
156
-
157
-
158
-
159
-
160
-
161
-
162
-
163
-
164
-
165
-
166
-
167
-
168
-
169
-
170
-
171
-
172
-
173
-
174
-
175
-
176
-
177
-
178
-
179
-
180
-
181
-
182
-
183
-
184
-
185
-
186
-
187
-
188
-
189
-
190
-
191
-
192
-
193
-
194
-
195
-
196
-
197
-
198
-
199
-
200
-
201
-
202
-
203
-
204
-
205
-
206
-
207
-
208
-
209
-
210
-
211
-
212
-
213
-
214
-
215
-
216
-
217
-
218
-
219
-
220
-
221
-
222
-
223
-
224
-
225
-
226
-
227
-
228
-
229
-
230
-
231
-
232
-
233
-
234
-
235
-
236
-
237
-
238
-
239
-
240
-
241
-
242
-
243
-
244
-
245
-
246
-
247
-
248
-
249
-
250
-
251
-
252
-
253
-
254
-
255
-
256
-
257
-
258
-
259
-
260
-
261
-
262
-
263
-
264
-
265
-
266
-
267
-
268
-
269
-
270
-
271
-
272
-
273
-
274
-
275
-
276
-
277
-
278
-
279
-
280
-
281
-
282
-
283
-
284
-
285
-
286
-
287
-
288
-
289
-
290
-
291
-
292
-
293
-
294
-
295
-
296
-
297
-
298
-
299
-
300
-
301
-
302
-
303
-
304
-
305
-
306
-
307
-
308
-
309
-
310
-
311
-
312
-
313
-
314
-
315
-
316
-
317
-
318
-
319
-
320
 |
 |