Dell Powerconnect W-ClearPass Virtual Appliances W-ClearPass Guest 6.0 Deploym - Page 40
Importing Guest Accounts, Guest > Import Accounts
 |
View all Dell Powerconnect W-ClearPass Virtual Appliances manuals
Add to My Manuals
Save this manual to your list of manuals |
Page 40 highlights
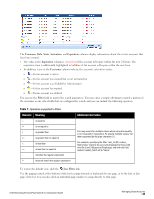
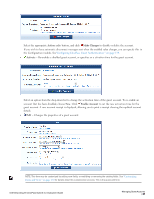
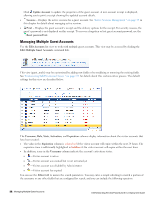
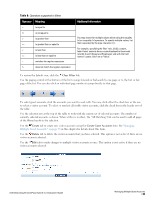
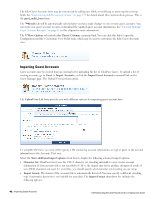
The Edit Guest Accounts form may be customized by adding new fields, or modifying or removing the existing fields. See "Customizing Self-Provisioned Access " on page 171 for details about this customization process. This is the guest_multi_form form. The Results tab will be automatically selected after you have made changes to one or more guest accounts. You can create new guest account receipts or download the updated guest account information. See "Creating Multiple Guest Account Receipts " on page 31 in this chapter for more information. The More Options tab includes the Choose Columns command link. You can click this link to open the Configuration module's Customize View Fields form, which may be used to customize the Edit Guest Accounts view. Importing Guest Accounts Guest accounts may be created from an existing list by uploading the list to ClearPass Guest. To upload a list of existing accounts, go to Guest > Import Accounts, or click the Import Guest Accounts command link on the Guest Manager page. The Upload User List form opens. The Upload User List form provides you with different options for importing guest account data. To complete the form, you must either specify a file containing account information, or type or paste in the account information to the Accounts Text area. Select the Show additional import options check box to display the following advanced import options: l Character Set: ClearPass Guest uses the UTF-8 character set encoding internally to store visitor account information. If your accounts file is not encoded in UTF-8, the import may fail or produce unexpected results if non-ASCII characters are used. To avoid this, you should specify what character set encoding you are using. l Import format: The format of the accounts file is automatically detected. You may specify a different encoding type if automatic detection is not suitable for your data. The Import Format drop-down list includes the following options: 40 | Importing Guest Accounts Dell Networking W-ClearPass Guest 6.0 | Deployment Guide
-
 1
1 -
2
-
3
-
4
-
5
-
6
-
7
-
8
-
9
-
10
-
11
-
12
-
13
-
14
-
15
-
16
-
17
-
18
-
19
-
20
-
21
-
22
-
23
-
24
-
25
-
26
-
27
-
28
-
29
-
30
-
31
-
32
-
33
-
34
-
 35
35 -
 36
36 -
 37
37 -
 38
38 -
 39
39 -
 40
40 -
 41
41 -
 42
42 -
 43
43 -
 44
44 -
 45
45 -
46
-
47
-
48
-
49
-
50
-
51
-
52
-
53
-
54
-
55
-
56
-
57
-
58
-
59
-
60
-
61
-
62
-
63
-
64
-
65
-
66
-
67
-
68
-
69
-
70
-
71
-
72
-
73
-
74
-
75
-
76
-
77
-
78
-
79
-
80
-
81
-
82
-
83
-
84
-
85
-
86
-
87
-
88
-
89
-
90
-
91
-
92
-
93
-
94
-
95
-
96
-
97
-
98
-
99
-
100
-
101
-
102
-
103
-
104
-
105
-
106
-
107
-
108
-
109
-
110
-
111
-
112
-
113
-
114
-
115
-
116
-
117
-
118
-
119
-
120
-
121
-
122
-
123
-
124
-
125
-
126
-
127
-
128
-
129
-
130
-
131
-
132
-
133
-
134
-
135
-
136
-
137
-
138
-
139
-
140
-
141
-
142
-
143
-
144
-
145
-
146
-
147
-
148
-
149
-
150
-
151
-
152
-
153
-
154
-
155
-
156
-
157
-
158
-
159
-
160
-
161
-
162
-
163
-
164
-
165
-
166
-
167
-
168
-
169
-
170
-
171
-
172
-
173
-
174
-
175
-
176
-
177
-
178
-
179
-
180
-
181
-
182
-
183
-
184
-
185
-
186
-
187
-
188
-
189
-
190
-
191
-
192
-
193
-
194
-
195
-
196
-
197
-
198
-
199
-
200
-
201
-
202
-
203
-
204
-
205
-
206
-
207
-
208
-
209
-
210
-
211
-
212
-
213
-
214
-
215
-
216
-
217
-
218
-
219
-
220
-
221
-
222
-
223
-
224
-
225
-
226
-
227
-
228
-
229
-
230
-
231
-
232
-
233
-
234
-
235
-
236
-
237
-
238
-
239
-
240
-
241
-
242
-
243
-
244
-
245
-
246
-
247
-
248
-
249
-
250
-
251
-
252
-
253
-
254
-
255
-
256
-
257
-
258
-
259
-
260
-
261
-
262
-
263
-
264
-
265
-
266
-
267
-
268
-
269
-
270
-
271
-
272
-
273
-
274
-
275
-
276
-
277
-
278
-
279
-
280
-
281
-
282
-
283
-
284
-
285
-
286
-
287
-
288
-
289
-
290
-
291
-
292
-
293
-
294
-
295
-
296
-
297
-
298
-
299
-
300
-
301
-
302
-
303
-
304
-
305
-
306
-
307
-
308
-
309
-
310
-
311
-
312
-
313
-
314
-
315
-
316
-
317
-
318
-
319
-
320
 |
 |