Brother International PS-300B Instruction Manual - English - Page 100
Adding and modifying a preset pattern (Shape-Pattern
 |
View all Brother International PS-300B manuals
Add to My Manuals
Save this manual to your list of manuals |
Page 100 highlights
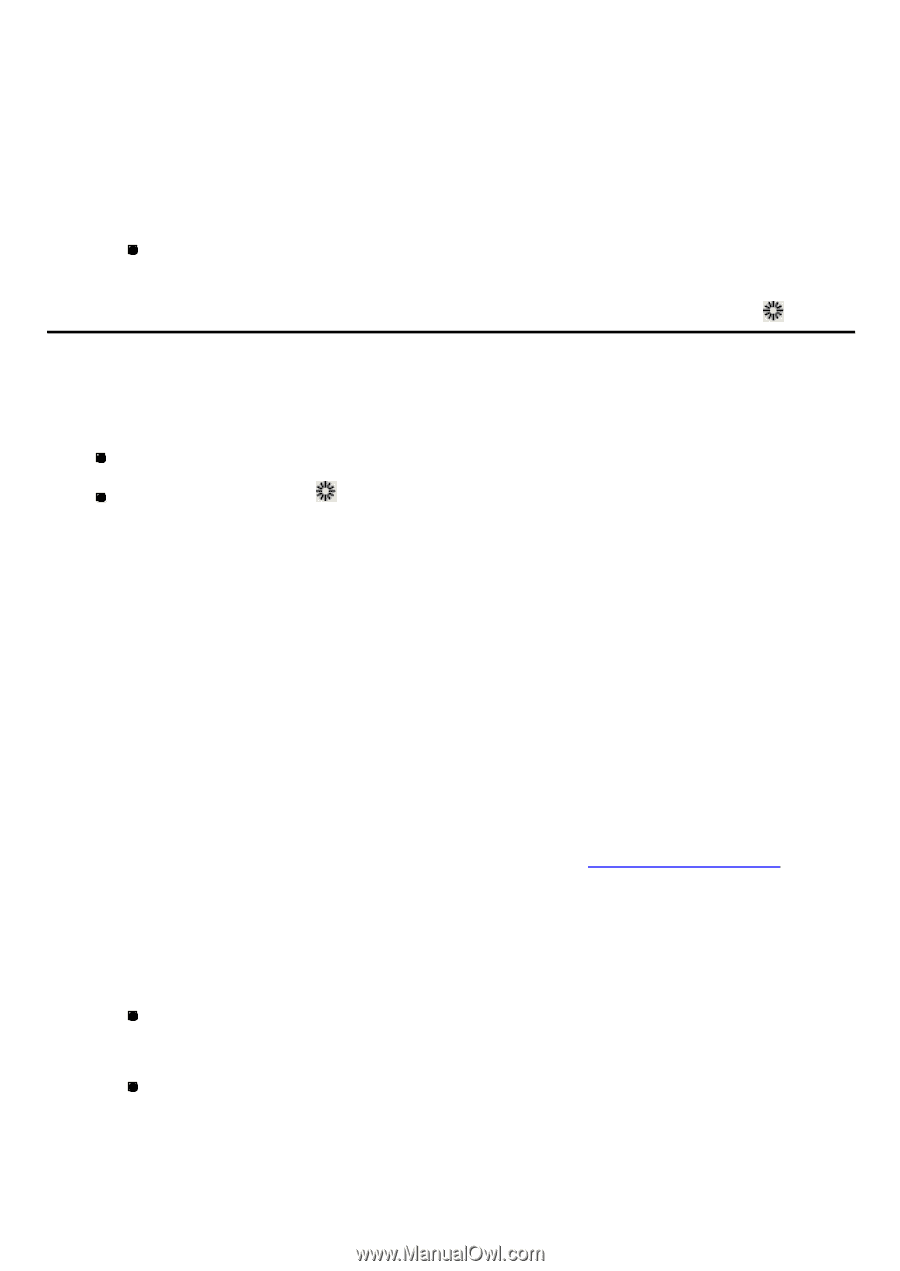
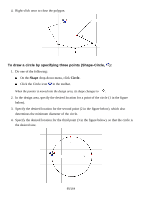
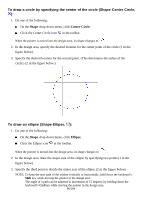
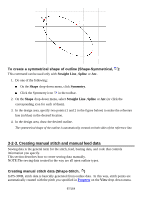
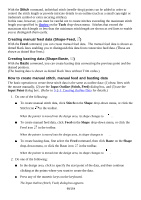
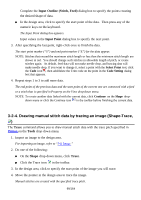
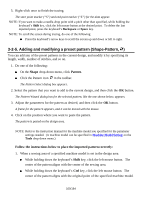
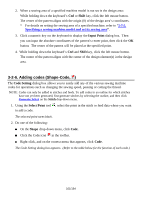
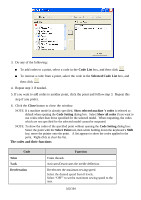
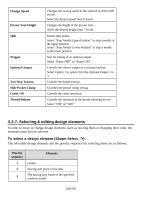
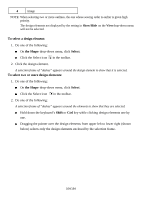
5. Right-click once to finish the tracing. The start point marker ("S") and end point marker ("E") for the data appear. NOTE: If you want to make a needle -drop point with a pitch other than specified, while holding the keyboard's Shift key, click the left mouse button at the desired point. To delete the last inputted point, press the keyboard's Backspace or Space key. NOTE: To scroll the screen during tracing, do one of the following: Press the keyboard's arrow keys to scroll the screen up and down or left to right. 3-2-5. Adding and modifying a preset pattern (Shape-Pattern, ) You can add any of the preset patterns in the current design, and modify it by specifying its length, width, number of stitches, and so on. 1. Do one of the following: On the Shape drop-down menu, click Pattern. Click the Pattern icon in the toolbar. The Pattern Select dialog box appears. 2. Select the pattern that you want to add to the current design, and then click the OK button. The Pattern Wizard dialog box for the selected pattern, like the one shown below, appears. 3. Adjust the parameters for the pattern as desired, and then click the OK button. A frame for the patte rn appears, and it can be moved with the mouse. 4. Click on the position where you want to paste the pattern. The pattern is pasted on the design area. NOTE: Refer to the instruction manual for the machine model you specified for the parameter settings needed. (A machine model can be specified in Machine Model Setting on the Tools drop-down menu.) Follow the instructions below to place the imported pattern correctly: 1. When a sewing area of a specified machine model is set in the design area: While holding down the keyboard's Shift key, click the left mouse button. The center of the pattern aligns with the center of the sewing area. While holding down the keyboard's Ctrl key, click the left mouse button. The center of the pattern aligns with the original point of the specified machine model. 100/164
-
 1
1 -
2
-
3
-
4
-
5
-
6
-
7
-
8
-
9
-
10
-
11
-
12
-
13
-
14
-
15
-
16
-
17
-
18
-
19
-
20
-
21
-
22
-
23
-
24
-
25
-
26
-
27
-
28
-
29
-
30
-
31
-
32
-
33
-
34
-
35
-
36
-
37
-
38
-
39
-
40
-
41
-
42
-
43
-
44
-
45
-
46
-
47
-
48
-
49
-
50
-
51
-
52
-
53
-
54
-
55
-
56
-
57
-
58
-
59
-
60
-
61
-
62
-
63
-
64
-
65
-
66
-
67
-
68
-
69
-
70
-
71
-
72
-
73
-
74
-
75
-
76
-
77
-
78
-
79
-
80
-
81
-
82
-
83
-
84
-
85
-
86
-
87
-
88
-
89
-
90
-
91
-
92
-
93
-
94
-
 95
95 -
 96
96 -
 97
97 -
 98
98 -
 99
99 -
 100
100 -
 101
101 -
 102
102 -
 103
103 -
 104
104 -
 105
105 -
106
-
107
-
108
-
109
-
110
-
111
-
112
-
113
-
114
-
115
-
116
-
117
-
118
-
119
-
120
-
121
-
122
-
123
-
124
-
125
-
126
-
127
-
128
-
129
-
130
-
131
-
132
-
133
-
134
-
135
-
136
-
137
-
138
-
139
-
140
-
141
-
142
-
143
-
144
-
145
-
146
-
147
-
148
-
149
-
150
-
151
-
152
-
153
-
154
-
155
-
156
-
157
-
158
-
159
-
160
-
161
-
162
-
163
-
164
 |
 |