Brother International PS-300B Instruction Manual - English - Page 147
Aligning design elements, To reverse the sewing direction of design elements Modify-Swap
 |
View all Brother International PS-300B manuals
Add to My Manuals
Save this manual to your list of manuals |
Page 147 highlights
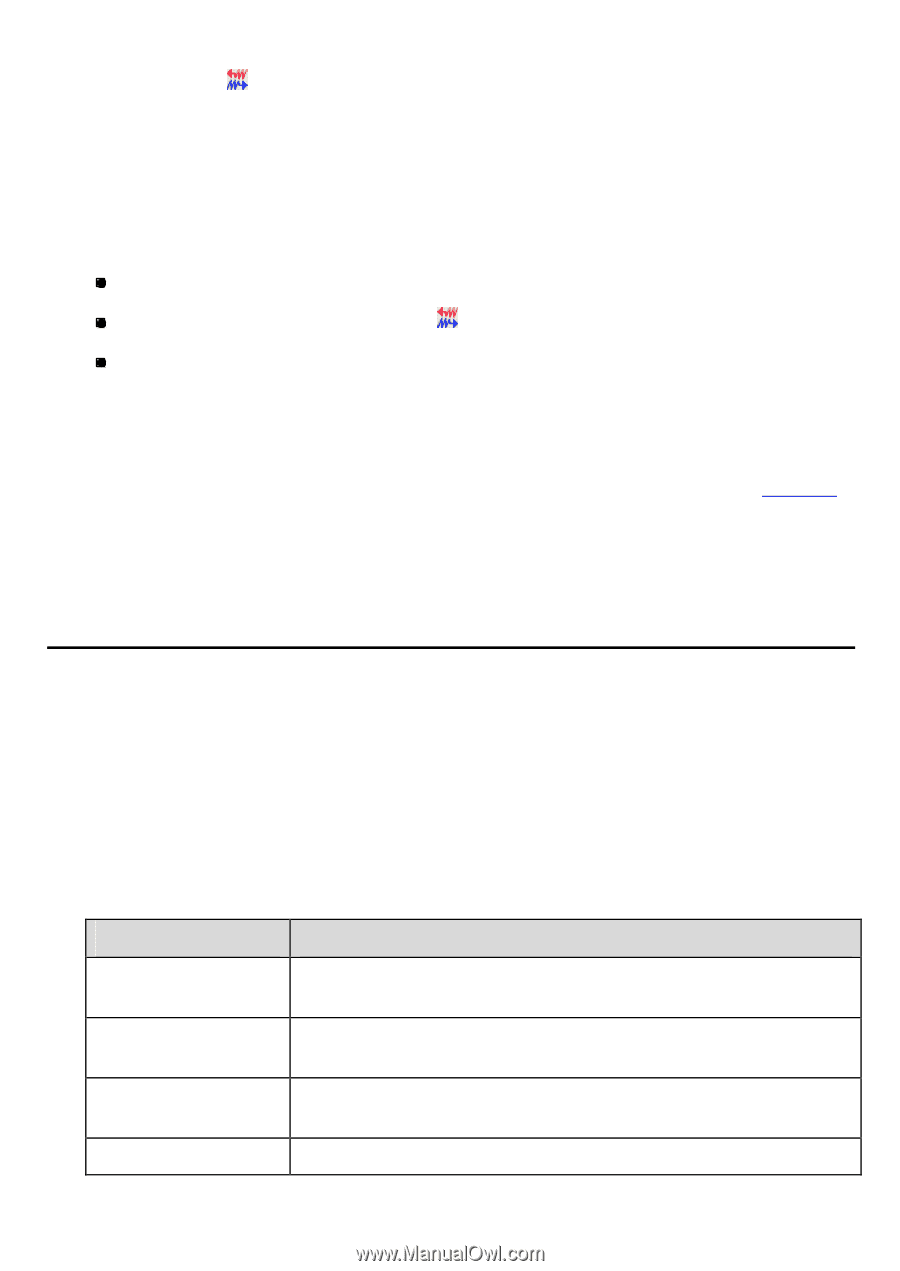
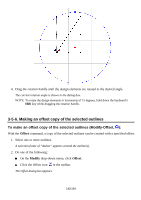
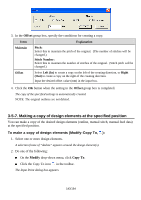
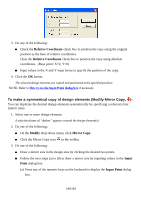
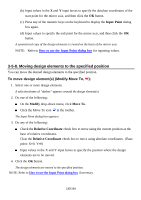
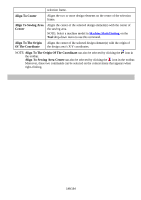
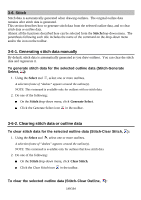
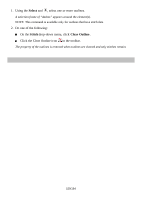
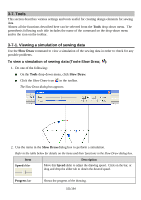
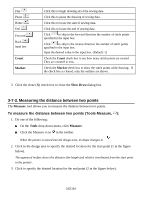
To reverse the sewing direction of design elements (Modify-Swap Start/End Point, ): To reverse the sewing direction of the selected design elements: 1. Select one or more design elements. A selection frame of "dashes" appears around the design element(s). 2. Do one of the following: On the Modify drop-down menu, click Swap Start/End Point. Click the Swap Start/End Point icon in the toolbar. Right-click to display the context menu, and then click Swap Start/End Point. The start and end points of the selected design element(s) are switched. NOTE: If no design element is selected in step 1, the sewing direction of all the design elements in the design area is reversed. This command will not reverse the Tack Method for the start and end points set in Property on the View drop-down menu. This means the tack methods for the start and end points are exchanged. 3-5-10. Aligning design elements Use the commands on the Alignment sub-menu to align design elements. To align design elements (Modify-Alignment-"sub-menu"): 1. Select one or more design elements. A selection frame of "dashes" appears around the design element(s). 2. On the Modify drop-down menu, click Alignment. On the Alignment sub- menu, click the desired command. Refer to the table below for details on the sub-menu commands and their functions. Sub-menu command Align To Left Align To Right Align To Top Align To Bottom Function Aligns the two or more design elements on the left side of the selection frame. Aligns the two or more design elements on the right side of the selection frame. Aligns the two or more design elements on the top edge of the selection frame. Aligns the two or more design elements on the bottom edge of the 147/164
-
 1
1 -
2
-
3
-
4
-
5
-
6
-
7
-
8
-
9
-
10
-
11
-
12
-
13
-
14
-
15
-
16
-
17
-
18
-
19
-
20
-
21
-
22
-
23
-
24
-
25
-
26
-
27
-
28
-
29
-
30
-
31
-
32
-
33
-
34
-
35
-
36
-
37
-
38
-
39
-
40
-
41
-
42
-
43
-
44
-
45
-
46
-
47
-
48
-
49
-
50
-
51
-
52
-
53
-
54
-
55
-
56
-
57
-
58
-
59
-
60
-
61
-
62
-
63
-
64
-
65
-
66
-
67
-
68
-
69
-
70
-
71
-
72
-
73
-
74
-
75
-
76
-
77
-
78
-
79
-
80
-
81
-
82
-
83
-
84
-
85
-
86
-
87
-
88
-
89
-
90
-
91
-
92
-
93
-
94
-
95
-
96
-
97
-
98
-
99
-
100
-
101
-
102
-
103
-
104
-
105
-
106
-
107
-
108
-
109
-
110
-
111
-
112
-
113
-
114
-
115
-
116
-
117
-
118
-
119
-
120
-
121
-
122
-
123
-
124
-
125
-
126
-
127
-
128
-
129
-
130
-
131
-
132
-
133
-
134
-
135
-
136
-
137
-
138
-
139
-
140
-
141
-
 142
142 -
 143
143 -
 144
144 -
 145
145 -
 146
146 -
 147
147 -
 148
148 -
 149
149 -
 150
150 -
 151
151 -
 152
152 -
153
-
154
-
155
-
156
-
157
-
158
-
159
-
160
-
161
-
162
-
163
-
164
 |
 |