Brother International PS-300B Instruction Manual - English - Page 153
To change the size of the design elements, Measure, Resize, Snap Setting
 |
View all Brother International PS-300B manuals
Add to My Manuals
Save this manual to your list of manuals |
Page 153 highlights
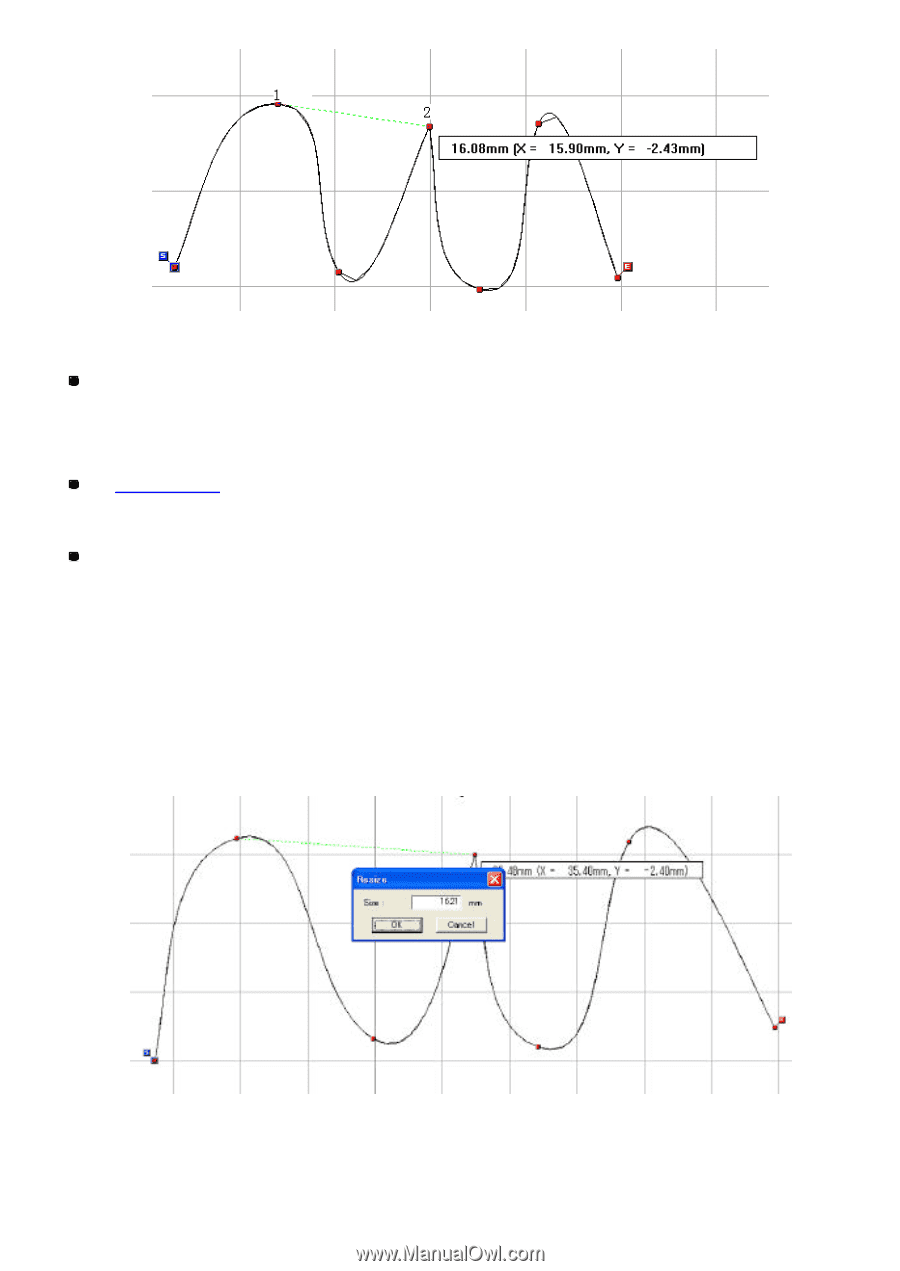
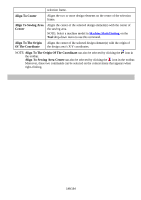
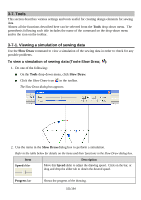
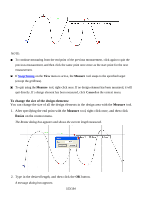
NOTE: To continue measuring from the end point of the previous measurement, click again to quit the previous measurement, and then click the same point once more as the start point for the next measurement. If Snap Setting on the Vie w menu is active, the Measure tool snaps to the specified target (except the gridlines). To quit using the Measure tool, right-click once. If no design element has been measured, it will quit directly. If a design element has been measured, click Cancel on the context menu. To change the size of the design elements: You can change the size of all the design elements in the design area with the Measure tool. 1. After specifying the end point with the Measure tool, right-click once, and then click Resize on the context menu. The Resize dialog box appears and shows the current length measured. 2. Type in the desired length, and then click the OK button. A message dialog box appears. 153/164
-
 1
1 -
2
-
3
-
4
-
5
-
6
-
7
-
8
-
9
-
10
-
11
-
12
-
13
-
14
-
15
-
16
-
17
-
18
-
19
-
20
-
21
-
22
-
23
-
24
-
25
-
26
-
27
-
28
-
29
-
30
-
31
-
32
-
33
-
34
-
35
-
36
-
37
-
38
-
39
-
40
-
41
-
42
-
43
-
44
-
45
-
46
-
47
-
48
-
49
-
50
-
51
-
52
-
53
-
54
-
55
-
56
-
57
-
58
-
59
-
60
-
61
-
62
-
63
-
64
-
65
-
66
-
67
-
68
-
69
-
70
-
71
-
72
-
73
-
74
-
75
-
76
-
77
-
78
-
79
-
80
-
81
-
82
-
83
-
84
-
85
-
86
-
87
-
88
-
89
-
90
-
91
-
92
-
93
-
94
-
95
-
96
-
97
-
98
-
99
-
100
-
101
-
102
-
103
-
104
-
105
-
106
-
107
-
108
-
109
-
110
-
111
-
112
-
113
-
114
-
115
-
116
-
117
-
118
-
119
-
120
-
121
-
122
-
123
-
124
-
125
-
126
-
127
-
128
-
129
-
130
-
131
-
132
-
133
-
134
-
135
-
136
-
137
-
138
-
139
-
140
-
141
-
142
-
143
-
144
-
145
-
146
-
147
-
 148
148 -
 149
149 -
 150
150 -
 151
151 -
 152
152 -
 153
153 -
 154
154 -
 155
155 -
 156
156 -
 157
157 -
 158
158 -
159
-
160
-
161
-
162
-
163
-
164
 |
 |