Brother International PS-300B Instruction Manual - English - Page 21
Select, Point, Shift, To align the sewing start point to the start point of the first outline
 |
View all Brother International PS-300B manuals
Add to My Manuals
Save this manual to your list of manuals |
Page 21 highlights
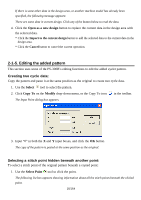
1. Use the Select Point tool to click the sewing start point. 2. To change the sewing start point, do one of the following: Drag the sewing start point and drop it at the desired position. Dragging the sewing start point, click any of the numeric keys. The Input Point dialog box appears. Input the coordinates and click the OK button. The sewing start point will move to the specified position. To align the sewing start point to the start point of the first outline: While holding down the keyboard's Ctrl key, drag the sewing start point. To align the sewing start point to the center of all the sewing data: While holding down the keyboard's Shift key, drag the sewing start point. 21/164
-
 1
1 -
2
-
3
-
4
-
5
-
6
-
7
-
8
-
9
-
10
-
11
-
12
-
13
-
14
-
15
-
 16
16 -
 17
17 -
 18
18 -
 19
19 -
 20
20 -
 21
21 -
 22
22 -
 23
23 -
 24
24 -
 25
25 -
 26
26 -
27
-
28
-
29
-
30
-
31
-
32
-
33
-
34
-
35
-
36
-
37
-
38
-
39
-
40
-
41
-
42
-
43
-
44
-
45
-
46
-
47
-
48
-
49
-
50
-
51
-
52
-
53
-
54
-
55
-
56
-
57
-
58
-
59
-
60
-
61
-
62
-
63
-
64
-
65
-
66
-
67
-
68
-
69
-
70
-
71
-
72
-
73
-
74
-
75
-
76
-
77
-
78
-
79
-
80
-
81
-
82
-
83
-
84
-
85
-
86
-
87
-
88
-
89
-
90
-
91
-
92
-
93
-
94
-
95
-
96
-
97
-
98
-
99
-
100
-
101
-
102
-
103
-
104
-
105
-
106
-
107
-
108
-
109
-
110
-
111
-
112
-
113
-
114
-
115
-
116
-
117
-
118
-
119
-
120
-
121
-
122
-
123
-
124
-
125
-
126
-
127
-
128
-
129
-
130
-
131
-
132
-
133
-
134
-
135
-
136
-
137
-
138
-
139
-
140
-
141
-
142
-
143
-
144
-
145
-
146
-
147
-
148
-
149
-
150
-
151
-
152
-
153
-
154
-
155
-
156
-
157
-
158
-
159
-
160
-
161
-
162
-
163
-
164
 |
 |
21/164
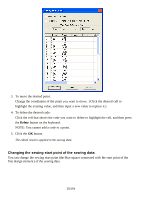
1. Use the
Select
Point
tool to click the sewing start point.
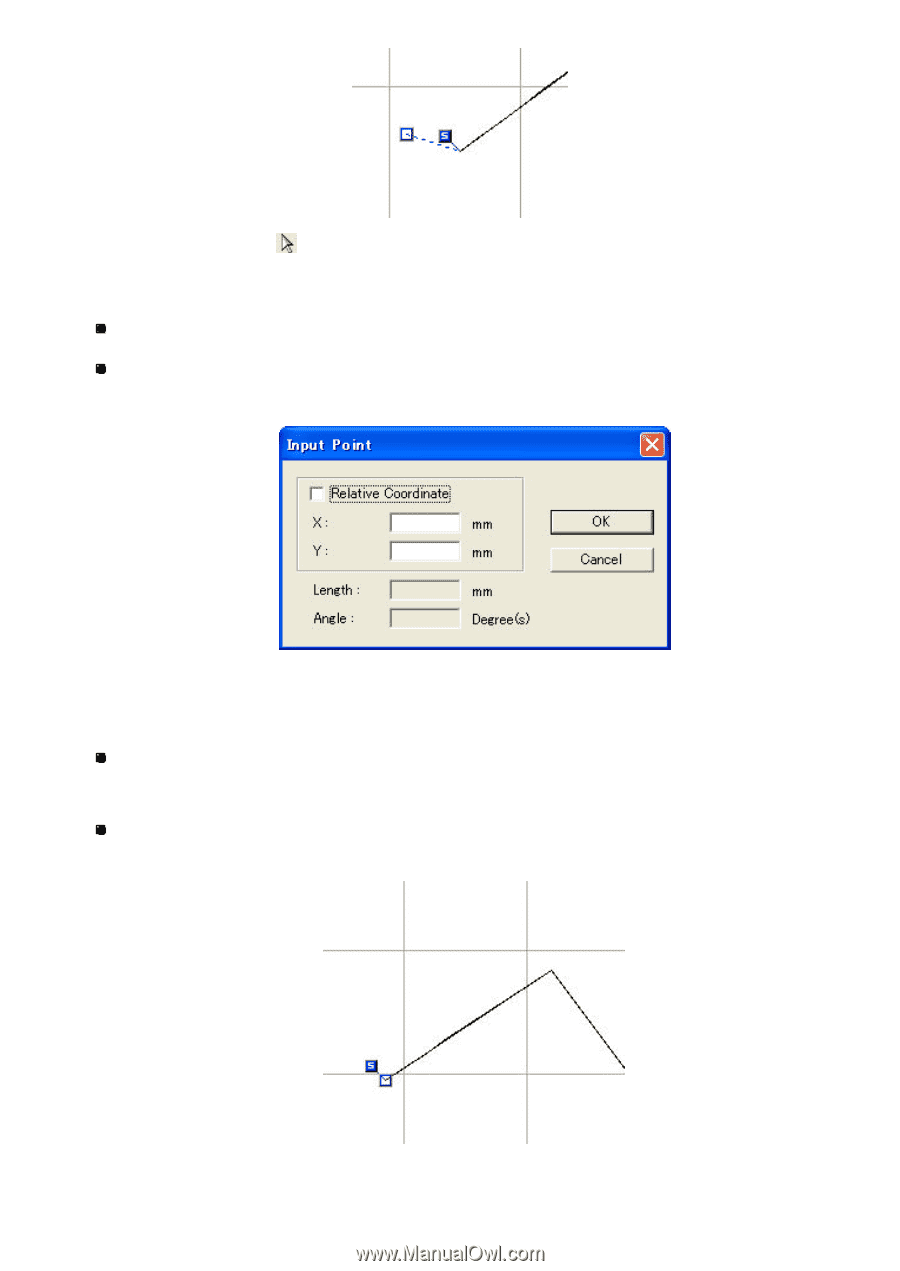
2. To change the sewing start point, do one of the following:
Drag the sewing start point and drop it at the desired position.
Dragging the sewing start point, click any of the numeric keys.
The Input Point dialog box appears.
Input the coordinates and click the
OK
button.
The sewing start point will move to the specified position.
To align the sewing start point to the start point of the first outline:
While holding down the keyboard’s
Ctrl
key, drag the sewing start point.
To align the sewing start point to the center of all the sewing data:
While holding down the keyboard’s
Shift
key, drag the sewing start point.