Brother International PS-300B Instruction Manual - English - Page 143
Making a copy of design elements at the specified position
 |
View all Brother International PS-300B manuals
Add to My Manuals
Save this manual to your list of manuals |
Page 143 highlights
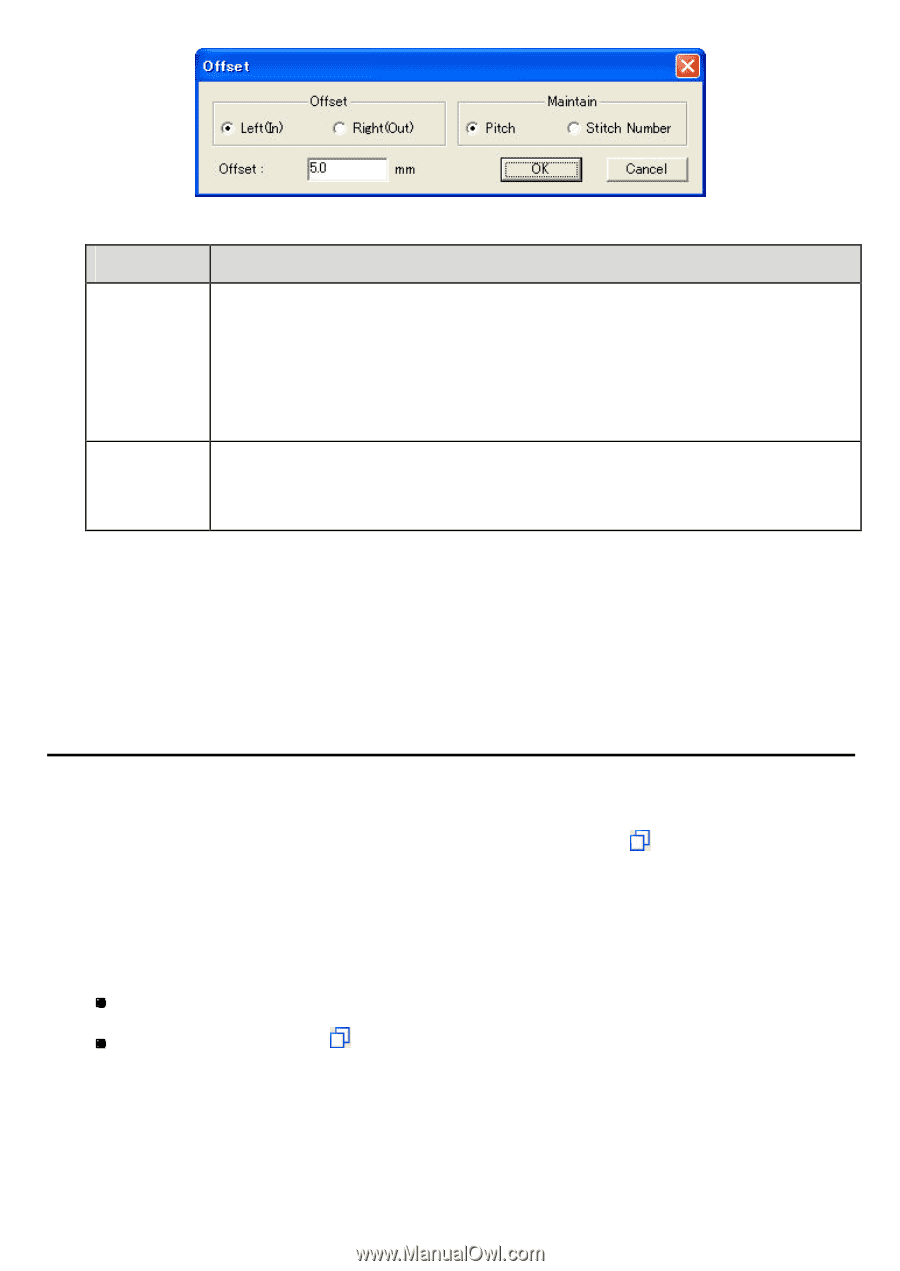
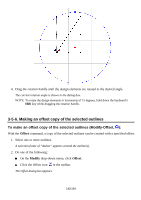
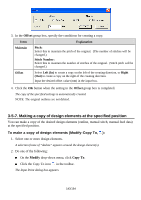
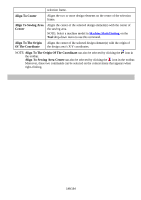
3. In the Offset group box, specify the conditions for creating a copy. Item Explanation Maintain Pitch: Select this to maintain the pitch of the original. (The number of stitches will be changed.) Stitch Number: Select this to maintain the number of stitches of the original. (Stitch pitch will be changed.) Offset Select Left (In) to create a copy on the left of the creating direction, or Right (Out) to create a copy on the right of the creating direction. Input the desired offset value (mm) in the input box. 4. Click the OK button when the setting in the Offset group box is completed. The copy of the specified settings is automatically created. NOTE: The original outlines are not deleted. 3-5-7. Making a copy of design elements at the specified position You can make a copy of the desired design elements (outline, manual stitch, manual feed data) at the specified position. To make a copy of design elements (Modify-Copy To, ): 1. Select one or more design elements. A selection frame of "dashes" appears around the design element(s). 2. Do one of the following: On the Modify drop-down menu, click Copy To. Click the Copy To icon in the toolbar. The Input Point dialog box appears. 143/164
-
 1
1 -
2
-
3
-
4
-
5
-
6
-
7
-
8
-
9
-
10
-
11
-
12
-
13
-
14
-
15
-
16
-
17
-
18
-
19
-
20
-
21
-
22
-
23
-
24
-
25
-
26
-
27
-
28
-
29
-
30
-
31
-
32
-
33
-
34
-
35
-
36
-
37
-
38
-
39
-
40
-
41
-
42
-
43
-
44
-
45
-
46
-
47
-
48
-
49
-
50
-
51
-
52
-
53
-
54
-
55
-
56
-
57
-
58
-
59
-
60
-
61
-
62
-
63
-
64
-
65
-
66
-
67
-
68
-
69
-
70
-
71
-
72
-
73
-
74
-
75
-
76
-
77
-
78
-
79
-
80
-
81
-
82
-
83
-
84
-
85
-
86
-
87
-
88
-
89
-
90
-
91
-
92
-
93
-
94
-
95
-
96
-
97
-
98
-
99
-
100
-
101
-
102
-
103
-
104
-
105
-
106
-
107
-
108
-
109
-
110
-
111
-
112
-
113
-
114
-
115
-
116
-
117
-
118
-
119
-
120
-
121
-
122
-
123
-
124
-
125
-
126
-
127
-
128
-
129
-
130
-
131
-
132
-
133
-
134
-
135
-
136
-
137
-
 138
138 -
 139
139 -
 140
140 -
 141
141 -
 142
142 -
 143
143 -
 144
144 -
 145
145 -
 146
146 -
 147
147 -
 148
148 -
149
-
150
-
151
-
152
-
153
-
154
-
155
-
156
-
157
-
158
-
159
-
160
-
161
-
162
-
163
-
164
 |
 |