Brother International PS-300B Instruction Manual - English - Page 101
Adding codes (Shape-Code
 |
View all Brother International PS-300B manuals
Add to My Manuals
Save this manual to your list of manuals |
Page 101 highlights
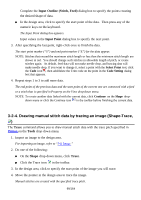
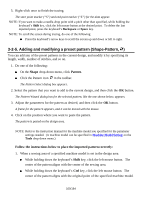
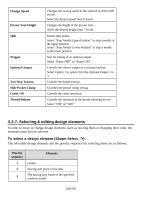
2. When a sewing area of a specified machine model is not set in the design area: While holding down the keyboard's Ctrl or Shift key, click the left mouse button. The center of the pattern aligns with the origin (0) of the design area's coordinates. * For details on setting the sewing area of a specified machine, refer to "3-7-5. Specifying a sewing machine model and set its sewing area". 3. Click a numeric key on the keyboard to display the Input Point dialog box. Then you can input the absolute coordinates of the pattern's center point, then click the OK button. The center of the pattern will be placed at the specified point. 4. While holding down the keyboard's Ctrl and Shift key, click the left mouse button. The center of the pattern aligns with the center of the design element(s) in the design area. 3-2-6. Adding codes (Shape-Code, ) The Code Setting dialog box allows you to easily add any of the various sewing machine codes for operations such as changing the sewing speed, pausing or cutting the thread. NOTE: Codes can only be added to stitches and feeds. To add codes to an outline for which stitches have not yet been generated, first generate stitches by selecting the outline, and then click Generate Select on the Stitch drop-down menu. 1. Using the Select Point tool , select the point in the stitch or feed data where you want to add a code. The selected point turns black. 2. Do one of the following: On the Shape drop-down menu, click Code . Click the Code icon in the toolbar. Right-click, and on the context menu that appears, click Code . The Code Setting dialog box appears. (Refer to the table below for the function of each code.) 101/164
-
 1
1 -
2
-
3
-
4
-
5
-
6
-
7
-
8
-
9
-
10
-
11
-
12
-
13
-
14
-
15
-
16
-
17
-
18
-
19
-
20
-
21
-
22
-
23
-
24
-
25
-
26
-
27
-
28
-
29
-
30
-
31
-
32
-
33
-
34
-
35
-
36
-
37
-
38
-
39
-
40
-
41
-
42
-
43
-
44
-
45
-
46
-
47
-
48
-
49
-
50
-
51
-
52
-
53
-
54
-
55
-
56
-
57
-
58
-
59
-
60
-
61
-
62
-
63
-
64
-
65
-
66
-
67
-
68
-
69
-
70
-
71
-
72
-
73
-
74
-
75
-
76
-
77
-
78
-
79
-
80
-
81
-
82
-
83
-
84
-
85
-
86
-
87
-
88
-
89
-
90
-
91
-
92
-
93
-
94
-
95
-
 96
96 -
 97
97 -
 98
98 -
 99
99 -
 100
100 -
 101
101 -
 102
102 -
 103
103 -
 104
104 -
 105
105 -
 106
106 -
107
-
108
-
109
-
110
-
111
-
112
-
113
-
114
-
115
-
116
-
117
-
118
-
119
-
120
-
121
-
122
-
123
-
124
-
125
-
126
-
127
-
128
-
129
-
130
-
131
-
132
-
133
-
134
-
135
-
136
-
137
-
138
-
139
-
140
-
141
-
142
-
143
-
144
-
145
-
146
-
147
-
148
-
149
-
150
-
151
-
152
-
153
-
154
-
155
-
156
-
157
-
158
-
159
-
160
-
161
-
162
-
163
-
164
 |
 |