Brother International PS-300B Instruction Manual - English - Page 119
Attribute, Running, Stitch Type, Border, Color, Connection, STITCH, Tack Method
 |
View all Brother International PS-300B manuals
Add to My Manuals
Save this manual to your list of manuals |
Page 119 highlights
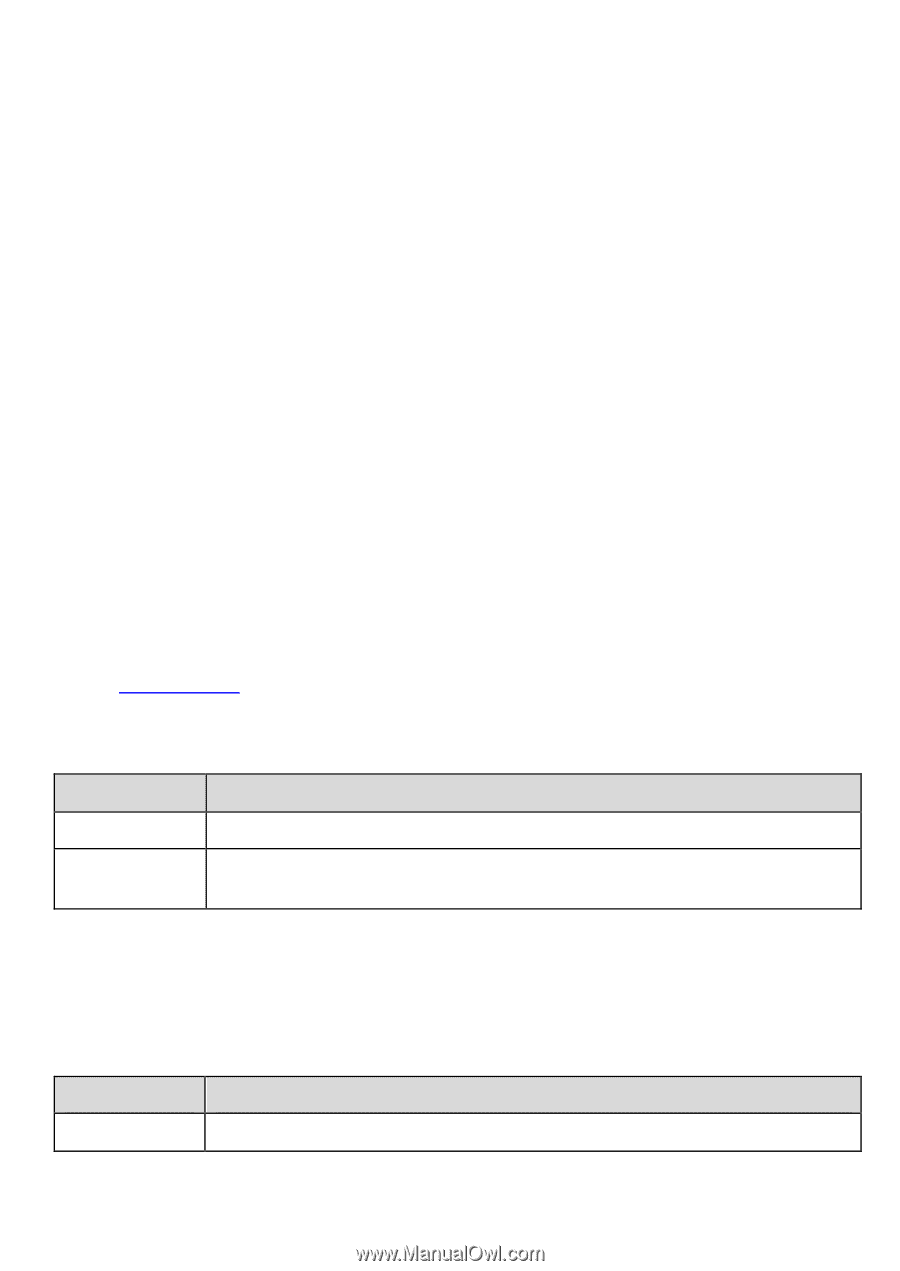
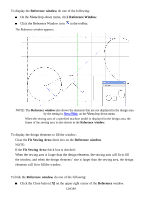
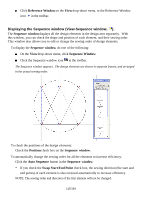
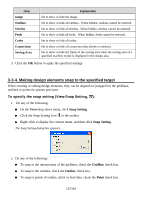
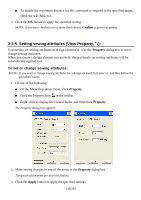
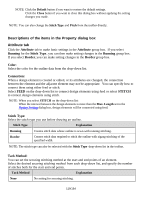
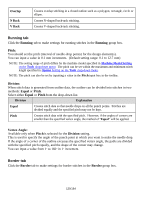
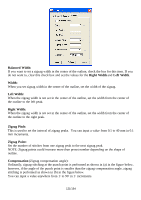
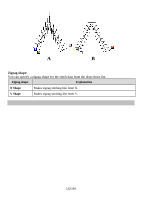
NOTE: Click the Default button if you want to restore the default settings. Click the Close button if you want to close this dialog box without applying the setting changes you made. NOTE: You can also change the Stitch Type and Pitch from the toolbar directly. Descr iptions of the items in the Property dialog box Attribute tab Click the Attribute tab to make basic settings in the Attribute group box. If you select Running for the Stitch Type , you can then make setting changes in the Running group box. If you select Border, you can make setting changes in the Border group box. Color: Select the color for the outline data from the drop-down list. Connection: When a design element is created or edited, or its attributes are changed, the connection between the element and the adjacent element may not be appropriate. You can specify how to connect them using either feed or stitch. Select FEED on the drop-down list to connect design elements using feed or select STITCH to connect design elements using stitch. NOTE: When you select STITCH on the drop-down list: When the interval between the design elements is more than the Max. Length set in the Option Setting dialog box, design elements will be connected using feed. Stitch Type: Select the stitch type you use before drawing an outline. Stitch Type Explanation Running Creates stitch data whose outline is sewn with running stitching. Border Creates stitch data required to stitch the outline with zigzag stitching of the specified width. NOTE: The stitch type can also be selected with the Stitch Type drop-down list in the toolbar. Tack Method: You can set the securing stitching method at the start and end points of an element. Select the desired securing stitching method from each drop-down list, and specify the number of stitches both for the start and end points. Tack Method Explanation None No setting for securing stitching. 119/164
-
 1
1 -
2
-
3
-
4
-
5
-
6
-
7
-
8
-
9
-
10
-
11
-
12
-
13
-
14
-
15
-
16
-
17
-
18
-
19
-
20
-
21
-
22
-
23
-
24
-
25
-
26
-
27
-
28
-
29
-
30
-
31
-
32
-
33
-
34
-
35
-
36
-
37
-
38
-
39
-
40
-
41
-
42
-
43
-
44
-
45
-
46
-
47
-
48
-
49
-
50
-
51
-
52
-
53
-
54
-
55
-
56
-
57
-
58
-
59
-
60
-
61
-
62
-
63
-
64
-
65
-
66
-
67
-
68
-
69
-
70
-
71
-
72
-
73
-
74
-
75
-
76
-
77
-
78
-
79
-
80
-
81
-
82
-
83
-
84
-
85
-
86
-
87
-
88
-
89
-
90
-
91
-
92
-
93
-
94
-
95
-
96
-
97
-
98
-
99
-
100
-
101
-
102
-
103
-
104
-
105
-
106
-
107
-
108
-
109
-
110
-
111
-
112
-
113
-
 114
114 -
 115
115 -
 116
116 -
 117
117 -
 118
118 -
 119
119 -
 120
120 -
 121
121 -
 122
122 -
 123
123 -
 124
124 -
125
-
126
-
127
-
128
-
129
-
130
-
131
-
132
-
133
-
134
-
135
-
136
-
137
-
138
-
139
-
140
-
141
-
142
-
143
-
144
-
145
-
146
-
147
-
148
-
149
-
150
-
151
-
152
-
153
-
154
-
155
-
156
-
157
-
158
-
159
-
160
-
161
-
162
-
163
-
164
 |
 |