Brother International PS-300B Instruction Manual - English - Page 18
Shape, Code List, Selected Code List, Close, To check the codes applied to the specified point, Select
 |
View all Brother International PS-300B manuals
Add to My Manuals
Save this manual to your list of manuals |
Page 18 highlights
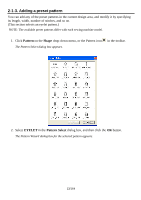
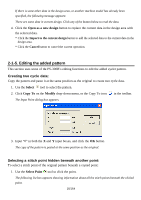
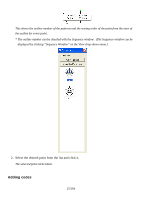
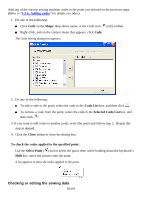
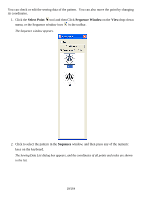
Add any of the various sewing machine codes to the point you selected in the previous steps. (Refer to "3-2-6. Adding codes" for details on codes.) 1. Do one of the following: Click Code on the Shape drop-down menu, or the Code icon in the toolbar. Right-click, and on the context menu that appears, click Code . The Code Setting dialog box appears. 2. Do any of the following: To add a code to the point, select the code in the Code List box, and then click . To remove a code from the point, select the code in the Selected Code List box, and then click . 3. If you want to add codes to another point, select the point and follow step 2. Repeat this step as desired. 4. Click the Close button to close the dialog box. To check the codes applied to the specified point: Use the Select Point ( ) tool to select the point, then while holding down the keyboard's Shift key, move the pointer onto the point. A list appears to show the codes applied to the point. Checking or editing the sewing data 18/164
-
 1
1 -
2
-
3
-
4
-
5
-
6
-
7
-
8
-
9
-
10
-
11
-
12
-
 13
13 -
 14
14 -
 15
15 -
 16
16 -
 17
17 -
 18
18 -
 19
19 -
 20
20 -
 21
21 -
 22
22 -
 23
23 -
24
-
25
-
26
-
27
-
28
-
29
-
30
-
31
-
32
-
33
-
34
-
35
-
36
-
37
-
38
-
39
-
40
-
41
-
42
-
43
-
44
-
45
-
46
-
47
-
48
-
49
-
50
-
51
-
52
-
53
-
54
-
55
-
56
-
57
-
58
-
59
-
60
-
61
-
62
-
63
-
64
-
65
-
66
-
67
-
68
-
69
-
70
-
71
-
72
-
73
-
74
-
75
-
76
-
77
-
78
-
79
-
80
-
81
-
82
-
83
-
84
-
85
-
86
-
87
-
88
-
89
-
90
-
91
-
92
-
93
-
94
-
95
-
96
-
97
-
98
-
99
-
100
-
101
-
102
-
103
-
104
-
105
-
106
-
107
-
108
-
109
-
110
-
111
-
112
-
113
-
114
-
115
-
116
-
117
-
118
-
119
-
120
-
121
-
122
-
123
-
124
-
125
-
126
-
127
-
128
-
129
-
130
-
131
-
132
-
133
-
134
-
135
-
136
-
137
-
138
-
139
-
140
-
141
-
142
-
143
-
144
-
145
-
146
-
147
-
148
-
149
-
150
-
151
-
152
-
153
-
154
-
155
-
156
-
157
-
158
-
159
-
160
-
161
-
162
-
163
-
164
 |
 |