Brother International PS-300B Instruction Manual - English - Page 137
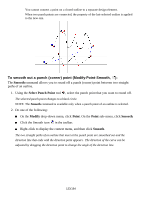
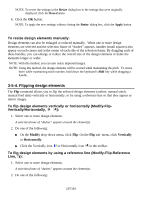
Flipping design elements, Vertically/Horizontally
 |
View all Brother International PS-300B manuals
Add to My Manuals
Save this manual to your list of manuals |
Page 137 highlights
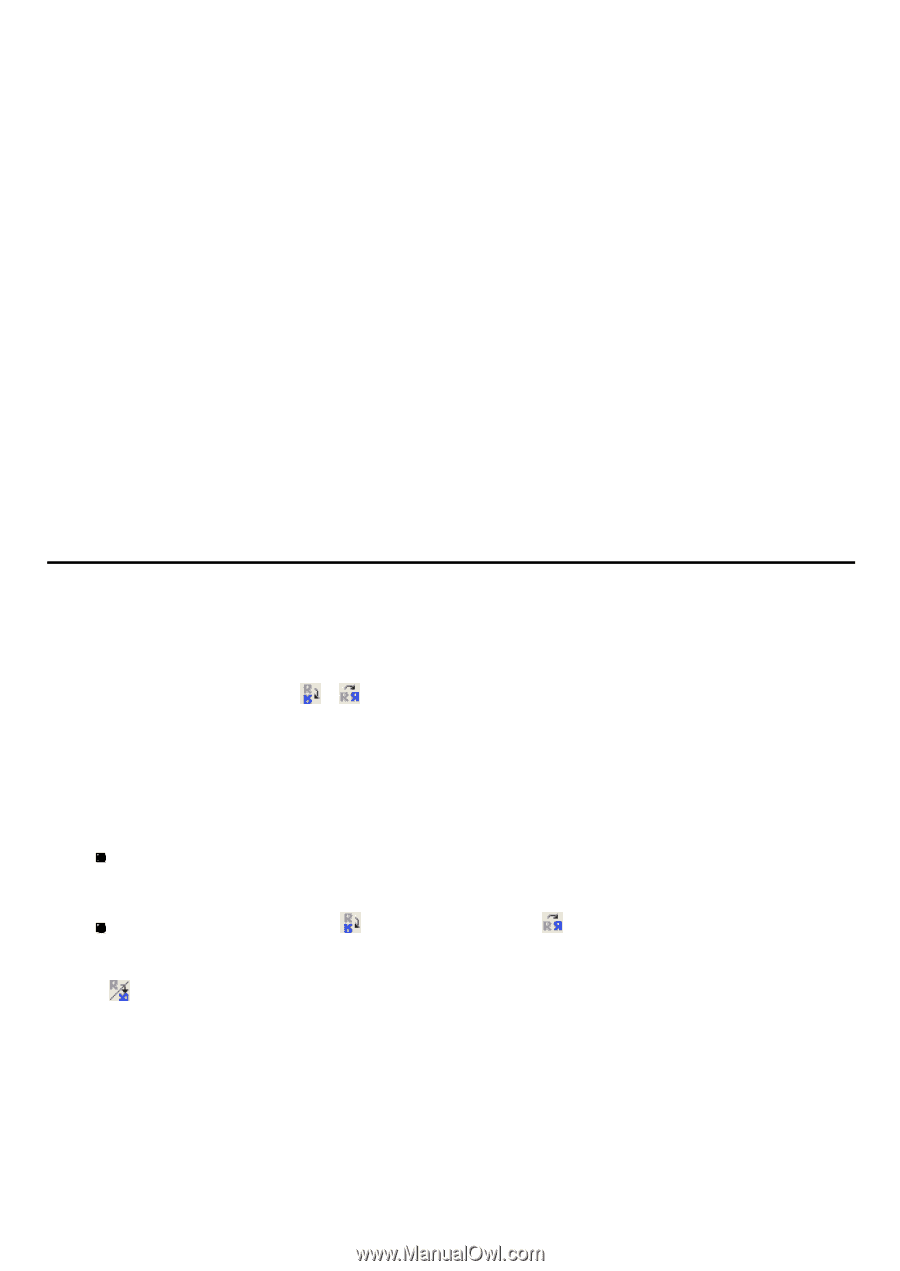
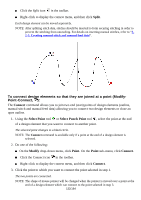
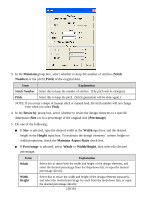
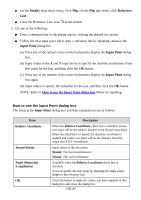
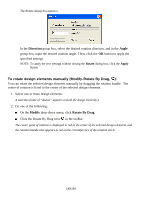
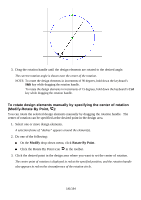
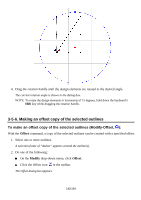
NOTE: To revert the settings in the Resize dialog box to the settings that were originally displayed, click the Reset button. 6. Click the OK button. NOTE: To apply the new settings without closing the Resize dialog box, click the Apply button. To resize design elements manually: Design elements can also be enlarged or reduced manually. When one or more design elements are selected and the selection frame of "dashes" appears, handles (small squares) also appear on each corner and at the center of each side of the selection frame. By dragging each of these handles, you can enlarge or reduce the overall size of the design elements or make the elements longer or wider. NOTE: With this method, you can also resize imported images. NOTE: Using this method, the design elements will be resized while maintaining the pitch. To resize them while maintaining stitch number, hold down the keyboard's Shift key while dragging a handle. 3-5-4. Flipping design elements The Flip command allows you to flip the selected design elements (outline, manual stitch, manual feed data) vertically or horizontally, or by using a reference line so that they appear as mirror images. To flip design elements vertically or horizontally (Modify-Flip- Vertically/Horizontally, ): 1. Select one or more design elements. A selection frame of "dashes" appears around the element(s). 2. Do one of the following: On the Modify drop-down menu, click Flip. On the Flip sub- menu, click Vertically or Horizontally. Click the Vertically icon or Horizontally icon in the toolbar. To flip design elements by using a reference line (Modify-Flip-Reference Line, ): 1. Select one or more design elements. A selection frame of "dashes" appears around the element(s). 2. Do one of the following: 137/164
-
 1
1 -
2
-
3
-
4
-
5
-
6
-
7
-
8
-
9
-
10
-
11
-
12
-
13
-
14
-
15
-
16
-
17
-
18
-
19
-
20
-
21
-
22
-
23
-
24
-
25
-
26
-
27
-
28
-
29
-
30
-
31
-
32
-
33
-
34
-
35
-
36
-
37
-
38
-
39
-
40
-
41
-
42
-
43
-
44
-
45
-
46
-
47
-
48
-
49
-
50
-
51
-
52
-
53
-
54
-
55
-
56
-
57
-
58
-
59
-
60
-
61
-
62
-
63
-
64
-
65
-
66
-
67
-
68
-
69
-
70
-
71
-
72
-
73
-
74
-
75
-
76
-
77
-
78
-
79
-
80
-
81
-
82
-
83
-
84
-
85
-
86
-
87
-
88
-
89
-
90
-
91
-
92
-
93
-
94
-
95
-
96
-
97
-
98
-
99
-
100
-
101
-
102
-
103
-
104
-
105
-
106
-
107
-
108
-
109
-
110
-
111
-
112
-
113
-
114
-
115
-
116
-
117
-
118
-
119
-
120
-
121
-
122
-
123
-
124
-
125
-
126
-
127
-
128
-
129
-
130
-
131
-
 132
132 -
 133
133 -
 134
134 -
 135
135 -
 136
136 -
 137
137 -
 138
138 -
 139
139 -
 140
140 -
 141
141 -
 142
142 -
143
-
144
-
145
-
146
-
147
-
148
-
149
-
150
-
151
-
152
-
153
-
154
-
155
-
156
-
157
-
158
-
159
-
160
-
161
-
162
-
163
-
164
 |
 |