Brother International PS-300B Instruction Manual - English - Page 26
Adding stitch points, Property, Border, Width, Close, Select Point, Shape
 |
View all Brother International PS-300B manuals
Add to My Manuals
Save this manual to your list of manuals |
Page 26 highlights
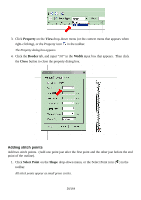
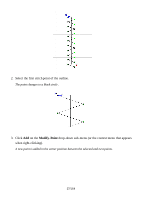
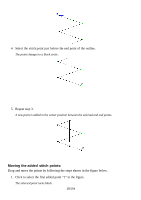
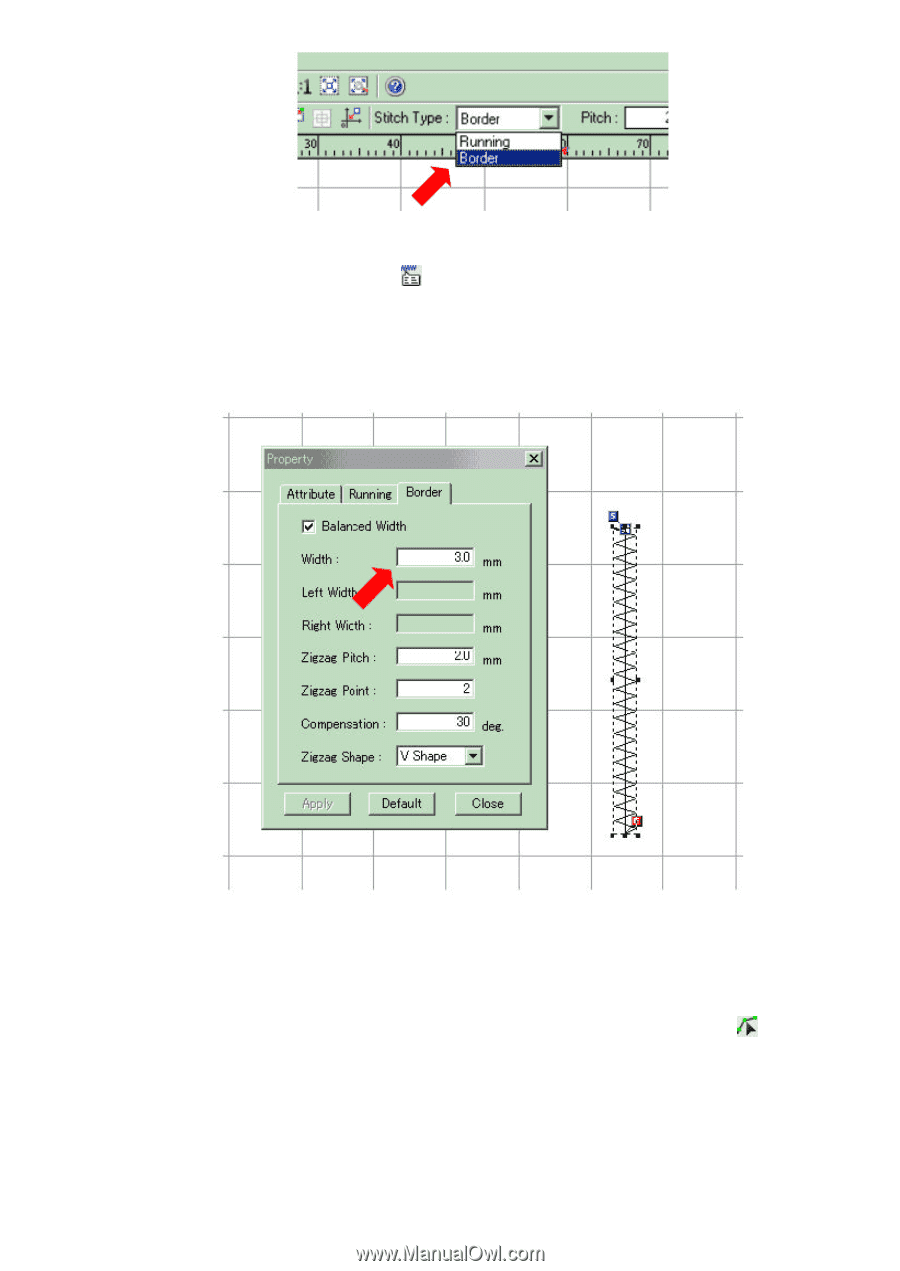
3. Click Property on the View drop-down menu (or the context menu that appears when right-clicking), or the Property icon in the toolbar. The Property dialog box appears. 4. Click the Border tab, and input "3.0" in the Width input box that appears. Then click the Close button to close the property dialog box. Adding stitch points Add two stitch points. (Add one point just after the first point and the other just before the end point of the outline). 1. Click Select Point on the Shape drop-down menu, or the Select Point icon ( ) in the toolbar. All stitch points appear as small green circles. 26/164
-
 1
1 -
2
-
3
-
4
-
5
-
6
-
7
-
8
-
9
-
10
-
11
-
12
-
13
-
14
-
15
-
16
-
17
-
18
-
19
-
20
-
 21
21 -
 22
22 -
 23
23 -
 24
24 -
 25
25 -
 26
26 -
 27
27 -
 28
28 -
 29
29 -
 30
30 -
 31
31 -
32
-
33
-
34
-
35
-
36
-
37
-
38
-
39
-
40
-
41
-
42
-
43
-
44
-
45
-
46
-
47
-
48
-
49
-
50
-
51
-
52
-
53
-
54
-
55
-
56
-
57
-
58
-
59
-
60
-
61
-
62
-
63
-
64
-
65
-
66
-
67
-
68
-
69
-
70
-
71
-
72
-
73
-
74
-
75
-
76
-
77
-
78
-
79
-
80
-
81
-
82
-
83
-
84
-
85
-
86
-
87
-
88
-
89
-
90
-
91
-
92
-
93
-
94
-
95
-
96
-
97
-
98
-
99
-
100
-
101
-
102
-
103
-
104
-
105
-
106
-
107
-
108
-
109
-
110
-
111
-
112
-
113
-
114
-
115
-
116
-
117
-
118
-
119
-
120
-
121
-
122
-
123
-
124
-
125
-
126
-
127
-
128
-
129
-
130
-
131
-
132
-
133
-
134
-
135
-
136
-
137
-
138
-
139
-
140
-
141
-
142
-
143
-
144
-
145
-
146
-
147
-
148
-
149
-
150
-
151
-
152
-
153
-
154
-
155
-
156
-
157
-
158
-
159
-
160
-
161
-
162
-
163
-
164
 |
 |
26/164
3. Click
Property
on the
View
drop-down menu (or the context menu that appears when
right-clicking), or the Property icon
in the toolbar.
The Property dialog box appears.
4. Click the
Border
tab, and input “3.0” in the
Width
input box that appears.
Then click
the
Close
button to close the property dialog box.
Adding stitch points
Add two stitch points.
(Add one point just after the first point and the other just before the end
point of the outline).
1. Click
Select Point
on the
Shape
drop-down menu, or the Select Point icon (
) in the
toolbar.
All stitch points appear as small green circles.