Brother International PS-300B Instruction Manual - English - Page 130
Modifying, 3-5-1. Changing feed data to stitch data, and vice versa, 3-5-2. Editing single points
 |
View all Brother International PS-300B manuals
Add to My Manuals
Save this manual to your list of manuals |
Page 130 highlights
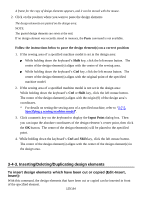
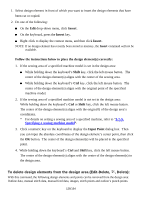
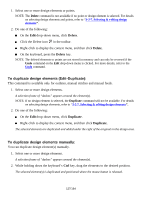
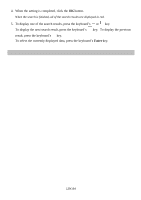
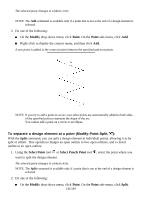
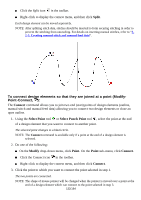
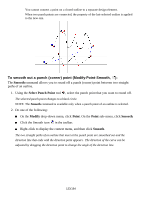
3-5. Modifying This section describes how to modify design elements. Almost all the functions described here can be selected from the Modify drop-down menu. The parenthesis following each title includes the name of the command on the drop-down menu and/or the icon on the toolbar. NOTE: If no design element is selected, almost all the commands on the Modify drop-down menu will not be available. For details on selecting design elements, refer to 3-2-7. Selecting & editing design elements . 3-5-1. Changing feed data to stitch data, and vice versa To change feed data to stitch data, and vice versa (Modify-Change Data Type, ): You can change any feed data to stitch data, and any stitch data to feed data. The data between the selected point(s) to the next point(s) is converted. 1. Click Select Point on the Shape menu, or click the Select Point icon on the toolbar. All stitch points are displayed. Stitch data is shown in solid lines, and feed data in dotted lines. 2. Select the point(s) of feed (or stitch) you want to convert to stitch (or feed) data. 3. Do one of the following: On the Modify drop-down menu, click Change Data Type . Click the Change Data Type icon in the toolbar. Selected data is converted. You can confirm that the conversion was successful by seeing how the data is displayed. 3-5-2. Editing single points PS-300B is provided with various ways of modifying single stitch and punch points on a design element, for example, to add or split points at the desired positions, or to change a rectangle to one with rounded corners. To add a new point (Modify-Point-Add): With the Add command, you can add a new point to the center position between the specified and next points. 1. Using the Select Point tool or Select Punch Point tool , select the point just before the position where you want to add a new point. 130/164
-
 1
1 -
2
-
3
-
4
-
5
-
6
-
7
-
8
-
9
-
10
-
11
-
12
-
13
-
14
-
15
-
16
-
17
-
18
-
19
-
20
-
21
-
22
-
23
-
24
-
25
-
26
-
27
-
28
-
29
-
30
-
31
-
32
-
33
-
34
-
35
-
36
-
37
-
38
-
39
-
40
-
41
-
42
-
43
-
44
-
45
-
46
-
47
-
48
-
49
-
50
-
51
-
52
-
53
-
54
-
55
-
56
-
57
-
58
-
59
-
60
-
61
-
62
-
63
-
64
-
65
-
66
-
67
-
68
-
69
-
70
-
71
-
72
-
73
-
74
-
75
-
76
-
77
-
78
-
79
-
80
-
81
-
82
-
83
-
84
-
85
-
86
-
87
-
88
-
89
-
90
-
91
-
92
-
93
-
94
-
95
-
96
-
97
-
98
-
99
-
100
-
101
-
102
-
103
-
104
-
105
-
106
-
107
-
108
-
109
-
110
-
111
-
112
-
113
-
114
-
115
-
116
-
117
-
118
-
119
-
120
-
121
-
122
-
123
-
124
-
 125
125 -
 126
126 -
 127
127 -
 128
128 -
 129
129 -
 130
130 -
 131
131 -
 132
132 -
 133
133 -
 134
134 -
 135
135 -
136
-
137
-
138
-
139
-
140
-
141
-
142
-
143
-
144
-
145
-
146
-
147
-
148
-
149
-
150
-
151
-
152
-
153
-
154
-
155
-
156
-
157
-
158
-
159
-
160
-
161
-
162
-
163
-
164
 |
 |
