Brother International PS-300B Instruction Manual - English - Page 86
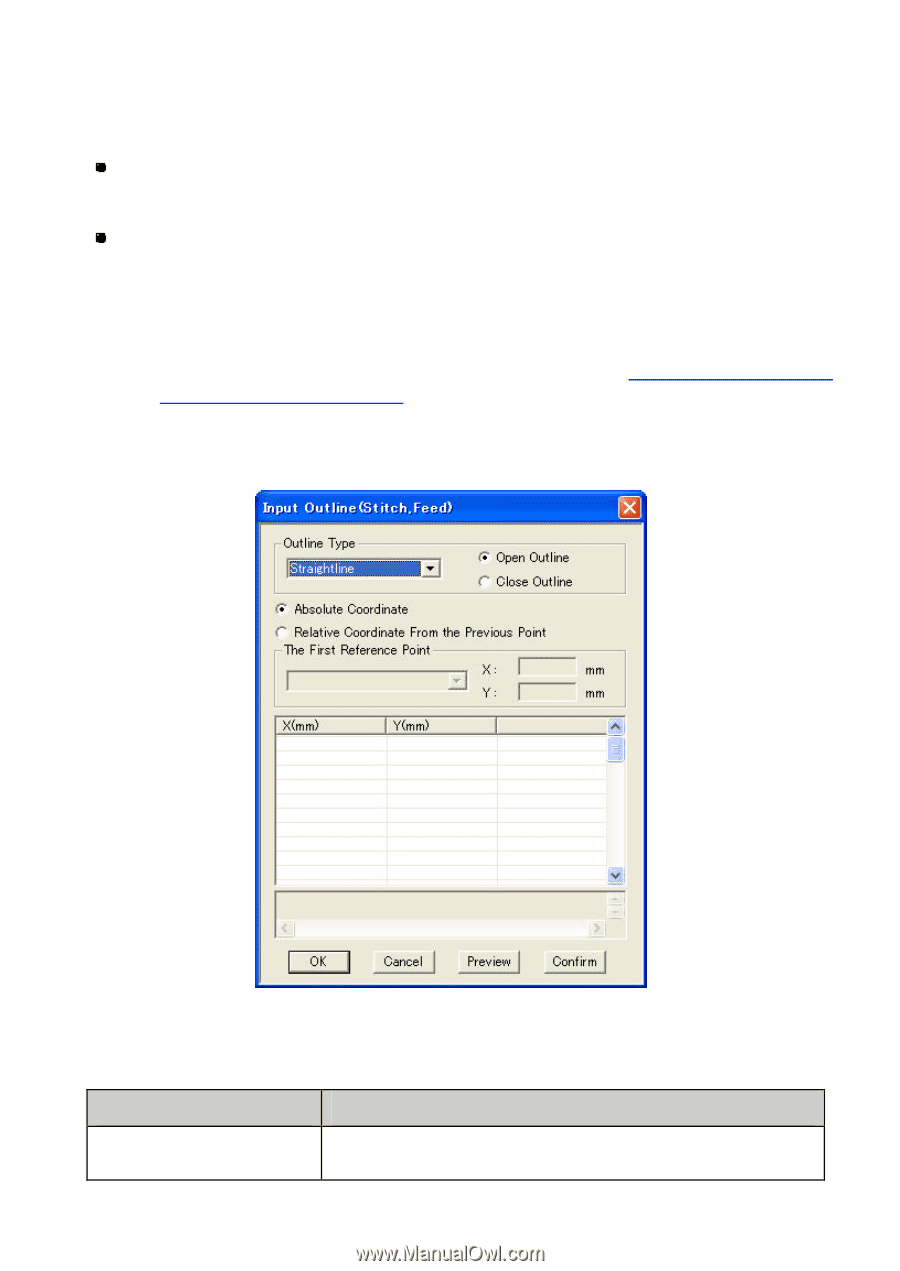
Shape, Input Outline Stitch, Feed, Item/group box, Description, Outline Type
 |
View all Brother International PS-300B manuals
Add to My Manuals
Save this manual to your list of manuals |
Page 86 highlights
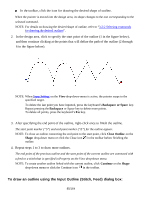
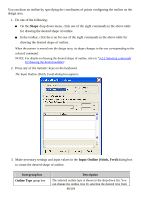
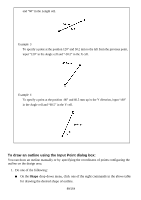
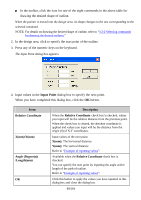
You can draw an outline by specifying the coordinates of points configuring the outline on the design area. 1. Do one of the following: On the Shape drop-down menu, click one of the eight commands in the above table for drawing the desired shape of outline. In the toolbar, click the icon for one of the eight commands in the above table for drawing the desired shape of outline. When the pointer is moved into the design area, its shape changes to the one corresponding to the selected command. NOTE: For details on drawing the desired shape of outline, refer to "3-2-2 Selecting commands for drawing the desired outlines". 2. Press any of the numeric keys on the keyboard. The Input Outline (Stitch, Feed) dialog box appears. 3. Make necessary settings and input values in the Input Outline (Stitch, Feed) dialog box to create the desired shape of outline. Item/group box Outline Type group box Description The selected outline type is shown in the drop-down list. You can change the outline type by selecting the desired type from 86/164
-
 1
1 -
2
-
3
-
4
-
5
-
6
-
7
-
8
-
9
-
10
-
11
-
12
-
13
-
14
-
15
-
16
-
17
-
18
-
19
-
20
-
21
-
22
-
23
-
24
-
25
-
26
-
27
-
28
-
29
-
30
-
31
-
32
-
33
-
34
-
35
-
36
-
37
-
38
-
39
-
40
-
41
-
42
-
43
-
44
-
45
-
46
-
47
-
48
-
49
-
50
-
51
-
52
-
53
-
54
-
55
-
56
-
57
-
58
-
59
-
60
-
61
-
62
-
63
-
64
-
65
-
66
-
67
-
68
-
69
-
70
-
71
-
72
-
73
-
74
-
75
-
76
-
77
-
78
-
79
-
80
-
 81
81 -
 82
82 -
 83
83 -
 84
84 -
 85
85 -
 86
86 -
 87
87 -
 88
88 -
 89
89 -
 90
90 -
 91
91 -
92
-
93
-
94
-
95
-
96
-
97
-
98
-
99
-
100
-
101
-
102
-
103
-
104
-
105
-
106
-
107
-
108
-
109
-
110
-
111
-
112
-
113
-
114
-
115
-
116
-
117
-
118
-
119
-
120
-
121
-
122
-
123
-
124
-
125
-
126
-
127
-
128
-
129
-
130
-
131
-
132
-
133
-
134
-
135
-
136
-
137
-
138
-
139
-
140
-
141
-
142
-
143
-
144
-
145
-
146
-
147
-
148
-
149
-
150
-
151
-
152
-
153
-
154
-
155
-
156
-
157
-
158
-
159
-
160
-
161
-
162
-
163
-
164
 |
 |