Brother International PS-300B Instruction Manual - English - Page 125
Inserting/Deleting/Duplicating design elements
 |
View all Brother International PS-300B manuals
Add to My Manuals
Save this manual to your list of manuals |
Page 125 highlights
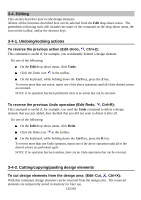
A frame for the copy of design elements appears, and it can be moved with the mouse. 2. Click on the position where you want to paste the design elements The design elements are pasted on the design area. NOTE: The pasted design elements are sewn at the end. If no design element was recently stored in memory, the Paste command is not available. Follow the instructions below to paste the design element(s) on a correct position: 1. If the sewing area of a specified machine model is set in the design area: While holding down the keyboard's Shift key, click the left mouse button. The center of the design element (s) aligns with the center of the sewing area. While holding down the keyboard's Ctrl key, click the left mouse button. The center of the design element (s) aligns with the original point of the specified machine model. 2. If the sewing area of a specified machine model is not set in the design area: While holding down the keyboard's Ctrl or Shift key, click the left mouse button. The center of the design element (s) aligns with the origin (0) of the design area's coordinates. * For details on setting the sewing area of a specified machine, refer to "3-7-5. Specifying a sewing machine model". 3. Click a numeric key on the keyboard to display the Input Point dialog box. Then you can input the absolute coordinates of the design element 's center point, then click the OK button. The center of the design element(s) will be placed to the specified point. 4. While holding down the keyboard's Ctrl and Shift key, click the left mouse button. The center of the design element (s) aligns with the center of the design element(s) in the design area. 3-4-3. Inserting/Deleting/Duplicating design elements To insert design elements which have been cut or copied (Edit-Insert, Insert): With this command, the design elements that have been cut or copied can be inserted in front of the specified element. 125/164
-
 1
1 -
2
-
3
-
4
-
5
-
6
-
7
-
8
-
9
-
10
-
11
-
12
-
13
-
14
-
15
-
16
-
17
-
18
-
19
-
20
-
21
-
22
-
23
-
24
-
25
-
26
-
27
-
28
-
29
-
30
-
31
-
32
-
33
-
34
-
35
-
36
-
37
-
38
-
39
-
40
-
41
-
42
-
43
-
44
-
45
-
46
-
47
-
48
-
49
-
50
-
51
-
52
-
53
-
54
-
55
-
56
-
57
-
58
-
59
-
60
-
61
-
62
-
63
-
64
-
65
-
66
-
67
-
68
-
69
-
70
-
71
-
72
-
73
-
74
-
75
-
76
-
77
-
78
-
79
-
80
-
81
-
82
-
83
-
84
-
85
-
86
-
87
-
88
-
89
-
90
-
91
-
92
-
93
-
94
-
95
-
96
-
97
-
98
-
99
-
100
-
101
-
102
-
103
-
104
-
105
-
106
-
107
-
108
-
109
-
110
-
111
-
112
-
113
-
114
-
115
-
116
-
117
-
118
-
119
-
 120
120 -
 121
121 -
 122
122 -
 123
123 -
 124
124 -
 125
125 -
 126
126 -
 127
127 -
 128
128 -
 129
129 -
 130
130 -
131
-
132
-
133
-
134
-
135
-
136
-
137
-
138
-
139
-
140
-
141
-
142
-
143
-
144
-
145
-
146
-
147
-
148
-
149
-
150
-
151
-
152
-
153
-
154
-
155
-
156
-
157
-
158
-
159
-
160
-
161
-
162
-
163
-
164
 |
 |
