HP StorageWorks 2/16V Brocade Web Tools Administrator's Guide - Supporting Fab - Page 250
Activating a CUP Port Connectivity Configuration
 |
View all HP StorageWorks 2/16V manuals
Add to My Manuals
Save this manual to your list of manuals |
Page 250 highlights
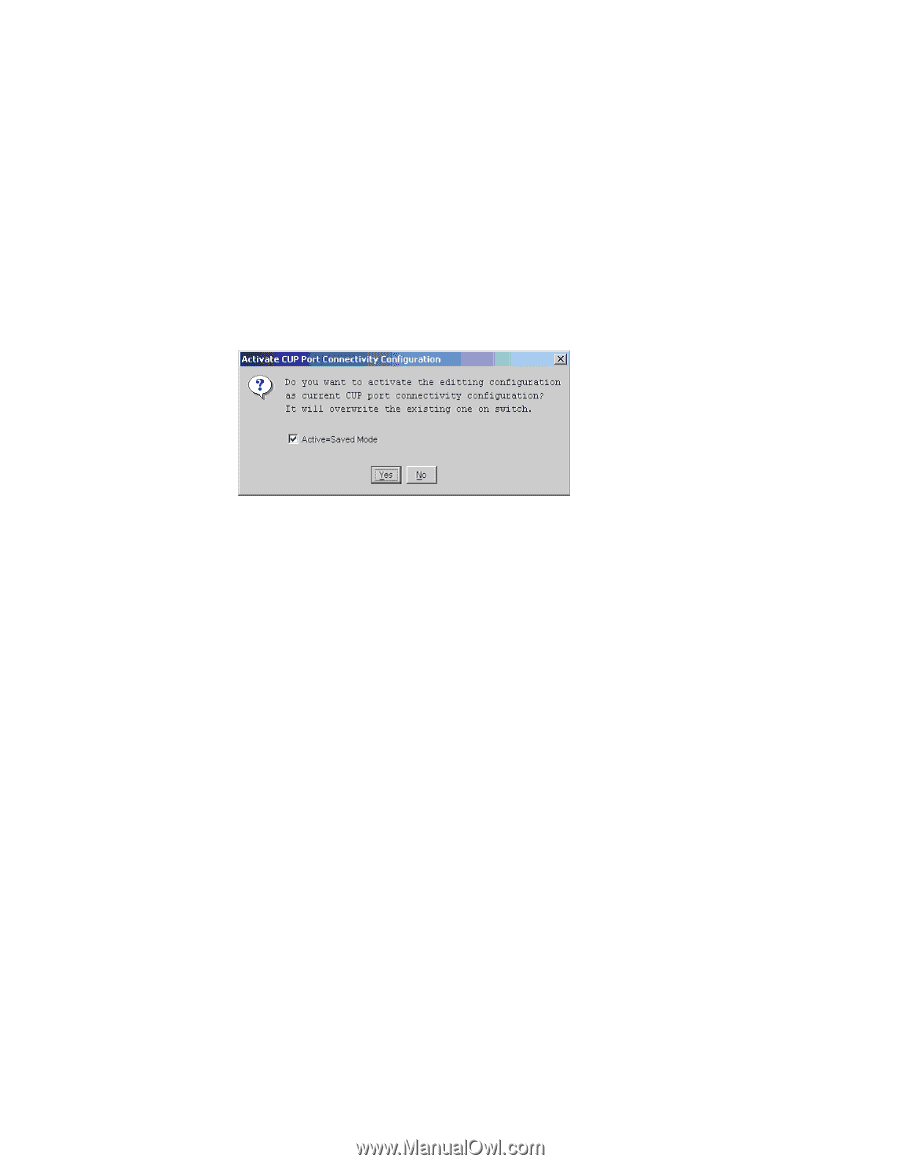
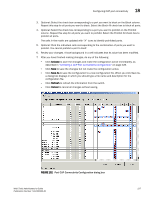
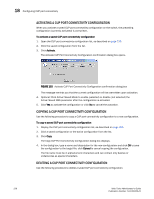
18 Configuring CUP port connectivity ACTIVATING A CUP PORT CONNECTIVITY CONFIGURATION When you activate a saved CUP port connectivity configuration on the switch, the preceding configuration (currently activated) is overwritten. To activate a saved CUP port connectivity configuration 1. Open the CUP port connectivity configuration list, as described on page 225. 2. Click the saved configuration from the list. 3. Click Activate. The Activate CUP Port Connectivity Configuration confirmation dialog box opens. FIGURE 103 Activate CUP Port Connectivity Configuration confirmation dialog box The message reminds you that the current configuration will be overwritten upon activation. 4. Optional: Click Active=Saved Mode to enable (selected) or disable (not selected) the Active=Saved FMS parameter after the configuration is activated. 5. Click Yes to activate the configuration or click No to cancel the activation. COPYING A CUP PORT CONNECTIVITY CONFIGURATION Use the following procedure to copy a CUP port connectivity configuration to a new configuration. To copy a saved CUP port connectivity configuration 1. Display the CUP port connectivity configuration list, as described on page 225. 2. Click a saved configuration or the active configuration from the list. 3. Click Copy. The Copy CUP Port Connectivity Configuration dialog box displays. 4. In the dialog box, type a name and description for the new configuration and click OK to save the configuration to the target file; click Cancel to cancel copying the configuration. The file name must be in alphanumeric characters and can contain only dashes or underscores as special characters. DELETING A CUP PORT CONNECTIVITY CONFIGURATION Use the following procedure to delete a saved CUP port connectivity configuration. 228 Web Tools Administrator's Guide Publication Number: 53-1000435-01
-
 1
1 -
2
-
3
-
4
-
5
-
6
-
7
-
8
-
9
-
10
-
11
-
12
-
13
-
14
-
15
-
16
-
17
-
18
-
19
-
20
-
21
-
22
-
23
-
24
-
25
-
26
-
27
-
28
-
29
-
30
-
31
-
32
-
33
-
34
-
35
-
36
-
37
-
38
-
39
-
40
-
41
-
42
-
43
-
44
-
45
-
46
-
47
-
48
-
49
-
50
-
51
-
52
-
53
-
54
-
55
-
56
-
57
-
58
-
59
-
60
-
61
-
62
-
63
-
64
-
65
-
66
-
67
-
68
-
69
-
70
-
71
-
72
-
73
-
74
-
75
-
76
-
77
-
78
-
79
-
80
-
81
-
82
-
83
-
84
-
85
-
86
-
87
-
88
-
89
-
90
-
91
-
92
-
93
-
94
-
95
-
96
-
97
-
98
-
99
-
100
-
101
-
102
-
103
-
104
-
105
-
106
-
107
-
108
-
109
-
110
-
111
-
112
-
113
-
114
-
115
-
116
-
117
-
118
-
119
-
120
-
121
-
122
-
123
-
124
-
125
-
126
-
127
-
128
-
129
-
130
-
131
-
132
-
133
-
134
-
135
-
136
-
137
-
138
-
139
-
140
-
141
-
142
-
143
-
144
-
145
-
146
-
147
-
148
-
149
-
150
-
151
-
152
-
153
-
154
-
155
-
156
-
157
-
158
-
159
-
160
-
161
-
162
-
163
-
164
-
165
-
166
-
167
-
168
-
169
-
170
-
171
-
172
-
173
-
174
-
175
-
176
-
177
-
178
-
179
-
180
-
181
-
182
-
183
-
184
-
185
-
186
-
187
-
188
-
189
-
190
-
191
-
192
-
193
-
194
-
195
-
196
-
197
-
198
-
199
-
200
-
201
-
202
-
203
-
204
-
205
-
206
-
207
-
208
-
209
-
210
-
211
-
212
-
213
-
214
-
215
-
216
-
217
-
218
-
219
-
220
-
221
-
222
-
223
-
224
-
225
-
226
-
227
-
228
-
229
-
230
-
231
-
232
-
233
-
234
-
235
-
236
-
237
-
238
-
239
-
240
-
241
-
242
-
243
-
244
-
 245
245 -
 246
246 -
 247
247 -
 248
248 -
 249
249 -
 250
250 -
 251
251 -
 252
252 -
 253
253 -
 254
254 -
 255
255 -
256
-
257
-
258
-
259
-
260
-
261
-
262
-
263
-
264
-
265
-
266
 |
 |