HP StorageWorks 2/16V Brocade Web Tools Administrator's Guide - Supporting Fab - Page 56
Filtering IP Addresses, Managing blades
 |
View all HP StorageWorks 2/16V manuals
Add to My Manuals
Save this manual to your list of manuals |
Page 56 highlights
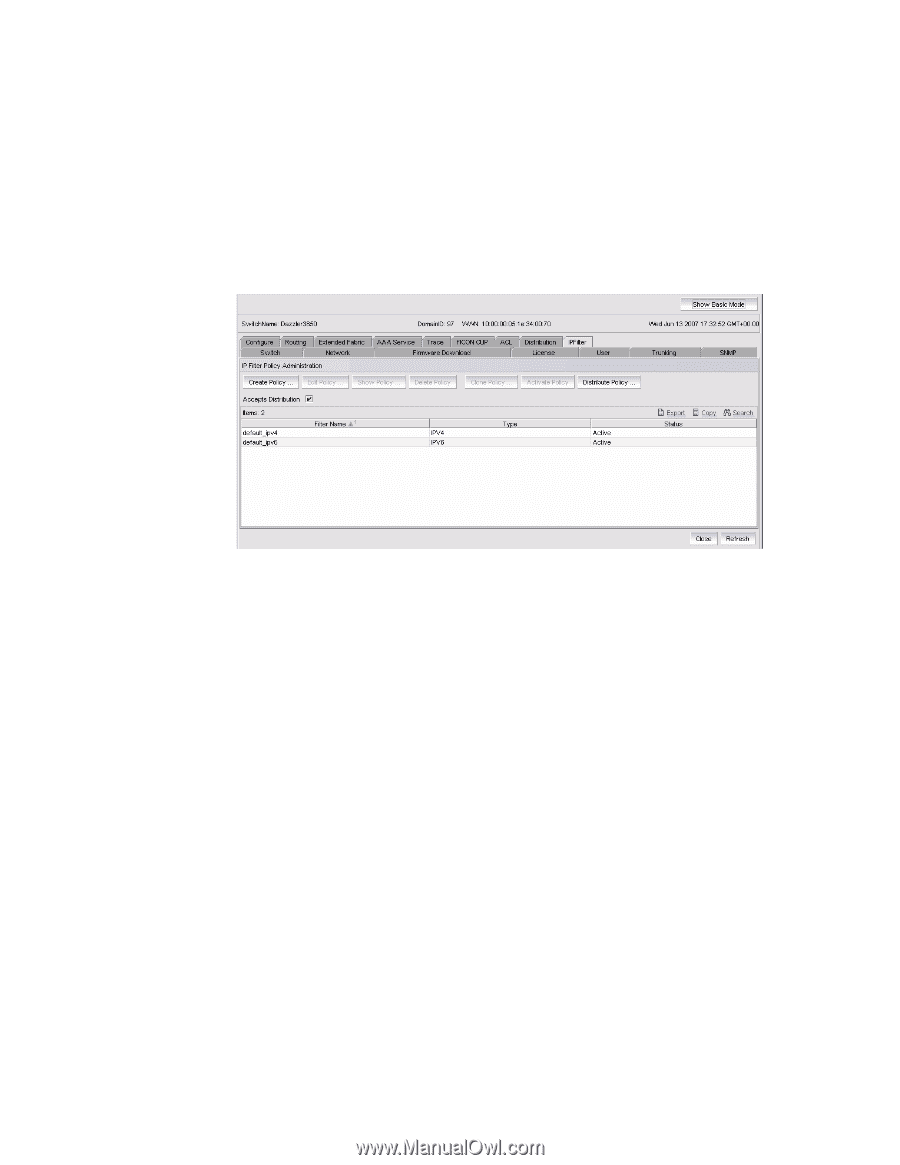
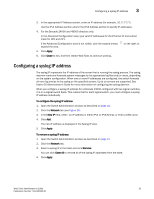
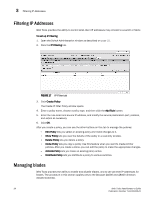
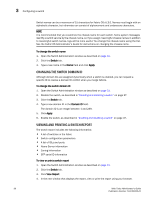
3 Filtering IP Addresses Filtering IP Addresses Web Tools provides the ability to control what client IP addresses may connect to a switch or fabric To set up IP filtering 1. Open the Switch Administration window as described on page 31. 2. Click the IP Filtering tab. FIGURE 17 IP Filter tab 3. Click Create Policy. The Create IP Filter Policy window opens. 4. Enter a policy name, choose a policy type, and then click the Add Rule button. 5. Enter the rule order and source IP address, and modify the service/destination port, protocol, and action as necessary. 6. Click OK. After you create a policy, you can use the other buttons on this tab to manage the policies: - Edit Policy lets you select an existing policy and make changes to it. - Show Policy lets you view the details of the policy in a read-only window. - Delete Policy lets you delete a policy. - Clone Policy lets you copy a policy. Use this feature when you want to create similar policies. After you create a clone, you can edit the policy to make the appropriate changes. - Activate Policy lets you make an existing policy active. - Distribute Policy lets you distribute a policy to various switches. Managing blades Web Tools provides the ability to enable and disable blades, and to set slot-level IP addresses for blades. The procedure in this section applies only to the Brocade 24000 and 48000 directors (bladed switches). 34 Web Tools Administrator's Guide Publication Number: 53-1000435-01
-
 1
1 -
2
-
3
-
4
-
5
-
6
-
7
-
8
-
9
-
10
-
11
-
12
-
13
-
14
-
15
-
16
-
17
-
18
-
19
-
20
-
21
-
22
-
23
-
24
-
25
-
26
-
27
-
28
-
29
-
30
-
31
-
32
-
33
-
34
-
35
-
36
-
37
-
38
-
39
-
40
-
41
-
42
-
43
-
44
-
45
-
46
-
47
-
48
-
49
-
50
-
 51
51 -
 52
52 -
 53
53 -
 54
54 -
 55
55 -
 56
56 -
 57
57 -
 58
58 -
 59
59 -
 60
60 -
 61
61 -
62
-
63
-
64
-
65
-
66
-
67
-
68
-
69
-
70
-
71
-
72
-
73
-
74
-
75
-
76
-
77
-
78
-
79
-
80
-
81
-
82
-
83
-
84
-
85
-
86
-
87
-
88
-
89
-
90
-
91
-
92
-
93
-
94
-
95
-
96
-
97
-
98
-
99
-
100
-
101
-
102
-
103
-
104
-
105
-
106
-
107
-
108
-
109
-
110
-
111
-
112
-
113
-
114
-
115
-
116
-
117
-
118
-
119
-
120
-
121
-
122
-
123
-
124
-
125
-
126
-
127
-
128
-
129
-
130
-
131
-
132
-
133
-
134
-
135
-
136
-
137
-
138
-
139
-
140
-
141
-
142
-
143
-
144
-
145
-
146
-
147
-
148
-
149
-
150
-
151
-
152
-
153
-
154
-
155
-
156
-
157
-
158
-
159
-
160
-
161
-
162
-
163
-
164
-
165
-
166
-
167
-
168
-
169
-
170
-
171
-
172
-
173
-
174
-
175
-
176
-
177
-
178
-
179
-
180
-
181
-
182
-
183
-
184
-
185
-
186
-
187
-
188
-
189
-
190
-
191
-
192
-
193
-
194
-
195
-
196
-
197
-
198
-
199
-
200
-
201
-
202
-
203
-
204
-
205
-
206
-
207
-
208
-
209
-
210
-
211
-
212
-
213
-
214
-
215
-
216
-
217
-
218
-
219
-
220
-
221
-
222
-
223
-
224
-
225
-
226
-
227
-
228
-
229
-
230
-
231
-
232
-
233
-
234
-
235
-
236
-
237
-
238
-
239
-
240
-
241
-
242
-
243
-
244
-
245
-
246
-
247
-
248
-
249
-
250
-
251
-
252
-
253
-
254
-
255
-
256
-
257
-
258
-
259
-
260
-
261
-
262
-
263
-
264
-
265
-
266
 |
 |