HP StorageWorks 2/16V Brocade Web Tools Administrator's Guide - Supporting Fab - Page 43
Switch View buttons, Switch View, Interpreting port LEDs, Managing Your Ports
 |
View all HP StorageWorks 2/16V manuals
Add to My Manuals
Save this manual to your list of manuals |
Page 43 highlights
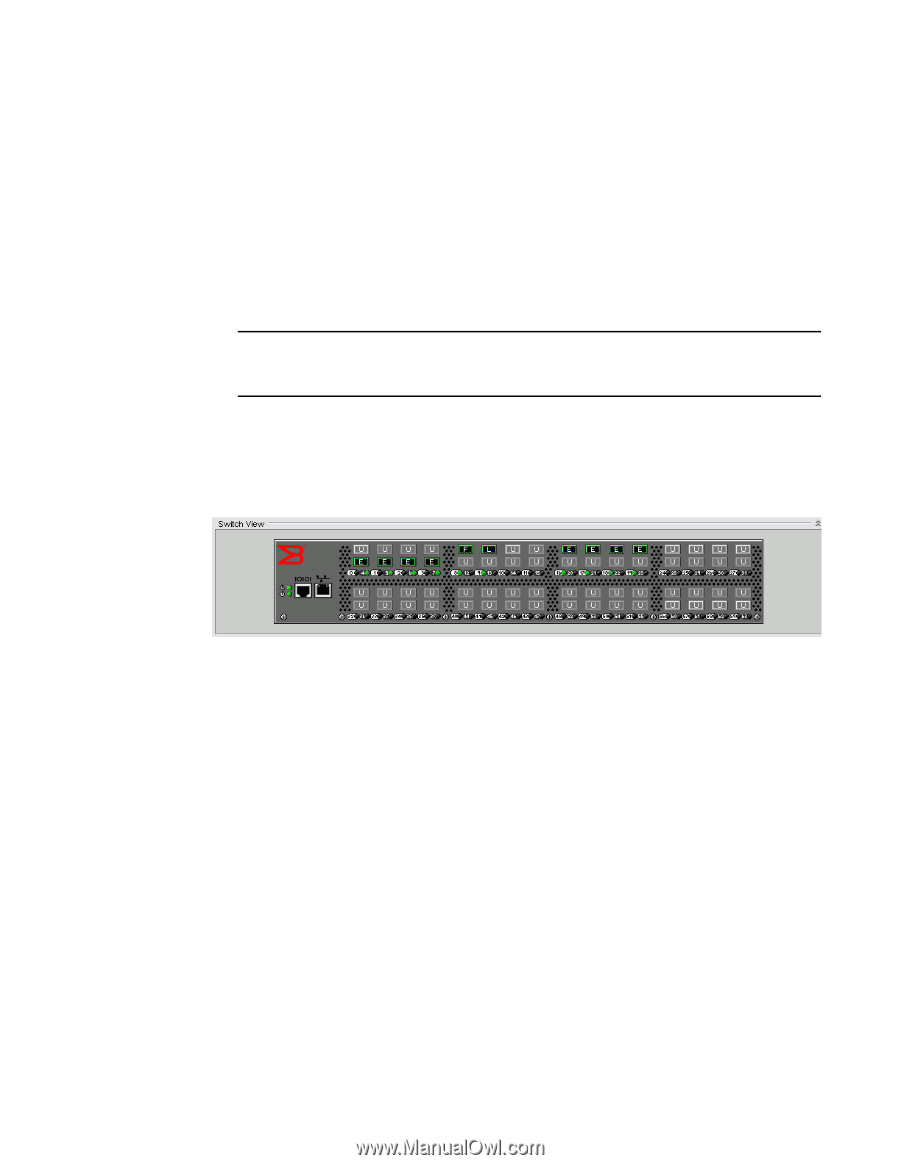
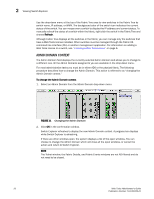
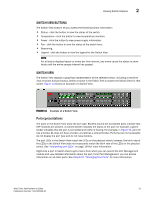
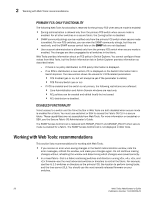
Viewing Switch Explorer 2 SWITCH VIEW BUTTONS The Switch View buttons let you access the following switch information: • Status - click the button to view the status of the switch. • Temperature - click the button to view temperature monitors. • Power - click the button to view power supply information. • Fan - click the button to view the status of the switch fans. • Beaconing. • Legend - click the button to view the legend for the Switch View. NOTE For all status displays based on errors per time interval, any errors cause the status to show faulty until the entire sample interval has passed. SWITCH VIEW The Switch View displays a graphical representation of the selected switch, including a real-time view of switch and port status. Select a switch in the Fabric Tree to access the Switch View for that switch. Figure 12 shows an example of a Switch View. FIGURE 12 Example of a Switch View Port representations The ports in the Switch View show the port type. Borders around the accessible ports indicate that SFP modules are present. A colored border indicates the status of the port; for example, a green border indicates that the port is connected and traffic is flowing. For example, in Figure 12, port 20 has a border, 21 does not have a border, and 22 has a colored border. Ports that are not accessible do not display the port type and do not have borders. The port LEDs in the Switch View match the LEDs on the physical switch; however, the blink rate of the LEDs in the Switch View does not necessarily match the blink rate of the LEDs on the physical switch. See "Interpreting port LEDs" on page 154 for more information. Right-click a port in Switch View to get a menu from which you can launch the Port Management module and view detailed information about the port. From Port Management, you can access information on all other ports. See Chapter 5, "Managing Your Ports" for more information. Web Tools Administrator's Guide 21 Publication Number: 53-1000435-01
-
 1
1 -
2
-
3
-
4
-
5
-
6
-
7
-
8
-
9
-
10
-
11
-
12
-
13
-
14
-
15
-
16
-
17
-
18
-
19
-
20
-
21
-
22
-
23
-
24
-
25
-
26
-
27
-
28
-
29
-
30
-
31
-
32
-
33
-
34
-
35
-
36
-
37
-
 38
38 -
 39
39 -
 40
40 -
 41
41 -
 42
42 -
 43
43 -
 44
44 -
 45
45 -
 46
46 -
 47
47 -
 48
48 -
49
-
50
-
51
-
52
-
53
-
54
-
55
-
56
-
57
-
58
-
59
-
60
-
61
-
62
-
63
-
64
-
65
-
66
-
67
-
68
-
69
-
70
-
71
-
72
-
73
-
74
-
75
-
76
-
77
-
78
-
79
-
80
-
81
-
82
-
83
-
84
-
85
-
86
-
87
-
88
-
89
-
90
-
91
-
92
-
93
-
94
-
95
-
96
-
97
-
98
-
99
-
100
-
101
-
102
-
103
-
104
-
105
-
106
-
107
-
108
-
109
-
110
-
111
-
112
-
113
-
114
-
115
-
116
-
117
-
118
-
119
-
120
-
121
-
122
-
123
-
124
-
125
-
126
-
127
-
128
-
129
-
130
-
131
-
132
-
133
-
134
-
135
-
136
-
137
-
138
-
139
-
140
-
141
-
142
-
143
-
144
-
145
-
146
-
147
-
148
-
149
-
150
-
151
-
152
-
153
-
154
-
155
-
156
-
157
-
158
-
159
-
160
-
161
-
162
-
163
-
164
-
165
-
166
-
167
-
168
-
169
-
170
-
171
-
172
-
173
-
174
-
175
-
176
-
177
-
178
-
179
-
180
-
181
-
182
-
183
-
184
-
185
-
186
-
187
-
188
-
189
-
190
-
191
-
192
-
193
-
194
-
195
-
196
-
197
-
198
-
199
-
200
-
201
-
202
-
203
-
204
-
205
-
206
-
207
-
208
-
209
-
210
-
211
-
212
-
213
-
214
-
215
-
216
-
217
-
218
-
219
-
220
-
221
-
222
-
223
-
224
-
225
-
226
-
227
-
228
-
229
-
230
-
231
-
232
-
233
-
234
-
235
-
236
-
237
-
238
-
239
-
240
-
241
-
242
-
243
-
244
-
245
-
246
-
247
-
248
-
249
-
250
-
251
-
252
-
253
-
254
-
255
-
256
-
257
-
258
-
259
-
260
-
261
-
262
-
263
-
264
-
265
-
266
 |
 |