Brother International PE-DESIGN 10 Instruction Manual - Page 98
Actual Size], Change Position
 |
View all Brother International PE-DESIGN 10 manuals
Add to My Manuals
Save this manual to your list of manuals |
Page 98 highlights
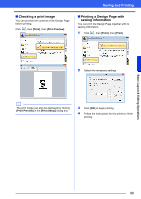
Saving and Printing Print hoop section boundaries onto the first page: Select this check box to print the sections of a design where the Design Page has been set to a custom size or to [Jumbo Frame]. The pattern sections are printed in red. Divide embroidery image into 2 pages: Select this check box to print at actual size and on A4- or Letter-size paper a design that is larger than the paper size by dividing it in two and printing each half on different pages. (This setting is only available when [Actual Size] is selected in the [Print Setup] dialog box and when the Design Page is set to the larger hoop sizes. This setting is not available if a [User Hoop] size is selected.) With this split printing feature, / or / is printed in the lower-right corner of the paper to indicate which half is printed. Color Changes: Select this check box to print the thread color change information for the pattern. When this check box is cleared, the information for the necessary threads is printed. This allows you to check the total number of thread colors. f Stitch image Normal: Select this option to print the design as lines and dots. Realistic: Select this option to print a realistic image of the design. To change the settings of the realistic image, click [Attributes]. cc "Changing realistic view settings" on page 79 a If the [Divide embroidery image into 2 pages] check box is cleared and you print on paper of a larger size, the design does not print in two halves. Likewise, if you print on paper of a smaller size, the design might be cut off. g When printing an imported image onto iron-on paper or printable fabric, or when printing the sheet for positioning the embroidery in the printed image, select [Image print mode], and then select an option under [Material]. h Material Print the image on printable fabric or an iron-on transfer sheet: Select this option to print the background image on iron-on paper or fabric that can be printed on. Only the image is printed. Print a flipped image: Select this check box to print the image flipped on a vertical axis. When printing on iron-on paper, the image is normally printed flipped (mirror image). (For details, refer to the instructions for the iron-on paper that you are using.) Select this option if your printer does not have a function for printing a flipped (mirror) image. (For details, refer to the instructions for your printer.) Print a sheet of paper for aligning the printed image and the embroidery: Select this option to print a sheet for aligning the positions of the image and embroidery. Positioning marks and guide lines indicating the embroidering area are printed on the image. i Change Position The position where the image is printed on the paper can be changed. (Any part of the image extending out of the print area of the paper is not printed.) Click [Change Position] to display the [Image Print Position Setting] dialog box, and then drag the image to the desired printing position in the paper. 2 Click [OK]. cc "Changing the display of the embroidery design" on page 78. b With embroidery patterns for the jumbo frame The pattern in Side 2 of an embroidery pattern for the jumbo frame is printed with the orientation of the actual embroidery (rotated 180°). 97
-
 1
1 -
2
-
3
-
4
-
5
-
6
-
7
-
8
-
9
-
10
-
11
-
12
-
13
-
14
-
15
-
16
-
17
-
18
-
19
-
20
-
21
-
22
-
23
-
24
-
25
-
26
-
27
-
28
-
29
-
30
-
31
-
32
-
33
-
34
-
35
-
36
-
37
-
38
-
39
-
40
-
41
-
42
-
43
-
44
-
45
-
46
-
47
-
48
-
49
-
50
-
51
-
52
-
53
-
54
-
55
-
56
-
57
-
58
-
59
-
60
-
61
-
62
-
63
-
64
-
65
-
66
-
67
-
68
-
69
-
70
-
71
-
72
-
73
-
74
-
75
-
76
-
77
-
78
-
79
-
80
-
81
-
82
-
83
-
84
-
85
-
86
-
87
-
88
-
89
-
90
-
91
-
92
-
 93
93 -
 94
94 -
 95
95 -
 96
96 -
 97
97 -
 98
98 -
 99
99 -
 100
100 -
 101
101 -
 102
102 -
 103
103 -
104
-
105
-
106
-
107
-
108
-
109
-
110
-
111
-
112
-
113
-
114
-
115
-
116
-
117
-
118
-
119
-
120
-
121
-
122
-
123
-
124
-
125
-
126
-
127
-
128
-
129
-
130
-
131
-
132
-
133
-
134
-
135
-
136
-
137
-
138
-
139
-
140
-
141
-
142
-
143
-
144
-
145
-
146
-
147
-
148
-
149
-
150
-
151
-
152
-
153
-
154
-
155
-
156
-
157
-
158
-
159
-
160
-
161
-
162
-
163
-
164
-
165
-
166
-
167
-
168
-
169
-
170
-
171
-
172
-
173
-
174
-
175
-
176
-
177
-
178
-
179
-
180
-
181
-
182
-
183
-
184
-
185
-
186
-
187
-
188
-
189
-
190
-
191
-
192
-
193
-
194
-
195
-
196
-
197
-
198
-
199
-
200
-
201
-
202
-
203
-
204
-
205
-
206
-
207
-
208
-
209
-
210
-
211
-
212
-
213
-
214
-
215
-
216
-
217
-
218
-
219
-
220
-
221
-
222
-
223
-
224
-
225
-
226
-
227
-
228
-
229
-
230
-
231
-
232
-
233
-
234
-
235
-
236
-
237
-
238
-
239
-
240
-
241
-
242
-
243
-
244
-
245
-
246
-
247
-
248
-
249
-
250
-
251
-
252
-
253
-
254
-
255
-
256
-
257
-
258
-
259
-
260
-
261
-
262
-
263
-
264
-
265
-
266
-
267
-
268
-
269
-
270
-
271
-
272
-
273
-
274
-
275
-
276
-
277
-
278
-
279
-
280
-
281
-
282
-
283
-
284
-
285
-
286
-
287
-
288
-
289
-
290
-
291
-
292
-
293
-
294
-
295
-
296
-
297
-
298
-
299
-
300
-
301
-
302
-
303
-
304
-
305
-
306
-
307
-
308
-
309
-
310
-
311
-
312
-
313
-
314
-
315
-
316
-
317
-
318
-
319
-
320
-
321
-
322
-
323
-
324
-
325
-
326
-
327
-
328
-
329
-
330
-
331
-
332
-
333
-
334
-
335
-
336
-
337
-
338
-
339
-
340
-
341
-
342
-
343
-
344
-
345
-
346
-
347
-
348
-
349
-
350
-
351
-
352
-
353
 |
 |