Brother International PE-DESIGN Ver.6 Users Manual - English - Page 148
Editing Stitch Data
 |
View all Brother International PE-DESIGN Ver.6 manuals
Add to My Manuals
Save this manual to your list of manuals |
Page 148 highlights
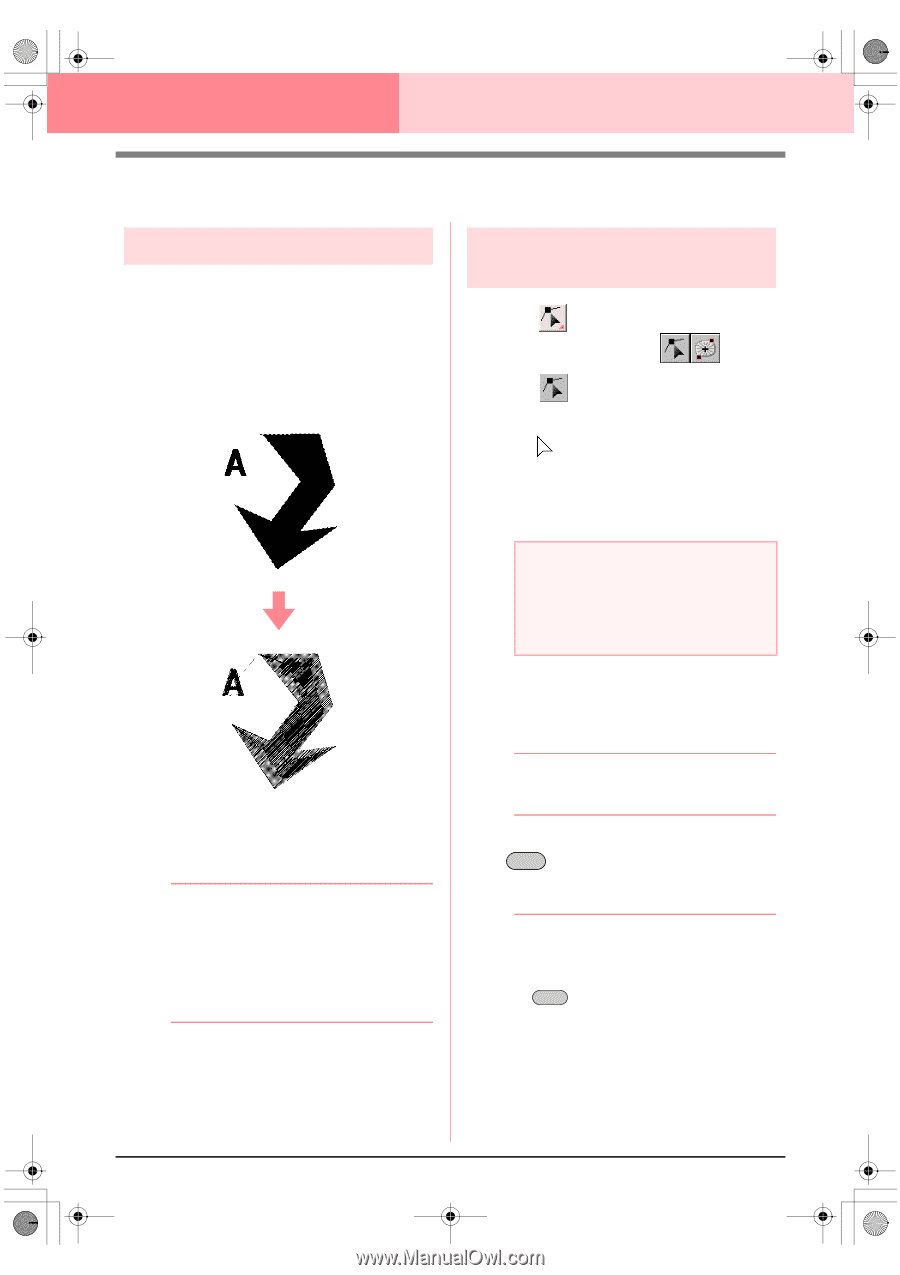
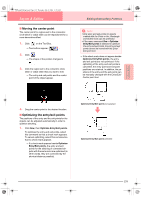
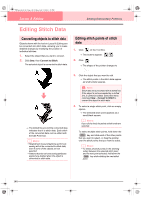
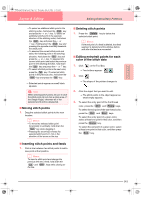
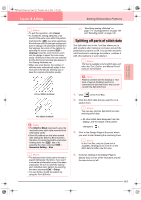
Advanced_02.fm Page 140 Friday, July 9, 2004 1:45 PM Layout & Editing Editing Embroidery Patterns Editing Stitch Data Converting objects to stitch data Objects drawn with the tools in Layout & Editing can be converted into stitch data, allowing you to make detailed changes by modifying the position of individual stitches. 1. Select the object that you want to convert. 2. Click Sew, then Convert to Stitch. The selected object is converted to stitch data. → The dotted line around the converted data indicates that it is stitch data. Each stitch of the converted data can be edited with the Edit Point tool. b Memo: • Related text, lines and patterns set for hole sewing will all be converted to stitch data, even if some of the objects are not selected. • Patterns that do not have sewing attributes applied are deleted when the object is converted to stitch data. Editing stitch points of stitch data 1. Click on the Tool Box. → Two buttons appear: . 2. Click . → The shape of the pointer changes to . 3. Click the object that you want to edit. → The stitch points in the stitch data appear as small empty squares. a Note: Stitch data are surrounded with a dotted line. If the object is not surrounded by a dotted line, it cannot be edited. Select the menu command Sew - Convert to Stitch to convert the object to stitch data. 4. To select a single stitch point, click an empty square. → The selected stitch point appears as a small black square. b Memo: If you click a feed, the points at both ends are selected. To select multiple stitch points, hold down the Ctrl key and click each of the other points that you want to select, or drag the pointer over the stitch points that you want to select. b Memo: • To select all stitch points (in the stitching order) between the selected stitch point and the next point selected, hold down the Shift key while clicking the next stitch point. 140
-
 1
1 -
2
-
3
-
4
-
5
-
6
-
7
-
8
-
9
-
10
-
11
-
12
-
13
-
14
-
15
-
16
-
17
-
18
-
19
-
20
-
21
-
22
-
23
-
24
-
25
-
26
-
27
-
28
-
29
-
30
-
31
-
32
-
33
-
34
-
35
-
36
-
37
-
38
-
39
-
40
-
41
-
42
-
43
-
44
-
45
-
46
-
47
-
48
-
49
-
50
-
51
-
52
-
53
-
54
-
55
-
56
-
57
-
58
-
59
-
60
-
61
-
62
-
63
-
64
-
65
-
66
-
67
-
68
-
69
-
70
-
71
-
72
-
73
-
74
-
75
-
76
-
77
-
78
-
79
-
80
-
81
-
82
-
83
-
84
-
85
-
86
-
87
-
88
-
89
-
90
-
91
-
92
-
93
-
94
-
95
-
96
-
97
-
98
-
99
-
100
-
101
-
102
-
103
-
104
-
105
-
106
-
107
-
108
-
109
-
110
-
111
-
112
-
113
-
114
-
115
-
116
-
117
-
118
-
119
-
120
-
121
-
122
-
123
-
124
-
125
-
126
-
127
-
128
-
129
-
130
-
131
-
132
-
133
-
134
-
135
-
136
-
137
-
138
-
139
-
140
-
141
-
142
-
 143
143 -
 144
144 -
 145
145 -
 146
146 -
 147
147 -
 148
148 -
 149
149 -
 150
150 -
 151
151 -
 152
152 -
 153
153 -
154
-
155
-
156
-
157
-
158
-
159
-
160
-
161
-
162
-
163
-
164
-
165
-
166
-
167
-
168
-
169
-
170
-
171
-
172
-
173
-
174
-
175
-
176
-
177
-
178
-
179
-
180
-
181
-
182
-
183
-
184
-
185
-
186
-
187
-
188
-
189
-
190
-
191
-
192
-
193
-
194
-
195
-
196
-
197
-
198
-
199
-
200
-
201
-
202
-
203
-
204
-
205
-
206
-
207
-
208
-
209
-
210
-
211
-
212
-
213
-
214
-
215
-
216
-
217
-
218
-
219
-
220
-
221
-
222
-
223
-
224
-
225
-
226
-
227
-
228
-
229
-
230
-
231
-
232
-
233
-
234
-
235
-
236
-
237
-
238
-
239
-
240
-
241
-
242
-
243
-
244
-
245
-
246
-
247
-
248
-
249
-
250
-
251
-
252
-
253
-
254
-
255
-
256
-
257
-
258
-
259
-
260
-
261
-
262
-
263
-
264
-
265
-
266
-
267
-
268
-
269
-
270
-
271
-
272
 |
 |