Brother International PE-DESIGN Ver.6 Users Manual - English - Page 62
Using Programmable Stitch Creator
 |
View all Brother International PE-DESIGN Ver.6 manuals
Add to My Manuals
Save this manual to your list of manuals |
Page 62 highlights
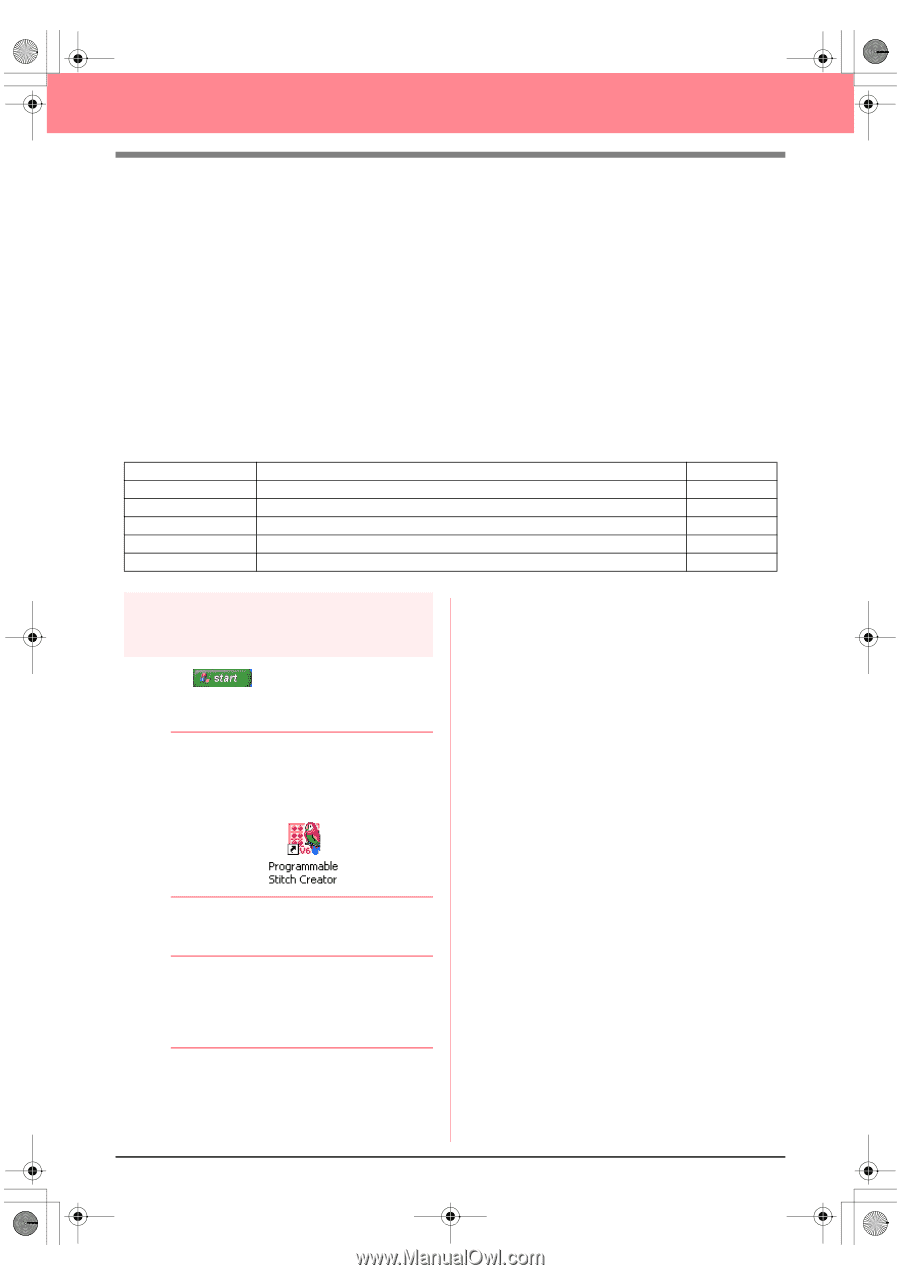
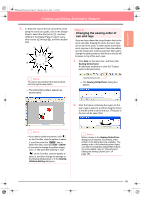
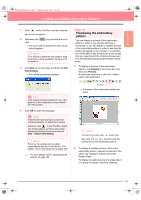
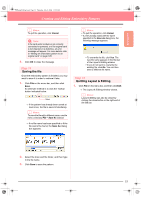
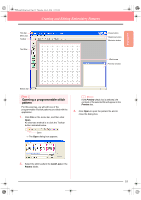
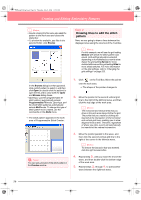
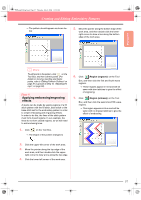
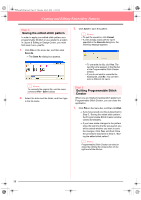
PeDesignV6Eng.book Page 54 Thursday, July 8, 2004 11:59 AM Creating and Editing Embroidery Patterns Using Programmable Stitch Creator Programmable Stitch Creator allows you to design fill stitch and motif stitch patterns that can be applied as a programmable fill stitch or motif stitch both in Design Center and Layout & Editing, resulting in more decorative embroidery patterns. When applied to enclosed regions, the fill stitch or motif stitch pattern fills the region in a tile-like manner. When applied to lines, the motif stitch pattern is repeated along the length of the line. In addition, the fill stitch patterns can be applied as an individual stamp to enclosed regions. You can create your own fill stitch and motif stitch patterns or use the many stitch patterns provided with this application, with or without editing them. In this section, we are going to edit an existing stitch pattern, and then apply embossing/engraving effects to it. The complete procedure will take you through the different steps of a normal working session with Programmable Stitch Creator and will introduce you to its most important features. Follow the instructions in this section step by step. If you have to interrupt this exercise for any reason, it is recommended to save the file (refer to Step 5, "Saving the edited stitch pattern", on page 58). You will be able to retrieve it later and resume your work. Step 1 Step 2 Step 3 Step 4 Step 5 Step 6 Starting up Programmable Stitch Creator Opening a programmable stitch pattern Drawing lines to edit the stitch pattern Applying embossing/engraving effects Saving the edited stitch pattern Quitting Programmable Stitch Creator page 54 page 55 page 56 page 57 page 58 page 58 Step 1 Starting up Programmable Stitch Creator 1. Click , select All Programs, then PE-DESIGN Ver.6. Select Programmable Stitch Creator. b Memo: If a shortcut for Programmable Stitch Creator was created, for example, on the desktop, double-click it to start up the application. → The Programmable Stitch Creator window appears. b Memo: To fill the entire screen with the Programmable Stitch Creator window, click the maximize button on the right end of the title bar. 54
-
 1
1 -
2
-
3
-
4
-
5
-
6
-
7
-
8
-
9
-
10
-
11
-
12
-
13
-
14
-
15
-
16
-
17
-
18
-
19
-
20
-
21
-
22
-
23
-
24
-
25
-
26
-
27
-
28
-
29
-
30
-
31
-
32
-
33
-
34
-
35
-
36
-
37
-
38
-
39
-
40
-
41
-
42
-
43
-
44
-
45
-
46
-
47
-
48
-
49
-
50
-
51
-
52
-
53
-
54
-
55
-
56
-
 57
57 -
 58
58 -
 59
59 -
 60
60 -
 61
61 -
 62
62 -
 63
63 -
 64
64 -
 65
65 -
 66
66 -
 67
67 -
68
-
69
-
70
-
71
-
72
-
73
-
74
-
75
-
76
-
77
-
78
-
79
-
80
-
81
-
82
-
83
-
84
-
85
-
86
-
87
-
88
-
89
-
90
-
91
-
92
-
93
-
94
-
95
-
96
-
97
-
98
-
99
-
100
-
101
-
102
-
103
-
104
-
105
-
106
-
107
-
108
-
109
-
110
-
111
-
112
-
113
-
114
-
115
-
116
-
117
-
118
-
119
-
120
-
121
-
122
-
123
-
124
-
125
-
126
-
127
-
128
-
129
-
130
-
131
-
132
-
133
-
134
-
135
-
136
-
137
-
138
-
139
-
140
-
141
-
142
-
143
-
144
-
145
-
146
-
147
-
148
-
149
-
150
-
151
-
152
-
153
-
154
-
155
-
156
-
157
-
158
-
159
-
160
-
161
-
162
-
163
-
164
-
165
-
166
-
167
-
168
-
169
-
170
-
171
-
172
-
173
-
174
-
175
-
176
-
177
-
178
-
179
-
180
-
181
-
182
-
183
-
184
-
185
-
186
-
187
-
188
-
189
-
190
-
191
-
192
-
193
-
194
-
195
-
196
-
197
-
198
-
199
-
200
-
201
-
202
-
203
-
204
-
205
-
206
-
207
-
208
-
209
-
210
-
211
-
212
-
213
-
214
-
215
-
216
-
217
-
218
-
219
-
220
-
221
-
222
-
223
-
224
-
225
-
226
-
227
-
228
-
229
-
230
-
231
-
232
-
233
-
234
-
235
-
236
-
237
-
238
-
239
-
240
-
241
-
242
-
243
-
244
-
245
-
246
-
247
-
248
-
249
-
250
-
251
-
252
-
253
-
254
-
255
-
256
-
257
-
258
-
259
-
260
-
261
-
262
-
263
-
264
-
265
-
266
-
267
-
268
-
269
-
270
-
271
-
272
 |
 |