Brother International PE-DESIGN Ver.6 Users Manual - English - Page 51
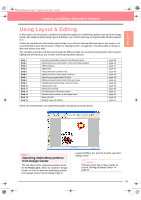
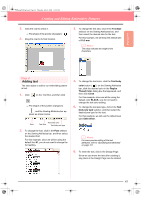
Adding text
 |
View all Brother International PE-DESIGN Ver.6 manuals
Add to My Manuals
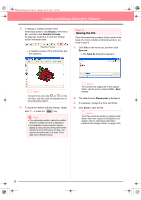
Save this manual to your list of manuals |
Page 51 highlights
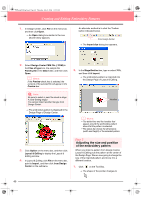
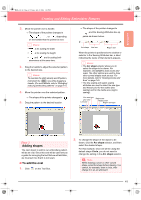
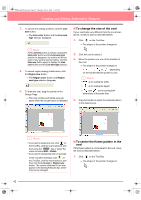
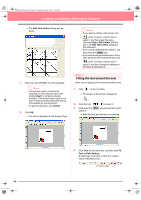
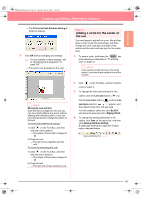
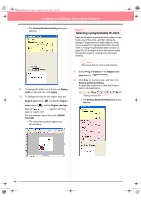
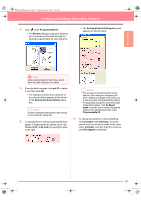
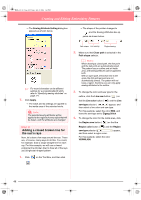
PeDesignV6Eng.book Page 43 Thursday, July 8, 2004 11:59 AM Creating and Editing Embroidery Patterns 2. Click the oval to select it. 3. To change the text size, click in the Text Size → The shape of the pointer changes to . selector on the Sewing Attributes bar, and then select the desired size for the text. 3. Drag the oval to its final location. For this example, we will keep the default size of 10.0 mm b Memo: The value indicates the height of the characters. Basic Operation Step 4 Adding text The next object to add to our embroidery pattern is text. 1. Click on the Tool Box, and then click . → The shape of the pointer changes to , and the Sewing Attributes bar appears as shown below. Font Text body color Text Size Text body sew type 2. To change the font, click in the Font selector on the Sewing Attributes bar, and then select the desired font. For this example, since we will be using the default font 01, you do not need to change the font setting. 4. To change the text color, click the Text body color button ( ) on the Sewing Attributes bar, click the desired color in the Region Thread Color dialog box that appeared, and then click Close. For this example, since we will be using the default color BLACK, you do not need to change the text color setting. 5. To change the text sew type, click in the Text body sew type selector, and then select the desired sew type for the text. For this example, we will use the default sew type Satin stitch. b Memo: For more precise setting of the text attributes, refer to "Specifying text attributes" on page 157. 6. To enter the text, click in the Design Page. Since we can move the text after creating it, any place in the Design Page can be clicked. 43
-
 1
1 -
2
-
3
-
4
-
5
-
6
-
7
-
8
-
9
-
10
-
11
-
12
-
13
-
14
-
15
-
16
-
17
-
18
-
19
-
20
-
21
-
22
-
23
-
24
-
25
-
26
-
27
-
28
-
29
-
30
-
31
-
32
-
33
-
34
-
35
-
36
-
37
-
38
-
39
-
40
-
41
-
42
-
43
-
44
-
45
-
 46
46 -
 47
47 -
 48
48 -
 49
49 -
 50
50 -
 51
51 -
 52
52 -
 53
53 -
 54
54 -
 55
55 -
 56
56 -
57
-
58
-
59
-
60
-
61
-
62
-
63
-
64
-
65
-
66
-
67
-
68
-
69
-
70
-
71
-
72
-
73
-
74
-
75
-
76
-
77
-
78
-
79
-
80
-
81
-
82
-
83
-
84
-
85
-
86
-
87
-
88
-
89
-
90
-
91
-
92
-
93
-
94
-
95
-
96
-
97
-
98
-
99
-
100
-
101
-
102
-
103
-
104
-
105
-
106
-
107
-
108
-
109
-
110
-
111
-
112
-
113
-
114
-
115
-
116
-
117
-
118
-
119
-
120
-
121
-
122
-
123
-
124
-
125
-
126
-
127
-
128
-
129
-
130
-
131
-
132
-
133
-
134
-
135
-
136
-
137
-
138
-
139
-
140
-
141
-
142
-
143
-
144
-
145
-
146
-
147
-
148
-
149
-
150
-
151
-
152
-
153
-
154
-
155
-
156
-
157
-
158
-
159
-
160
-
161
-
162
-
163
-
164
-
165
-
166
-
167
-
168
-
169
-
170
-
171
-
172
-
173
-
174
-
175
-
176
-
177
-
178
-
179
-
180
-
181
-
182
-
183
-
184
-
185
-
186
-
187
-
188
-
189
-
190
-
191
-
192
-
193
-
194
-
195
-
196
-
197
-
198
-
199
-
200
-
201
-
202
-
203
-
204
-
205
-
206
-
207
-
208
-
209
-
210
-
211
-
212
-
213
-
214
-
215
-
216
-
217
-
218
-
219
-
220
-
221
-
222
-
223
-
224
-
225
-
226
-
227
-
228
-
229
-
230
-
231
-
232
-
233
-
234
-
235
-
236
-
237
-
238
-
239
-
240
-
241
-
242
-
243
-
244
-
245
-
246
-
247
-
248
-
249
-
250
-
251
-
252
-
253
-
254
-
255
-
256
-
257
-
258
-
259
-
260
-
261
-
262
-
263
-
264
-
265
-
266
-
267
-
268
-
269
-
270
-
271
-
272
 |
 |
