Brother International PE-DESIGN Ver.6 Users Manual - English - Page 81
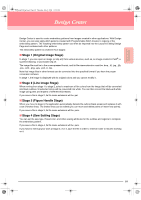
Continuing to Stage 2 Line Image Stage
 |
View all Brother International PE-DESIGN Ver.6 manuals
Add to My Manuals
Save this manual to your list of manuals |
Page 81 highlights
PeDesignV6Eng.book Page 73 Thursday, July 8, 2004 11:59 AM Advanced Opreation Design Center Design Center Stage 2 (Line Image Stage) Continuing to Stage 2 (Line Image Stage) After opening the image, continue to stage 2 (Line Image stage), where the color(s) that will be used to create the line image (outline of the image) will be selected. In stage 2 (Line Image stage), you can edit the image using the pen and eraser tools. You may also want to use these tools to create outlines that are easier to draw by hand, for example, free-hand writing. Use the zooming tools available to display the image enlarged or reduced. Toolbar button: 1. Click , or click Stage, then To Line Image. → The Cut out to Line Image dialog box appears. → The selected color appears in the top box under Pick Colors, and appears in the check box to show that the color is selected. b Memo: • You can repeat step 2. to select up to five colors. If more than five colors are selected, only the last five colors selected remain in the list. • To deselect a color, clear the corresponding check box. • To adjust the color tone and reduce image noise (distortions), click Image Tune. (For more details, refer to "Image tuning" on page 74.) → If you were in stage 3 (Figure Handle stage), you are returned to stage 2, unless you have modified the image in stage 3. In that case, a message will appear, asking you to confirm that you want to abandon the changes made in stage 3. b Memo: To display the image enlarged (or reduced), move the ZOOM slider up (or down). When the image is enlarged, you can scroll through it to display different parts. a Note: If you started with stage 3 (Figure Handle stage) by opening a stage 3 file, you cannot go to stage 2. 2. Click the outline color(s) that you want to convert into black outlines. → When the pointer is moved over the image, the shape of the pointer changes to . 3. Click Preview to preview the line image in the Design Page. b Memo: If necessary, the settings can be changed. After changing the settings, click Preview to preview the outline with the new settings applied. 4. Click OK. → All of the selected colors are converted to a black outline (line image), which is displayed in the Design Page of stage 2 (Line Image stage). !!scr34.bmp!! 73
-
 1
1 -
2
-
3
-
4
-
5
-
6
-
7
-
8
-
9
-
10
-
11
-
12
-
13
-
14
-
15
-
16
-
17
-
18
-
19
-
20
-
21
-
22
-
23
-
24
-
25
-
26
-
27
-
28
-
29
-
30
-
31
-
32
-
33
-
34
-
35
-
36
-
37
-
38
-
39
-
40
-
41
-
42
-
43
-
44
-
45
-
46
-
47
-
48
-
49
-
50
-
51
-
52
-
53
-
54
-
55
-
56
-
57
-
58
-
59
-
60
-
61
-
62
-
63
-
64
-
65
-
66
-
67
-
68
-
69
-
70
-
71
-
72
-
73
-
74
-
75
-
 76
76 -
 77
77 -
 78
78 -
 79
79 -
 80
80 -
 81
81 -
 82
82 -
 83
83 -
 84
84 -
 85
85 -
 86
86 -
87
-
88
-
89
-
90
-
91
-
92
-
93
-
94
-
95
-
96
-
97
-
98
-
99
-
100
-
101
-
102
-
103
-
104
-
105
-
106
-
107
-
108
-
109
-
110
-
111
-
112
-
113
-
114
-
115
-
116
-
117
-
118
-
119
-
120
-
121
-
122
-
123
-
124
-
125
-
126
-
127
-
128
-
129
-
130
-
131
-
132
-
133
-
134
-
135
-
136
-
137
-
138
-
139
-
140
-
141
-
142
-
143
-
144
-
145
-
146
-
147
-
148
-
149
-
150
-
151
-
152
-
153
-
154
-
155
-
156
-
157
-
158
-
159
-
160
-
161
-
162
-
163
-
164
-
165
-
166
-
167
-
168
-
169
-
170
-
171
-
172
-
173
-
174
-
175
-
176
-
177
-
178
-
179
-
180
-
181
-
182
-
183
-
184
-
185
-
186
-
187
-
188
-
189
-
190
-
191
-
192
-
193
-
194
-
195
-
196
-
197
-
198
-
199
-
200
-
201
-
202
-
203
-
204
-
205
-
206
-
207
-
208
-
209
-
210
-
211
-
212
-
213
-
214
-
215
-
216
-
217
-
218
-
219
-
220
-
221
-
222
-
223
-
224
-
225
-
226
-
227
-
228
-
229
-
230
-
231
-
232
-
233
-
234
-
235
-
236
-
237
-
238
-
239
-
240
-
241
-
242
-
243
-
244
-
245
-
246
-
247
-
248
-
249
-
250
-
251
-
252
-
253
-
254
-
255
-
256
-
257
-
258
-
259
-
260
-
261
-
262
-
263
-
264
-
265
-
266
-
267
-
268
-
269
-
270
-
271
-
272
 |
 |
