Brother International WP230B Owners Manual - English - Page 199
Entering, Editing
 |
View all Brother International WP230B manuals
Add to My Manuals
Save this manual to your list of manuals |
Page 199 highlights
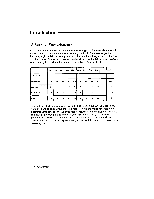
• Even in the case of direct input, the data may look slightly different in the Input Area andin the cell. This is because this wordprocessor allows you to control the layout of the data in the cells. For example, you may want a cell to appear on screen in bold. The data appears in bold in the cell, and in normal face in the Input Area. JTCII1,1) Entering and Editing Data To enter data in an empty cell, select that cell and type the data. A small cursor (the input cursor) appears in the Input Area. Press RETURN when you finish. The data appears in the cell. Proceed exactly the same way to replace old data with new data. The old data disappears from the Input Area as soon as you start typing. The new data appears in the cell when you press RETURN after retyping. NOTE: If you type a character key while moving through the grid, the word processor switches to the Input/Edit mode, clears the contents of the Input Area and displays the character that you typed. If you press RETURN at this step, the character you typed replaces the old data. To avoid this, press CANCEL instead ofRETURN. This restores the original data andreturns the word processor to the Command mode. To edit old data without deleting it, first press TAB. The cursor appears in the Input Area and you can edit the data. Press RETURN when the data is edited. NOTES: • After typing or editing in the Input Area, press -> , T , or1 instead ofRETURN. These keys enter the data, return to the Command mode, and move the cursor one position in the direction of the arrow on the grid. • In Input/Edit mode, press to move the cursor across the data in the Input Area. However, -> enters the data as explained above ifyou try to move past the last character. Press CODE + EXPR to move to the first character, or CODE + RELOC to move to the last one. Spreadsheet 187
-
 1
1 -
2
-
3
-
4
-
5
-
6
-
7
-
8
-
9
-
10
-
11
-
12
-
13
-
14
-
15
-
16
-
17
-
18
-
19
-
20
-
21
-
22
-
23
-
24
-
25
-
26
-
27
-
28
-
29
-
30
-
31
-
32
-
33
-
34
-
35
-
36
-
37
-
38
-
39
-
40
-
41
-
42
-
43
-
44
-
45
-
46
-
47
-
48
-
49
-
50
-
51
-
52
-
53
-
54
-
55
-
56
-
57
-
58
-
59
-
60
-
61
-
62
-
63
-
64
-
65
-
66
-
67
-
68
-
69
-
70
-
71
-
72
-
73
-
74
-
75
-
76
-
77
-
78
-
79
-
80
-
81
-
82
-
83
-
84
-
85
-
86
-
87
-
88
-
89
-
90
-
91
-
92
-
93
-
94
-
95
-
96
-
97
-
98
-
99
-
100
-
101
-
102
-
103
-
104
-
105
-
106
-
107
-
108
-
109
-
110
-
111
-
112
-
113
-
114
-
115
-
116
-
117
-
118
-
119
-
120
-
121
-
122
-
123
-
124
-
125
-
126
-
127
-
128
-
129
-
130
-
131
-
132
-
133
-
134
-
135
-
136
-
137
-
138
-
139
-
140
-
141
-
142
-
143
-
144
-
145
-
146
-
147
-
148
-
149
-
150
-
151
-
152
-
153
-
154
-
155
-
156
-
157
-
158
-
159
-
160
-
161
-
162
-
163
-
164
-
165
-
166
-
167
-
168
-
169
-
170
-
171
-
172
-
173
-
174
-
175
-
176
-
177
-
178
-
179
-
180
-
181
-
182
-
183
-
184
-
185
-
186
-
187
-
188
-
189
-
190
-
191
-
192
-
193
-
 194
194 -
 195
195 -
 196
196 -
 197
197 -
 198
198 -
 199
199 -
 200
200 -
 201
201 -
 202
202 -
 203
203 -
 204
204 -
205
-
206
-
207
-
208
-
209
-
210
-
211
-
212
-
213
-
214
-
215
-
216
-
217
-
218
-
219
-
220
-
221
-
222
-
223
-
224
-
225
-
226
-
227
-
228
-
229
-
230
-
231
-
232
-
233
-
234
-
235
-
236
-
237
-
238
-
239
-
240
-
241
-
242
-
243
-
244
-
245
-
246
-
247
-
248
-
249
-
250
-
251
-
252
-
253
-
254
-
255
-
256
-
257
-
258
-
259
-
260
-
261
-
262
-
263
-
264
-
265
-
266
-
267
-
268
-
269
-
270
-
271
-
272
-
273
-
274
-
275
-
276
-
277
-
278
-
279
-
280
-
281
-
282
-
283
-
284
-
285
-
286
-
287
-
288
-
289
-
290
-
291
-
292
-
293
-
294
-
295
-
296
-
297
-
298
-
299
-
300
-
301
-
302
-
303
-
304
-
305
-
306
-
307
-
308
-
309
-
310
-
311
-
312
-
313
-
314
-
315
-
316
-
317
-
318
-
319
-
320
-
321
-
322
-
323
-
324
-
325
-
326
-
327
-
328
-
329
-
330
-
331
-
332
-
333
-
334
-
335
-
336
-
337
-
338
-
339
-
340
 |
 |
