HP DesignJet T850 DesignJet T850 Printer Series DesignJet T950 Printer SeriesU - Page 126
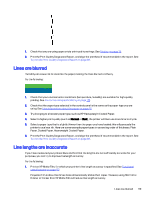
Lines are too thick, too thin, or missing, Print the Print Quality Diagnostic Report. See
 |
View all HP DesignJet T850 manuals
Add to My Manuals
Save this manual to your list of manuals |
Page 126 highlights
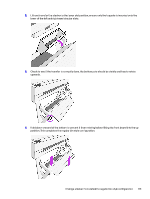
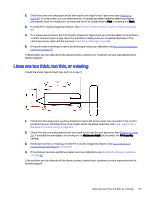
2. Check that you are using appropriate print-quality settings for your purposes (see Printing on page 35). In some cases, you can overcome a print-quality problem merely by selecting a higher print-quality level. For instance, if you have set the Print Quality level to Fast, try setting it to Best. 3. Print the Print Quality Diagnostic Report. See To print the Print Quality Diagnostic Report on page 86. 4. If no issues were found in the Print Quality Diagnostic Report, but you still see white horizontal lines or white streaks in your image, clean the printhead, making sure you complete all phases of the cleaning process right until the end (see Clean the printhead on page 86). 5. If the printhead is working correctly, perform paper advance calibration: see Recalibrate the paper advance on page 92. If the problem persists despite all the above actions, contact your customer service representative for further support. Lines are too thick, too thin, or missing Check the paper type and settings, and run a report. 1. Check that the paper type you have loaded corresponds to the paper type selected in the control panel and in your software. If you have doubts about the paper selection, see Paper type is not in the driver or control panel on page 104. 2. Check that you are using appropriate print-quality settings for your purposes (see Printing on page 35). If available for your paper, try turning on the Maximum detail option (under the Print quality setting). 3. If lines are too thin or missing, print the Print Quality Diagnostic Report. See To print the Print Quality Diagnostic Report on page 86 . 4. If the problem remains, perform a paper advance calibration: see Recalibrate the paper advance on page 92. If the problem persists despite all the above actions, contact your customer service representative for further support. Lines are too thick, too thin, or missing 117
-
 1
1 -
2
-
3
-
4
-
5
-
6
-
7
-
8
-
9
-
10
-
11
-
12
-
13
-
14
-
15
-
16
-
17
-
18
-
19
-
20
-
21
-
22
-
23
-
24
-
25
-
26
-
27
-
28
-
29
-
30
-
31
-
32
-
33
-
34
-
35
-
36
-
37
-
38
-
39
-
40
-
41
-
42
-
43
-
44
-
45
-
46
-
47
-
48
-
49
-
50
-
51
-
52
-
53
-
54
-
55
-
56
-
57
-
58
-
59
-
60
-
61
-
62
-
63
-
64
-
65
-
66
-
67
-
68
-
69
-
70
-
71
-
72
-
73
-
74
-
75
-
76
-
77
-
78
-
79
-
80
-
81
-
82
-
83
-
84
-
85
-
86
-
87
-
88
-
89
-
90
-
91
-
92
-
93
-
94
-
95
-
96
-
97
-
98
-
99
-
100
-
101
-
102
-
103
-
104
-
105
-
106
-
107
-
108
-
109
-
110
-
111
-
112
-
113
-
114
-
115
-
116
-
117
-
118
-
119
-
120
-
 121
121 -
 122
122 -
 123
123 -
 124
124 -
 125
125 -
 126
126 -
 127
127 -
 128
128 -
 129
129 -
 130
130 -
 131
131 -
132
-
133
-
134
-
135
-
136
-
137
-
138
-
139
-
140
-
141
-
142
-
143
-
144
-
145
-
146
-
147
-
148
-
149
-
150
-
151
-
152
-
153
-
154
-
155
-
156
-
157
-
158
-
159
-
160
-
161
-
162
-
163
-
164
-
165
-
166
-
167
-
168
-
169
-
170
-
171
-
172
-
173
-
174
-
175
-
176
-
177
-
178
-
179
-
180
-
181
-
182
-
183
-
184
-
185
-
186
-
187
-
188
-
189
-
190
-
191
 |
 |
