HP DesignJet T850 DesignJet T850 Printer Series DesignJet T950 Printer SeriesU - Page 60
Scan destinations, in the Embedded Web Server
 |
View all HP DesignJet T850 manuals
Add to My Manuals
Save this manual to your list of manuals |
Page 60 highlights
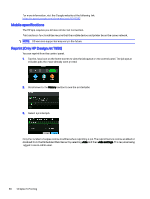
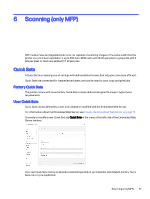
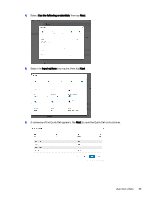
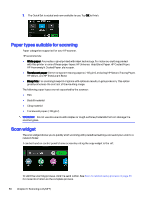
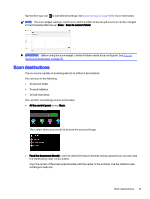
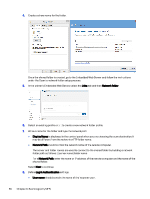
Tap the Settings icon to edit defined settings. See Scan settings on page 53 for more information. NOTE: The scan widget settings used to scan and the folder where the job is sent to can be changed in the Embedded Web Server: Scan > Scan to network folder. IMPORTANT: Before using the scan widget, a network folder needs to be configured. See Scan to network setup process on page 55. Scan destinations The scanner is capable of scanning directly to different destinations. You can scan to the following: ● To network folder ● To email address ● To USB flash drive You can start a scanning process in two ways: ● At the control panel: select Scan. Then select where you would like to store the scanned image. ● Feed the document directly: Load the sheet with the printed side facing upwards (you can also load the sheet before step 1, if you prefer). Align the center of the sheet approximately with the center of the scanner. Use the standard size markings to help you. Scan destinations 51
-
 1
1 -
2
-
3
-
4
-
5
-
6
-
7
-
8
-
9
-
10
-
11
-
12
-
13
-
14
-
15
-
16
-
17
-
18
-
19
-
20
-
21
-
22
-
23
-
24
-
25
-
26
-
27
-
28
-
29
-
30
-
31
-
32
-
33
-
34
-
35
-
36
-
37
-
38
-
39
-
40
-
41
-
42
-
43
-
44
-
45
-
46
-
47
-
48
-
49
-
50
-
51
-
52
-
53
-
54
-
 55
55 -
 56
56 -
 57
57 -
 58
58 -
 59
59 -
 60
60 -
 61
61 -
 62
62 -
 63
63 -
 64
64 -
 65
65 -
66
-
67
-
68
-
69
-
70
-
71
-
72
-
73
-
74
-
75
-
76
-
77
-
78
-
79
-
80
-
81
-
82
-
83
-
84
-
85
-
86
-
87
-
88
-
89
-
90
-
91
-
92
-
93
-
94
-
95
-
96
-
97
-
98
-
99
-
100
-
101
-
102
-
103
-
104
-
105
-
106
-
107
-
108
-
109
-
110
-
111
-
112
-
113
-
114
-
115
-
116
-
117
-
118
-
119
-
120
-
121
-
122
-
123
-
124
-
125
-
126
-
127
-
128
-
129
-
130
-
131
-
132
-
133
-
134
-
135
-
136
-
137
-
138
-
139
-
140
-
141
-
142
-
143
-
144
-
145
-
146
-
147
-
148
-
149
-
150
-
151
-
152
-
153
-
154
-
155
-
156
-
157
-
158
-
159
-
160
-
161
-
162
-
163
-
164
-
165
-
166
-
167
-
168
-
169
-
170
-
171
-
172
-
173
-
174
-
175
-
176
-
177
-
178
-
179
-
180
-
181
-
182
-
183
-
184
-
185
-
186
-
187
-
188
-
189
-
190
-
191
 |
 |