HP DesignJet T850 DesignJet T850 Printer Series DesignJet T950 Printer SeriesU - Page 33
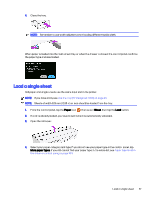
Load a roll into the printer
 |
View all HP DesignJet T850 manuals
Add to My Manuals
Save this manual to your list of manuals |
Page 33 highlights
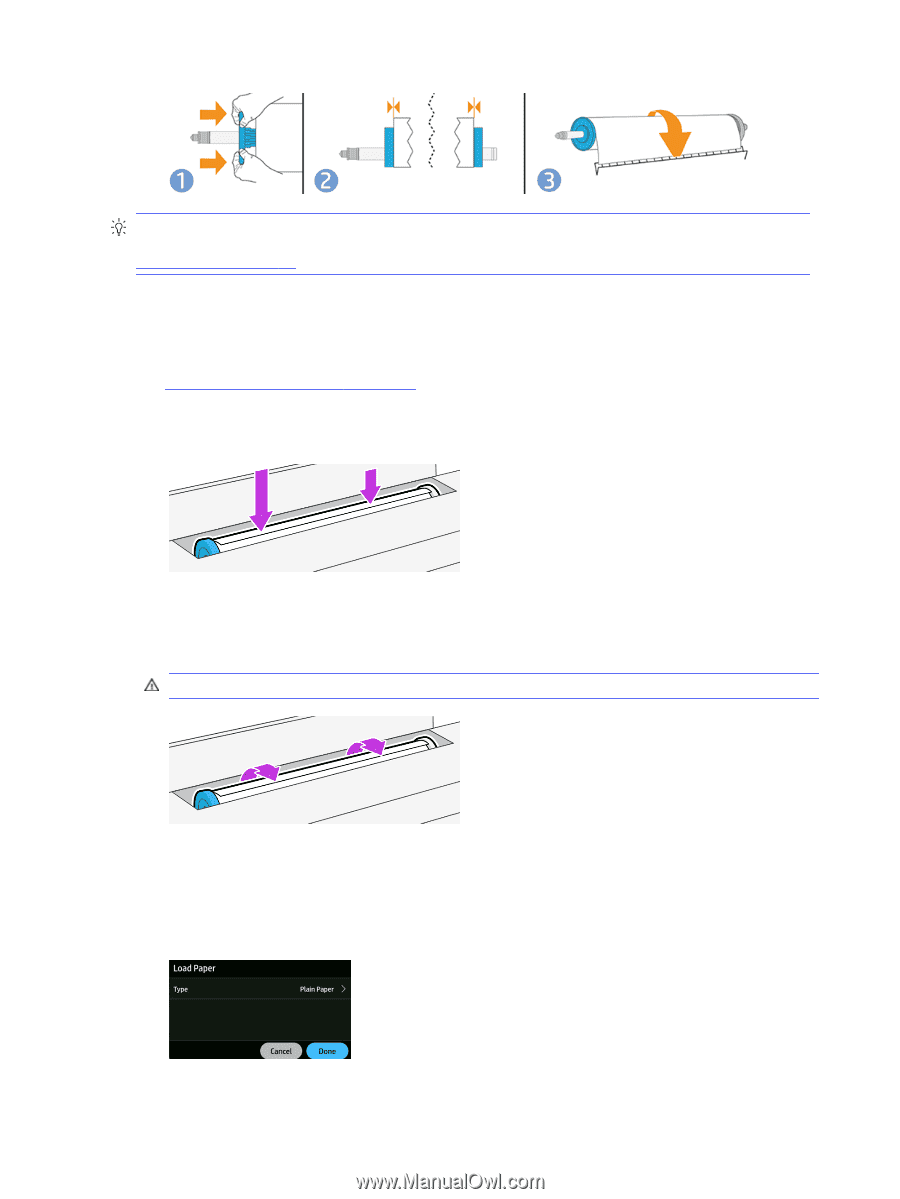
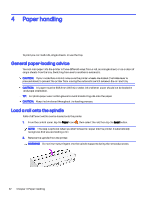
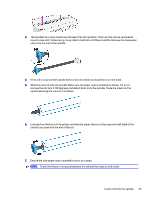
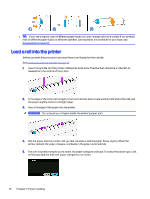
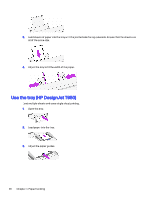
TIP: If you are a regular user of different paper types, you can change rolls more quickly if you preload rolls of different paper types on different spindles. Extra spindles are available for purchase, see Accessories on page 99. Load a roll into the printer Before you start this procedure, you must have a roll loaded on the spindle. See Load a roll onto the spindle on page 22. 1. Insert the spindle into the printer, holding it by both ends. The blue hub should be on the left, as viewed from the control of the printer. 2. If the edge of the roll is not straight or torn (sometimes due to tape used to hold end of the roll), pull the paper slightly and cut a straight edge. 3. Insert the edge of the paper into the printer. WARNING! Do not push your fingers inside the printer's paper path. 4. Roll the paper into the printer until you feel resistance and the paper flexes slightly. When the printer detects the paper, it beeps, and feeds in the paper automatically. 5. The control panel prompts you to select the paper category and type. To select the paper type, click on the type and the different paper categories are shown 24 Chapter 4 Paper handling
-
 1
1 -
2
-
3
-
4
-
5
-
6
-
7
-
8
-
9
-
10
-
11
-
12
-
13
-
14
-
15
-
16
-
17
-
18
-
19
-
20
-
21
-
22
-
23
-
24
-
25
-
26
-
27
-
 28
28 -
 29
29 -
 30
30 -
 31
31 -
 32
32 -
 33
33 -
 34
34 -
 35
35 -
 36
36 -
 37
37 -
 38
38 -
39
-
40
-
41
-
42
-
43
-
44
-
45
-
46
-
47
-
48
-
49
-
50
-
51
-
52
-
53
-
54
-
55
-
56
-
57
-
58
-
59
-
60
-
61
-
62
-
63
-
64
-
65
-
66
-
67
-
68
-
69
-
70
-
71
-
72
-
73
-
74
-
75
-
76
-
77
-
78
-
79
-
80
-
81
-
82
-
83
-
84
-
85
-
86
-
87
-
88
-
89
-
90
-
91
-
92
-
93
-
94
-
95
-
96
-
97
-
98
-
99
-
100
-
101
-
102
-
103
-
104
-
105
-
106
-
107
-
108
-
109
-
110
-
111
-
112
-
113
-
114
-
115
-
116
-
117
-
118
-
119
-
120
-
121
-
122
-
123
-
124
-
125
-
126
-
127
-
128
-
129
-
130
-
131
-
132
-
133
-
134
-
135
-
136
-
137
-
138
-
139
-
140
-
141
-
142
-
143
-
144
-
145
-
146
-
147
-
148
-
149
-
150
-
151
-
152
-
153
-
154
-
155
-
156
-
157
-
158
-
159
-
160
-
161
-
162
-
163
-
164
-
165
-
166
-
167
-
168
-
169
-
170
-
171
-
172
-
173
-
174
-
175
-
176
-
177
-
178
-
179
-
180
-
181
-
182
-
183
-
184
-
185
-
186
-
187
-
188
-
189
-
190
-
191
 |
 |