HP DesignJet T850 DesignJet T850 Printer Series DesignJet T950 Printer SeriesU - Page 62
Scan settings, Start Scan
 |
View all HP DesignJet T850 manuals
Add to My Manuals
Save this manual to your list of manuals |
Page 62 highlights
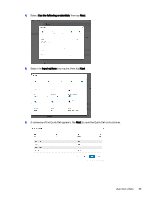
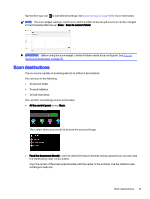
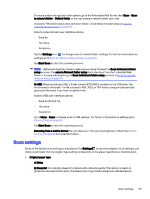
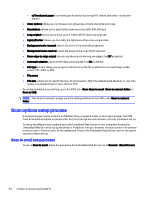
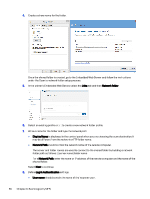
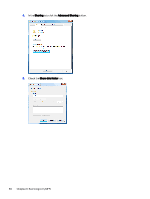
To create and/or change the folder options, go to the Embedded Web Server, then Scan > Scan to network folder > Default folder, or you can create a network folder quick set. A security PIN can be associated with each folder; check Network folder setup on Scan to network setup process on page 55. Scan to network folder user interface options: ○ Save As ○ File name ○ Resolution Tap the Settings icon to change scan to network folder settings. For further information on settings go to Scan to network setup process on page 55. Tap Start Scan to start the scanning process. NOTE: Before starting the process, make sure you have followed the Scan to Network folder setup process. The scan to Network folder setup has to be done from the Embedded Web Server. For more information, go to Scan to Network folder setup process on Scan to network setup process on page 55. - To USB: When scanning to USB, a folder named HPSCANS is created on the USB drive. The file is saved in the folder. The file is saved in PDF, JPEG, or TIFF format using an automatically generated file name if you have not given it one. Scan to USB user interface options: ○ Save As (format file ○ File name ○ Resolution Go to Menu > Scan to change scan to USB settings. For further information on settings go to Scan settings on page 53. Tap Start Scan to start the scanning process. - Scanning from a mobile device: You can also scan from your smartphone or tablet: See Mobile printing on page 42 for more information. Scan settings Some of the default scan settings are displayed. Tap Settings to see the complete list of settings, and check in particular that the original type setting corresponds to the paper type that you intend to scan. ● Original paper type: - a) White - b) Blueprint: for scanning blueprint originals with optimum results. This option converts to grayscale and inverts the colors, if needed, producing a white background with black lines. Scan settings 53
-
 1
1 -
2
-
3
-
4
-
5
-
6
-
7
-
8
-
9
-
10
-
11
-
12
-
13
-
14
-
15
-
16
-
17
-
18
-
19
-
20
-
21
-
22
-
23
-
24
-
25
-
26
-
27
-
28
-
29
-
30
-
31
-
32
-
33
-
34
-
35
-
36
-
37
-
38
-
39
-
40
-
41
-
42
-
43
-
44
-
45
-
46
-
47
-
48
-
49
-
50
-
51
-
52
-
53
-
54
-
55
-
56
-
 57
57 -
 58
58 -
 59
59 -
 60
60 -
 61
61 -
 62
62 -
 63
63 -
 64
64 -
 65
65 -
 66
66 -
 67
67 -
68
-
69
-
70
-
71
-
72
-
73
-
74
-
75
-
76
-
77
-
78
-
79
-
80
-
81
-
82
-
83
-
84
-
85
-
86
-
87
-
88
-
89
-
90
-
91
-
92
-
93
-
94
-
95
-
96
-
97
-
98
-
99
-
100
-
101
-
102
-
103
-
104
-
105
-
106
-
107
-
108
-
109
-
110
-
111
-
112
-
113
-
114
-
115
-
116
-
117
-
118
-
119
-
120
-
121
-
122
-
123
-
124
-
125
-
126
-
127
-
128
-
129
-
130
-
131
-
132
-
133
-
134
-
135
-
136
-
137
-
138
-
139
-
140
-
141
-
142
-
143
-
144
-
145
-
146
-
147
-
148
-
149
-
150
-
151
-
152
-
153
-
154
-
155
-
156
-
157
-
158
-
159
-
160
-
161
-
162
-
163
-
164
-
165
-
166
-
167
-
168
-
169
-
170
-
171
-
172
-
173
-
174
-
175
-
176
-
177
-
178
-
179
-
180
-
181
-
182
-
183
-
184
-
185
-
186
-
187
-
188
-
189
-
190
-
191
 |
 |