HP DesignJet T850 DesignJet T850 Printer Series DesignJet T950 Printer SeriesU - Page 63
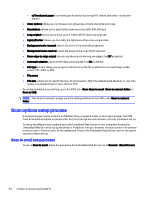
Scan options setup process
 |
View all HP DesignJet T850 manuals
Add to My Manuals
Save this manual to your list of manuals |
Page 63 highlights
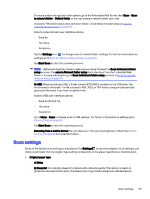
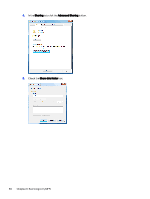
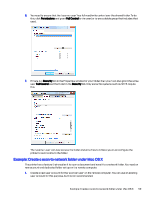
- c) Translucent paper: is a mode specifically for scanning NTP, vellum, and other translucent papers. ● Color options: allows you to choose color, grayscale, or black and white scanning. ● Resolutions: allows you to specify the scan resolution (200, 300, 600 dpi) ● Long original: allows you to scan up to 8 meters (26.25 feet) long originals. ● Lighter/Darker: allows you to modify the lightness of the scan using a slider. ● Background color removal: cleans the color in the original background. ● Background noise removal: clears the noise on the original background. ● Scan edge-to-edge output: do not crop the scan to the original edges. It is Off by default. ● Automatic deskew: corrects the skew automatically. It is On by default. ● File type: Format allows you to specify the format of the file in which the scanned image will be saved: TIFF, JPEG, or PDF. ● File name ● File size: allows you to specify the level of compression: High (the default level), Medium, or Low. This option is available if the format is JPEG or PDF. To configure default scan settings, go to the EWS, then Scan, Scan to email , Scan to network folder, or Scan to USB. NOTE: The 'Scan to network' widget uses the settings defined in the EWS under Scan to network folder. Scan options setup process A scanned image may be saved to a USB flash drive, a network folder, or an email message. The USB flash drive options require no preparation, but the other options will not work until they have been set up. To set up the different scan options, go to the Embedded Web Server in your computer. Access the Embedded Web Server by typing the printer's IP address into your browser. Find your printer's IP address on your printer's Home screen, on the dashboard. Once in the Embedded Web Server, look for the option you would like to set up. Scan to email setup process To set up Scan to email, follow the process in the Embedded Web Server. Go to General > Email Servers. 54 Chapter 6 Scanning (only MFP)
-
 1
1 -
2
-
3
-
4
-
5
-
6
-
7
-
8
-
9
-
10
-
11
-
12
-
13
-
14
-
15
-
16
-
17
-
18
-
19
-
20
-
21
-
22
-
23
-
24
-
25
-
26
-
27
-
28
-
29
-
30
-
31
-
32
-
33
-
34
-
35
-
36
-
37
-
38
-
39
-
40
-
41
-
42
-
43
-
44
-
45
-
46
-
47
-
48
-
49
-
50
-
51
-
52
-
53
-
54
-
55
-
56
-
57
-
 58
58 -
 59
59 -
 60
60 -
 61
61 -
 62
62 -
 63
63 -
 64
64 -
 65
65 -
 66
66 -
 67
67 -
 68
68 -
69
-
70
-
71
-
72
-
73
-
74
-
75
-
76
-
77
-
78
-
79
-
80
-
81
-
82
-
83
-
84
-
85
-
86
-
87
-
88
-
89
-
90
-
91
-
92
-
93
-
94
-
95
-
96
-
97
-
98
-
99
-
100
-
101
-
102
-
103
-
104
-
105
-
106
-
107
-
108
-
109
-
110
-
111
-
112
-
113
-
114
-
115
-
116
-
117
-
118
-
119
-
120
-
121
-
122
-
123
-
124
-
125
-
126
-
127
-
128
-
129
-
130
-
131
-
132
-
133
-
134
-
135
-
136
-
137
-
138
-
139
-
140
-
141
-
142
-
143
-
144
-
145
-
146
-
147
-
148
-
149
-
150
-
151
-
152
-
153
-
154
-
155
-
156
-
157
-
158
-
159
-
160
-
161
-
162
-
163
-
164
-
165
-
166
-
167
-
168
-
169
-
170
-
171
-
172
-
173
-
174
-
175
-
176
-
177
-
178
-
179
-
180
-
181
-
182
-
183
-
184
-
185
-
186
-
187
-
188
-
189
-
190
-
191
 |
 |