HP DesignJet T850 DesignJet T850 Printer Series DesignJet T950 Printer SeriesU - Page 65
Network folder, Display Name, Network Path, Log-in Authentication, User name, server name, folder name
 |
View all HP DesignJet T850 manuals
Add to My Manuals
Save this manual to your list of manuals |
Page 65 highlights
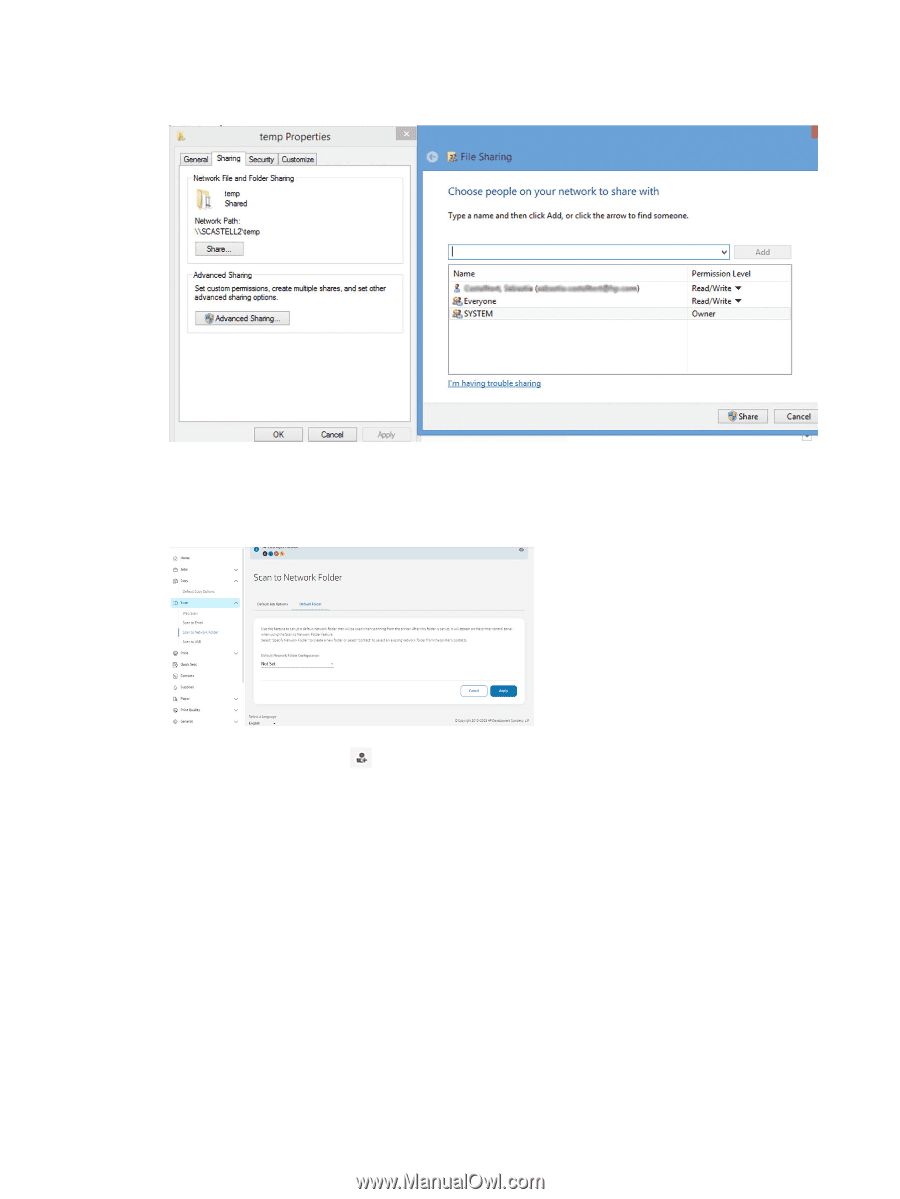
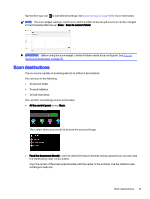
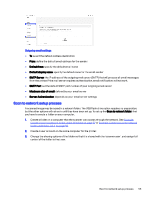
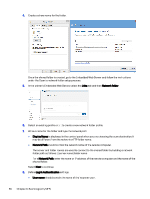
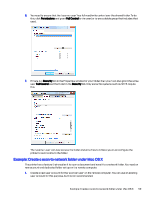
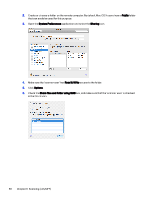
4. Create a share name for the folder. Once the shared folder is created, go to the Embedded Web Server and follow the instructions under the Scan to network folder setup process. 5. In the printer's Embedded Web Server, select the Jobs tab and then Network folder. 6. Select an existing profile or to create a new network folder profile. 7. Write a name for the folder and type the network path. ● Display Name is displayed in the control panel when you are choosing the scan destination. It may be different from the network or FTP folder name. ● Network Path should contain the network name of the remote computer. The server and folder names are used to connect to the shared folder by building a network folder path as follows: \\server name\folder name For a Network Path, enter the name or IP address of the remote computer and the name of the shared folder. Select Next to continue. 8. Define Log-in Authentication settings. ● User name should contain the name of the 'scanner user'. 56 Chapter 6 Scanning (only MFP)
-
 1
1 -
2
-
3
-
4
-
5
-
6
-
7
-
8
-
9
-
10
-
11
-
12
-
13
-
14
-
15
-
16
-
17
-
18
-
19
-
20
-
21
-
22
-
23
-
24
-
25
-
26
-
27
-
28
-
29
-
30
-
31
-
32
-
33
-
34
-
35
-
36
-
37
-
38
-
39
-
40
-
41
-
42
-
43
-
44
-
45
-
46
-
47
-
48
-
49
-
50
-
51
-
52
-
53
-
54
-
55
-
56
-
57
-
58
-
59
-
 60
60 -
 61
61 -
 62
62 -
 63
63 -
 64
64 -
 65
65 -
 66
66 -
 67
67 -
 68
68 -
 69
69 -
 70
70 -
71
-
72
-
73
-
74
-
75
-
76
-
77
-
78
-
79
-
80
-
81
-
82
-
83
-
84
-
85
-
86
-
87
-
88
-
89
-
90
-
91
-
92
-
93
-
94
-
95
-
96
-
97
-
98
-
99
-
100
-
101
-
102
-
103
-
104
-
105
-
106
-
107
-
108
-
109
-
110
-
111
-
112
-
113
-
114
-
115
-
116
-
117
-
118
-
119
-
120
-
121
-
122
-
123
-
124
-
125
-
126
-
127
-
128
-
129
-
130
-
131
-
132
-
133
-
134
-
135
-
136
-
137
-
138
-
139
-
140
-
141
-
142
-
143
-
144
-
145
-
146
-
147
-
148
-
149
-
150
-
151
-
152
-
153
-
154
-
155
-
156
-
157
-
158
-
159
-
160
-
161
-
162
-
163
-
164
-
165
-
166
-
167
-
168
-
169
-
170
-
171
-
172
-
173
-
174
-
175
-
176
-
177
-
178
-
179
-
180
-
181
-
182
-
183
-
184
-
185
-
186
-
187
-
188
-
189
-
190
-
191
 |
 |