HP DesignJet T850 DesignJet T850 Printer Series DesignJet T950 Printer SeriesU - Page 163
Wired network issues, Hostname, Network port created does not match printer IP address Windows
 |
View all HP DesignJet T850 manuals
Add to My Manuals
Save this manual to your list of manuals |
Page 163 highlights
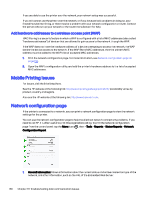
2. At the bottom of the screen, tap IPv4 / IPv6 > Manual, and enter the IP address, the subnet mask, and the gateway (those settings should be provided by your network administrator). Hostname You can use the hostname instead of the numeric IP address. 1. Go to the control panel and tap the Menu icon , then Settings > Network > Wi-Fi/Ethernet details. 2. Take a note of the IP address and the hostname (HPXXXXXX format). 3. If your computer is running Windows, tap the Start button, then the Configuration button, then tap Devices > Printers and Scanners, then tap the printer, then Administer > Properties > Ports > Configure Port, and in the Printer name or IP address field enter the hostname. Wired network issues If you are unable to install the HP software for your printer, then you need to perform some checks to solve the issue. Check that: ● All cable connections to the computer and the printer are secure. ● The network is operational and the network equipment is turned on. ● All applications, including virus protection programs, spyware protection programs, and firewalls, are not blocking the connections to the printer. ● The printer is installed on the same subnet as the computers that use the printer. If the installation program cannot discover the printer, print the network configuration page, and enter the IP address manually in the installation program. For more information, see Network configuration page on page 158. Though it is not recommended that you assign a static IP address to the printer, you might resolve some installation problems (such as a conflict with a personal firewall) by doing so. See Communication failures between computer and printer on page 153. Network port created does not match printer IP address (Windows) If you are using a computer running Windows, make sure that the network ports created in the printer driver match the printer's IP address. 1. Print the printer's network configuration page. 2. Click Start, point to Settings, then click Printers or Printers and Faxes. - or - Click Start, click Control Panel, then double-click Printers. 3. Right-click the Printer icon, click Properties, and then click the Ports tab. 4. Select the TCP/IP port for the printer, and then click Configure Port. 154 Chapter 19 Troubleshooting data communication issues
-
 1
1 -
2
-
3
-
4
-
5
-
6
-
7
-
8
-
9
-
10
-
11
-
12
-
13
-
14
-
15
-
16
-
17
-
18
-
19
-
20
-
21
-
22
-
23
-
24
-
25
-
26
-
27
-
28
-
29
-
30
-
31
-
32
-
33
-
34
-
35
-
36
-
37
-
38
-
39
-
40
-
41
-
42
-
43
-
44
-
45
-
46
-
47
-
48
-
49
-
50
-
51
-
52
-
53
-
54
-
55
-
56
-
57
-
58
-
59
-
60
-
61
-
62
-
63
-
64
-
65
-
66
-
67
-
68
-
69
-
70
-
71
-
72
-
73
-
74
-
75
-
76
-
77
-
78
-
79
-
80
-
81
-
82
-
83
-
84
-
85
-
86
-
87
-
88
-
89
-
90
-
91
-
92
-
93
-
94
-
95
-
96
-
97
-
98
-
99
-
100
-
101
-
102
-
103
-
104
-
105
-
106
-
107
-
108
-
109
-
110
-
111
-
112
-
113
-
114
-
115
-
116
-
117
-
118
-
119
-
120
-
121
-
122
-
123
-
124
-
125
-
126
-
127
-
128
-
129
-
130
-
131
-
132
-
133
-
134
-
135
-
136
-
137
-
138
-
139
-
140
-
141
-
142
-
143
-
144
-
145
-
146
-
147
-
148
-
149
-
150
-
151
-
152
-
153
-
154
-
155
-
156
-
157
-
 158
158 -
 159
159 -
 160
160 -
 161
161 -
 162
162 -
 163
163 -
 164
164 -
 165
165 -
 166
166 -
 167
167 -
 168
168 -
169
-
170
-
171
-
172
-
173
-
174
-
175
-
176
-
177
-
178
-
179
-
180
-
181
-
182
-
183
-
184
-
185
-
186
-
187
-
188
-
189
-
190
-
191
 |
 |
