Samsung SGH-T779 User Manual Ver.uvlj4_f8 (English(north America)) - Page 115
Camcorder Options, Self shot, Recording mode, Timer, Effects, Exposure value, Settings
 |
View all Samsung SGH-T779 manuals
Add to My Manuals
Save this manual to your list of manuals |
Page 115 highlights
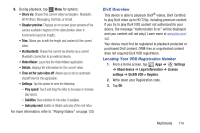
Camcorder Options Before you start recording videos, use the camcorder options to configure the camcorder for best results. Camcorder options are represented by icons on the left side of the screen. While in Camcorder mode, tap the following icons to set camcorder options: Self shot: Tap to switch to the front-facing camera lens and record a video of yourself. Recording mode: allows you to set the recording mode to: Normal, which is limited only by available space on the destination location, Limit for MMS, which is limited by MMS size restrictions, and Limit for email which restricts the file size so ti can easily be attached to a new outgoing email. Timer: Set a timer for how long to wait before recording a video. Options are: Off, 2 sec, 5 sec, and 10 sec. Effects: allows you to change the color tone or apply special effects to the video. Options include: No effect, Negative, Black and white, or Sepia. Exposure value: Set the brightness of the video. Settings • For more information, refer to "Configuring Camcorder Settings" on page 111. Camera / Camcorder Mode: allows you to take a photo in various modes. Once you change the mode, the corresponding indicator appears at the top left of the display. Slide the button up for Camera, or down for Camcorder. Camcorder button: shoots or stops video recording when tapped in Camcorder mode. Image viewer: allows you to access the Image viewer and the various viewing options for a selected video. The last video you shot, will be displayed as a thumbnail in the Image viewer icon. Multimedia 110
-
 1
1 -
2
-
3
-
4
-
5
-
6
-
7
-
8
-
9
-
10
-
11
-
12
-
13
-
14
-
15
-
16
-
17
-
18
-
19
-
20
-
21
-
22
-
23
-
24
-
25
-
26
-
27
-
28
-
29
-
30
-
31
-
32
-
33
-
34
-
35
-
36
-
37
-
38
-
39
-
40
-
41
-
42
-
43
-
44
-
45
-
46
-
47
-
48
-
49
-
50
-
51
-
52
-
53
-
54
-
55
-
56
-
57
-
58
-
59
-
60
-
61
-
62
-
63
-
64
-
65
-
66
-
67
-
68
-
69
-
70
-
71
-
72
-
73
-
74
-
75
-
76
-
77
-
78
-
79
-
80
-
81
-
82
-
83
-
84
-
85
-
86
-
87
-
88
-
89
-
90
-
91
-
92
-
93
-
94
-
95
-
96
-
97
-
98
-
99
-
100
-
101
-
102
-
103
-
104
-
105
-
106
-
107
-
108
-
109
-
 110
110 -
 111
111 -
 112
112 -
 113
113 -
 114
114 -
 115
115 -
 116
116 -
 117
117 -
 118
118 -
 119
119 -
 120
120 -
121
-
122
-
123
-
124
-
125
-
126
-
127
-
128
-
129
-
130
-
131
-
132
-
133
-
134
-
135
-
136
-
137
-
138
-
139
-
140
-
141
-
142
-
143
-
144
-
145
-
146
-
147
-
148
-
149
-
150
-
151
-
152
-
153
-
154
-
155
-
156
-
157
-
158
-
159
-
160
-
161
-
162
-
163
-
164
-
165
-
166
-
167
-
168
-
169
-
170
-
171
-
172
-
173
-
174
-
175
-
176
-
177
-
178
-
179
-
180
-
181
-
182
-
183
-
184
-
185
-
186
-
187
-
188
-
189
-
190
-
191
-
192
-
193
-
194
-
195
-
196
-
197
-
198
-
199
-
200
-
201
-
202
-
203
-
204
-
205
-
206
-
207
-
208
-
209
-
210
-
211
-
212
-
213
-
214
-
215
-
216
-
217
-
218
-
219
-
220
-
221
-
222
-
223
-
224
-
225
-
226
-
227
-
228
-
229
-
230
-
231
-
232
-
233
-
234
-
235
-
236
-
237
-
238
-
239
-
240
-
241
-
242
-
243
-
244
-
245
-
246
-
247
-
248
-
249
-
250
-
251
-
252
-
253
-
254
-
255
-
256
-
257
-
258
-
259
-
260
-
261
-
262
-
263
-
264
-
265
-
266
-
267
-
268
-
269
-
270
-
271
-
272
-
273
-
274
-
275
-
276
-
277
-
278
-
279
-
280
-
281
-
282
-
283
-
284
-
285
-
286
-
287
-
288
-
289
-
290
-
291
-
292
-
293
-
294
 |
 |