Samsung SGH-T779 User Manual Ver.uvlj4_f8 (English(north America)) - Page 82
Message Options, Options before composing a message
 |
View all Samsung SGH-T779 manuals
Add to My Manuals
Save this manual to your list of manuals |
Page 82 highlights
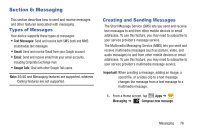
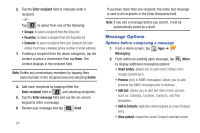
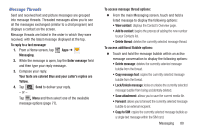
2. Tap the Enter recipient field to manually enter a recipient. - or - Tap to select from one of the following: • Groups: to select a recipient from the Group list. • Favorites: to select a recipient from the Favorites list. • Contacts: to select a recipient from your Contacts list (valid entries must have a wireless phone number or email address). 3. If adding a recipient from the above categories, tap the contact to place a checkmark then tap Done. The contact displays in the recipient field. Note: Delete any unnecessary members by tapping their name/number in the recipient area and selecting Delete. 4. Add more recipients by tapping either the Enter recipient field or and selecting recipients. 5. Tap the Enter message field and use the on-screen keypad to enter a message. 6. Review your message and tap Send. 77 If you have more than one recipient, the same text message is sent to all recipients in the Enter Recipients field. Note: If you exit a message before you send it, it will be automatically saved as a draft. Message Options Options before composing a message 1. From a Home screen, tap Apps ➔ Messaging. 2. From within an existing open message, tap Menu to display additional messaging options: • Insert smiley: allows you to add insert smiley icons images (emoticons). • Preview (only in MMS messages): allows you to add preview the MMS message prior to delivery. • Add text: allows you to add text items from sources such as: Calendar, Location, Contacts, and Text templates. • Add to Contacts: adds the current recipient as a new Contacts entry. • View contact: reveals the current Contact's overview screen.
-
 1
1 -
2
-
3
-
4
-
5
-
6
-
7
-
8
-
9
-
10
-
11
-
12
-
13
-
14
-
15
-
16
-
17
-
18
-
19
-
20
-
21
-
22
-
23
-
24
-
25
-
26
-
27
-
28
-
29
-
30
-
31
-
32
-
33
-
34
-
35
-
36
-
37
-
38
-
39
-
40
-
41
-
42
-
43
-
44
-
45
-
46
-
47
-
48
-
49
-
50
-
51
-
52
-
53
-
54
-
55
-
56
-
57
-
58
-
59
-
60
-
61
-
62
-
63
-
64
-
65
-
66
-
67
-
68
-
69
-
70
-
71
-
72
-
73
-
74
-
75
-
76
-
 77
77 -
 78
78 -
 79
79 -
 80
80 -
 81
81 -
 82
82 -
 83
83 -
 84
84 -
 85
85 -
 86
86 -
 87
87 -
88
-
89
-
90
-
91
-
92
-
93
-
94
-
95
-
96
-
97
-
98
-
99
-
100
-
101
-
102
-
103
-
104
-
105
-
106
-
107
-
108
-
109
-
110
-
111
-
112
-
113
-
114
-
115
-
116
-
117
-
118
-
119
-
120
-
121
-
122
-
123
-
124
-
125
-
126
-
127
-
128
-
129
-
130
-
131
-
132
-
133
-
134
-
135
-
136
-
137
-
138
-
139
-
140
-
141
-
142
-
143
-
144
-
145
-
146
-
147
-
148
-
149
-
150
-
151
-
152
-
153
-
154
-
155
-
156
-
157
-
158
-
159
-
160
-
161
-
162
-
163
-
164
-
165
-
166
-
167
-
168
-
169
-
170
-
171
-
172
-
173
-
174
-
175
-
176
-
177
-
178
-
179
-
180
-
181
-
182
-
183
-
184
-
185
-
186
-
187
-
188
-
189
-
190
-
191
-
192
-
193
-
194
-
195
-
196
-
197
-
198
-
199
-
200
-
201
-
202
-
203
-
204
-
205
-
206
-
207
-
208
-
209
-
210
-
211
-
212
-
213
-
214
-
215
-
216
-
217
-
218
-
219
-
220
-
221
-
222
-
223
-
224
-
225
-
226
-
227
-
228
-
229
-
230
-
231
-
232
-
233
-
234
-
235
-
236
-
237
-
238
-
239
-
240
-
241
-
242
-
243
-
244
-
245
-
246
-
247
-
248
-
249
-
250
-
251
-
252
-
253
-
254
-
255
-
256
-
257
-
258
-
259
-
260
-
261
-
262
-
263
-
264
-
265
-
266
-
267
-
268
-
269
-
270
-
271
-
272
-
273
-
274
-
275
-
276
-
277
-
278
-
279
-
280
-
281
-
282
-
283
-
284
-
285
-
286
-
287
-
288
-
289
-
290
-
291
-
292
-
293
-
294
 |
 |