Adobe 22011292 User Guide - Page 113
Initial Amplification Fade Tab
 |
UPC - 883919139081
View all Adobe 22011292 manuals
Add to My Manuals
Save this manual to your list of manuals |
Page 113 highlights
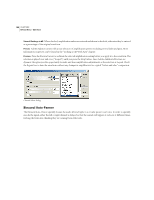
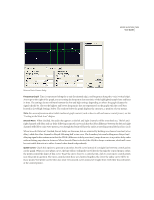
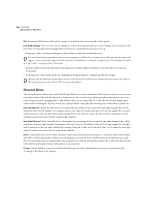
ADOBE AUDITION 99 User Guide Initial Amplification (Fade Tab) Move the slider(s) for the amount of volume change you wish to apply to the beginning of the selection. Any figure over an amplification value of 100% or 0dB makes the selection louder; a figure below 100% or 0dB reduces the volume. To achieve a fading in effect, choose an Initial Amplification value that's lower than that of the Final Amplification value. Final Amplification (Fade Tab) Move the slider(s) for the amount of volume change you wish to apply to the end of a selection. Any figure over an amplification value of 100% or 0dB makes the selection louder; a figure below 100% or 0dB reduces the volume. To achieve a fading out effect, choose a Final Amplification value that's lower than that of the Initial Amplification value. Linear Fades (Fade Tab) Select this radio button if you want the waveform's sample values to be faded in an even, linear fashion, which will produce a smooth slope from beginning to end. Logarithmic Fades (Fade Tab) This option tells Adobe Audition to use a logarithmic-style fade (also known as a "power fade"). This fades the amplitude of a signal at a constant rate, producing a steeper slope at one end of the fade (depending on whether you are fading in or out). DC Bias Adjust Some recording hardware may introduce a DC bias, which results in the recorded waveform appearing to be above or below the normal center line in the Wave Display. Many waveform transformations require that the signal be centered, and checking the DC Bias Adjust box ensures new recordings are perfectly centered. Choose the Absolute option to tell Adobe Audition the final DC value you want, as entered as a percentage in the L and R boxes. The main use for the option is to cancel out a DC that's not constant throughout the waveform. A super-lowcut filter is initiated to achieve this. Keep in mind that the actual amount adjusted varies with each sample. For instance, if you have a significant DC change in one area of the wave, at that boundary where the DC changes, the Absolute option will make all parts the same. (However, there will be a dip or peak right at the boundary point.) Select the Differential option to analyze the entire selected area to get the DC offset, and adjust every sample by the inverse of that exact amount. The Find Zero Now button will be enabled. Press it to scan the waveform and automatically enter the correct L and R percentages. To introduce a DC Bias by skewing the entire selected waveform above or below the center line, enter a positive or negative percentage. For example, a setting of 50% moves the entire waveform up halfway, and one of -50% moves it down halfway. Calculate Normalization Values When you press the Calculate Now button, Adobe Audition scans the selection and automatically adjusts the amplification sliders to the volume level that will normalize the selection to the entered peak level. Click on the OK button to apply these adjustments. Lock Left/Right With a stereo waveform loaded, the volume of the left and right channels may be individually adjusted. This lets you tweak the stereo balance or create cool panning effects. However, there are times when you want the amplitude of the left and right channels to be simultaneously lowered or raised. Check the Lock Left/Right box to make the scroll bars for the left and right channels to work in tandem and move together. Uncheck the Lock Left/Right box to adjust the channels separately.
-
 1
1 -
2
-
3
-
4
-
5
-
6
-
7
-
8
-
9
-
10
-
11
-
12
-
13
-
14
-
15
-
16
-
17
-
18
-
19
-
20
-
21
-
22
-
23
-
24
-
25
-
26
-
27
-
28
-
29
-
30
-
31
-
32
-
33
-
34
-
35
-
36
-
37
-
38
-
39
-
40
-
41
-
42
-
43
-
44
-
45
-
46
-
47
-
48
-
49
-
50
-
51
-
52
-
53
-
54
-
55
-
56
-
57
-
58
-
59
-
60
-
61
-
62
-
63
-
64
-
65
-
66
-
67
-
68
-
69
-
70
-
71
-
72
-
73
-
74
-
75
-
76
-
77
-
78
-
79
-
80
-
81
-
82
-
83
-
84
-
85
-
86
-
87
-
88
-
89
-
90
-
91
-
92
-
93
-
94
-
95
-
96
-
97
-
98
-
99
-
100
-
101
-
102
-
103
-
104
-
105
-
106
-
107
-
 108
108 -
 109
109 -
 110
110 -
 111
111 -
 112
112 -
 113
113 -
 114
114 -
 115
115 -
 116
116 -
 117
117 -
 118
118 -
119
-
120
-
121
-
122
-
123
-
124
-
125
-
126
-
127
-
128
-
129
-
130
-
131
-
132
-
133
-
134
-
135
-
136
-
137
-
138
-
139
-
140
-
141
-
142
-
143
-
144
-
145
-
146
-
147
-
148
-
149
-
150
-
151
-
152
-
153
-
154
-
155
-
156
-
157
-
158
-
159
-
160
-
161
-
162
-
163
-
164
-
165
-
166
-
167
-
168
-
169
-
170
-
171
-
172
-
173
-
174
-
175
-
176
-
177
-
178
-
179
-
180
-
181
-
182
-
183
-
184
-
185
-
186
-
187
-
188
-
189
-
190
-
191
-
192
-
193
-
194
-
195
-
196
-
197
-
198
-
199
-
200
-
201
-
202
-
203
-
204
-
205
-
206
-
207
-
208
-
209
-
210
-
211
-
212
-
213
-
214
-
215
-
216
-
217
-
218
-
219
-
220
-
221
-
222
-
223
-
224
-
225
-
226
-
227
-
228
-
229
-
230
-
231
-
232
-
233
-
234
-
235
-
236
-
237
-
238
-
239
-
240
-
241
-
242
-
243
-
244
-
245
-
246
-
247
-
248
-
249
-
250
-
251
-
252
-
253
-
254
-
255
-
256
-
257
-
258
-
259
-
260
-
261
-
262
-
263
-
264
-
265
-
266
-
267
-
268
-
269
-
270
-
271
-
272
-
273
-
274
-
275
-
276
-
277
-
278
-
279
-
280
-
281
-
282
-
283
-
284
-
285
-
286
-
287
-
288
-
289
-
290
-
291
-
292
-
293
-
294
-
295
-
296
-
297
-
298
-
299
-
300
-
301
-
302
-
303
-
304
-
305
-
306
-
307
-
308
-
309
-
310
-
311
-
312
-
313
-
314
-
315
-
316
-
317
-
318
-
319
-
320
-
321
-
322
-
323
-
324
-
325
-
326
-
327
-
328
-
329
-
330
-
331
-
332
-
333
-
334
-
335
-
336
-
337
-
338
-
339
-
340
-
341
-
342
-
343
-
344
-
345
-
346
-
347
-
348
-
349
-
350
-
351
-
352
-
353
-
354
-
355
-
356
-
357
-
358
-
359
-
360
-
361
-
362
-
363
-
364
-
365
-
366
-
367
-
368
-
369
-
370
-
371
-
372
-
373
-
374
-
375
-
376
-
377
-
378
-
379
-
380
-
381
-
382
-
383
-
384
-
385
-
386
-
387
-
388
-
389
-
390
 |
 |
