Adobe 22011292 User Guide - Page 259

Input Button, Lock Button, FX Button, Track Equalization Fields

Page 259 highlights

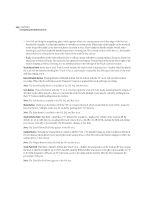
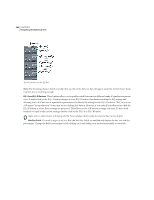
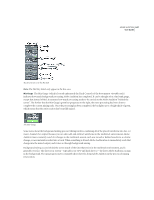
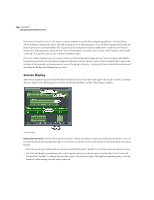
ADOBE AUDITION 245 User Guide Input Button Pressing the Input Button (which is labeled "Rec 1" by default) brings up Adobe Audition's Record Devices dialog, which allows you to specify the device from which you are recording. The text on the button changes to reflect the input device chosen. Note: The Input Button is found in both the Vol and Bus areas. Lock Button When real-time effects are applied to the track using the FX button, the Lock button is enabled. Pressing it tells Adobe Audition to lock in the effect(s) and disables the FX button. Release the button to unlock the effect(s) and reenable the FX button. Note: The Lock Button is found in both the Vol and Bus areas. Note: When a track is locked, what actually happens is that the effect is mixed into the background mix, thus removing the real-time effect from the CPU load. Keep in mind that when a track is locked, you can't do anything to the audio in it, such as moving a block or changing effects parameters. Note: While it takes time to process a track when you lock it, unlocking it is instant. Try locking down tracks that you are not working with at the time to save some CPU power for your other work. FX Button Click on the FX button to bring up the track's Effects Rack. The Effects Rack is used to apply any combination of real-time, off-line, and multitrack effects to the track After effects have been applied to the track, the button is renamed to whatever you've typed as a "friendly name" for the effects rack. If you haven't given a friendly name to the effects rack, a number is added on to the button's label. For instance, "FX" will become "FX 2" when effects have been applied to Track 2. Press the Lock Button to the left to lock in the effect(s), which disables the FX button. Right click on the FX button for quick access to the track's effects rack, settings, and mixer, or to bypass the effects on that track. When track effects are bypassed, they take no CPU time. Note: The FX Button is found in the Vol, EQ, and Bus areas. Track Equalization Fields The Low, Mid, and Hi Track EQ fields show the current low frequency, mid frequency, and high frequency equalization amplitude for the track. By default, they're all set at 0. However, you can easily change a field's value from -32 to 32 by left-clicking on it and sliding your mouse horizontally or vertically. Or, right-click on an EQ field to bring up Adobe Audition's Track Equalizers dialog, which gives you more precise control over the track's EQ.

  • 1
  • 2
  • 3
  • 4
  • 5
  • 6
  • 7
  • 8
  • 9
  • 10
  • 11
  • 12
  • 13
  • 14
  • 15
  • 16
  • 17
  • 18
  • 19
  • 20
  • 21
  • 22
  • 23
  • 24
  • 25
  • 26
  • 27
  • 28
  • 29
  • 30
  • 31
  • 32
  • 33
  • 34
  • 35
  • 36
  • 37
  • 38
  • 39
  • 40
  • 41
  • 42
  • 43
  • 44
  • 45
  • 46
  • 47
  • 48
  • 49
  • 50
  • 51
  • 52
  • 53
  • 54
  • 55
  • 56
  • 57
  • 58
  • 59
  • 60
  • 61
  • 62
  • 63
  • 64
  • 65
  • 66
  • 67
  • 68
  • 69
  • 70
  • 71
  • 72
  • 73
  • 74
  • 75
  • 76
  • 77
  • 78
  • 79
  • 80
  • 81
  • 82
  • 83
  • 84
  • 85
  • 86
  • 87
  • 88
  • 89
  • 90
  • 91
  • 92
  • 93
  • 94
  • 95
  • 96
  • 97
  • 98
  • 99
  • 100
  • 101
  • 102
  • 103
  • 104
  • 105
  • 106
  • 107
  • 108
  • 109
  • 110
  • 111
  • 112
  • 113
  • 114
  • 115
  • 116
  • 117
  • 118
  • 119
  • 120
  • 121
  • 122
  • 123
  • 124
  • 125
  • 126
  • 127
  • 128
  • 129
  • 130
  • 131
  • 132
  • 133
  • 134
  • 135
  • 136
  • 137
  • 138
  • 139
  • 140
  • 141
  • 142
  • 143
  • 144
  • 145
  • 146
  • 147
  • 148
  • 149
  • 150
  • 151
  • 152
  • 153
  • 154
  • 155
  • 156
  • 157
  • 158
  • 159
  • 160
  • 161
  • 162
  • 163
  • 164
  • 165
  • 166
  • 167
  • 168
  • 169
  • 170
  • 171
  • 172
  • 173
  • 174
  • 175
  • 176
  • 177
  • 178
  • 179
  • 180
  • 181
  • 182
  • 183
  • 184
  • 185
  • 186
  • 187
  • 188
  • 189
  • 190
  • 191
  • 192
  • 193
  • 194
  • 195
  • 196
  • 197
  • 198
  • 199
  • 200
  • 201
  • 202
  • 203
  • 204
  • 205
  • 206
  • 207
  • 208
  • 209
  • 210
  • 211
  • 212
  • 213
  • 214
  • 215
  • 216
  • 217
  • 218
  • 219
  • 220
  • 221
  • 222
  • 223
  • 224
  • 225
  • 226
  • 227
  • 228
  • 229
  • 230
  • 231
  • 232
  • 233
  • 234
  • 235
  • 236
  • 237
  • 238
  • 239
  • 240
  • 241
  • 242
  • 243
  • 244
  • 245
  • 246
  • 247
  • 248
  • 249
  • 250
  • 251
  • 252
  • 253
  • 254
  • 255
  • 256
  • 257
  • 258
  • 259
  • 260
  • 261
  • 262
  • 263
  • 264
  • 265
  • 266
  • 267
  • 268
  • 269
  • 270
  • 271
  • 272
  • 273
  • 274
  • 275
  • 276
  • 277
  • 278
  • 279
  • 280
  • 281
  • 282
  • 283
  • 284
  • 285
  • 286
  • 287
  • 288
  • 289
  • 290
  • 291
  • 292
  • 293
  • 294
  • 295
  • 296
  • 297
  • 298
  • 299
  • 300
  • 301
  • 302
  • 303
  • 304
  • 305
  • 306
  • 307
  • 308
  • 309
  • 310
  • 311
  • 312
  • 313
  • 314
  • 315
  • 316
  • 317
  • 318
  • 319
  • 320
  • 321
  • 322
  • 323
  • 324
  • 325
  • 326
  • 327
  • 328
  • 329
  • 330
  • 331
  • 332
  • 333
  • 334
  • 335
  • 336
  • 337
  • 338
  • 339
  • 340
  • 341
  • 342
  • 343
  • 344
  • 345
  • 346
  • 347
  • 348
  • 349
  • 350
  • 351
  • 352
  • 353
  • 354
  • 355
  • 356
  • 357
  • 358
  • 359
  • 360
  • 361
  • 362
  • 363
  • 364
  • 365
  • 366
  • 367
  • 368
  • 369
  • 370
  • 371
  • 372
  • 373
  • 374
  • 375
  • 376
  • 377
  • 378
  • 379
  • 380
  • 381
  • 382
  • 383
  • 384
  • 385
  • 386
  • 387
  • 388
  • 389
  • 390

245
ADOBE AUDITION
User Guide
Input Button
Pressing the Input Button (which is labeled “Rec 1” by default) brings up Adobe Audition’s Record Devices
dialog, which allows you to specify the device from which you are recording. The text on the button changes to reflect
the input device chosen.
Note:
The Input Button is found in both the Vol and Bus areas.
Lock Button
When real-time effects are applied to the track using the FX button, the Lock button is enabled. Pressing it
tells Adobe Audition to lock in the effect(s) and disables the FX button. Release the button to unlock the effect(s) and re-
enable the FX button.
Note:
The Lock Button is found in both the Vol and Bus areas.
Note:
When a track is locked, what actually happens is that the effect is mixed into the background mix, thus removing the
real-time effect from the CPU load. Keep in mind that when a track is locked, you can’t do anything to the audio in it, such
as moving a block or changing effects parameters.
Note:
While it takes time to process a track when you lock it, unlocking it is instant.
Try locking down tracks that you are not
working with at the time to save some CPU power for your other work.
FX Button
Click on the FX button to bring up the track’s Effects Rack. The Effects Rack is used to apply any combination
of real-time, off-line, and multitrack effects to the track
After effects have been applied to the track, the button is renamed to whatever you’ve typed as a “friendly name” for the
effects rack. If you haven’t given a friendly name to the effects rack, a number is added on to the button’s label. For
instance, “FX” will become “FX 2” when effects have been applied to Track 2. Press the Lock Button to the left to lock in
the effect(s), which disables the FX button.
Right click on the FX button for quick access to the track's effects rack, settings, and mixer, or to bypass the effects on that
track.
When track effects are bypassed, they take no CPU time.
Note:
The FX Button is found in the Vol, EQ, and Bus areas.
Track Equalization Fields
The Low, Mid, and Hi Track EQ fields show the current low frequency, mid frequency, and
high frequency equalization amplitude for the track. By default, they’re all set at 0. However, you can easily change a
field’s value from -32 to 32 by left-clicking on it and sliding your mouse horizontally or vertically. Or, right-click on an
EQ field to bring up Adobe Audition’s Track Equalizers dialog, which gives you more precise control over the track’s EQ.