Adobe 22011292 User Guide - Page 67
Save Selection, Save All, Batch File Convert
 |
UPC - 883919139081
View all Adobe 22011292 manuals
Add to My Manuals
Save this manual to your list of manuals |
Page 67 highlights
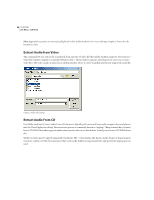
ADOBE AUDITION 53 User Guide Note: Some formats can't be written to using waveforms of certain sample types. In this case, Adobe Audition asks you if you want to convert before saving. Adobe Audition also warns you if you're trying to save a waveform to a compressed (lossy) format, and suggests that you keep a backup of your original file if you wish to preserve full audio fidelity. If you don't want to see this dialog box again, check the Don't display this message in the future box. Save extra non-audio information Uncheck this box if you don't want to save header fields such as copyright/author information and cue marks. If you plan to burn the waveform to compact disc using another program, unchecking the box is highly recommended. Some CD recording applications interpret non-audio information incorrectly and will place an unpleasant burst of noise as the beginning of each CD track. Options Most audio file formats support various options. (See the Waveform File Formats chapter for more information.) Press the Options button to bring up a window to select the desired settings. If the format doesn't have any options, the Options button is disabled ("grayed out"). Save Selection File > Save Selection works similarly to the File > Save As command, except it allows you to save just the highlighted selection of a waveform to its own file. This feature is very useful for saving small segments of a larger file. For instance, should you wish to record a number of samples from a friend's sampler, you could record them as a single, continuous file and then split them into their own waveforms. Or, you can break up a long music recording into smaller, more manageable tracks. Save All Run the File > Save All command to automatically save all open, modified waveforms to disk. Batch File Convert Adobe Audition's handy Batch File Convert tool allows you to easily change multiple waveforms from one audio format to another (such as from .wav to .mp3) using a four-window process. 1 Files This window is where you add files to the list of waveforms to be converted. Press the Add Files button to bring up the Please Choose the Source Files dialog (similar to Adobe Audition's File > Open dialog) to select one or more waveforms. Hold down your Ctrl or Shift keys to select non-contiguous or contiguous files respectively. You can even select an entire folder with the Add Folder button.
-
 1
1 -
2
-
3
-
4
-
5
-
6
-
7
-
8
-
9
-
10
-
11
-
12
-
13
-
14
-
15
-
16
-
17
-
18
-
19
-
20
-
21
-
22
-
23
-
24
-
25
-
26
-
27
-
28
-
29
-
30
-
31
-
32
-
33
-
34
-
35
-
36
-
37
-
38
-
39
-
40
-
41
-
42
-
43
-
44
-
45
-
46
-
47
-
48
-
49
-
50
-
51
-
52
-
53
-
54
-
55
-
56
-
57
-
58
-
59
-
60
-
61
-
 62
62 -
 63
63 -
 64
64 -
 65
65 -
 66
66 -
 67
67 -
 68
68 -
 69
69 -
 70
70 -
 71
71 -
 72
72 -
73
-
74
-
75
-
76
-
77
-
78
-
79
-
80
-
81
-
82
-
83
-
84
-
85
-
86
-
87
-
88
-
89
-
90
-
91
-
92
-
93
-
94
-
95
-
96
-
97
-
98
-
99
-
100
-
101
-
102
-
103
-
104
-
105
-
106
-
107
-
108
-
109
-
110
-
111
-
112
-
113
-
114
-
115
-
116
-
117
-
118
-
119
-
120
-
121
-
122
-
123
-
124
-
125
-
126
-
127
-
128
-
129
-
130
-
131
-
132
-
133
-
134
-
135
-
136
-
137
-
138
-
139
-
140
-
141
-
142
-
143
-
144
-
145
-
146
-
147
-
148
-
149
-
150
-
151
-
152
-
153
-
154
-
155
-
156
-
157
-
158
-
159
-
160
-
161
-
162
-
163
-
164
-
165
-
166
-
167
-
168
-
169
-
170
-
171
-
172
-
173
-
174
-
175
-
176
-
177
-
178
-
179
-
180
-
181
-
182
-
183
-
184
-
185
-
186
-
187
-
188
-
189
-
190
-
191
-
192
-
193
-
194
-
195
-
196
-
197
-
198
-
199
-
200
-
201
-
202
-
203
-
204
-
205
-
206
-
207
-
208
-
209
-
210
-
211
-
212
-
213
-
214
-
215
-
216
-
217
-
218
-
219
-
220
-
221
-
222
-
223
-
224
-
225
-
226
-
227
-
228
-
229
-
230
-
231
-
232
-
233
-
234
-
235
-
236
-
237
-
238
-
239
-
240
-
241
-
242
-
243
-
244
-
245
-
246
-
247
-
248
-
249
-
250
-
251
-
252
-
253
-
254
-
255
-
256
-
257
-
258
-
259
-
260
-
261
-
262
-
263
-
264
-
265
-
266
-
267
-
268
-
269
-
270
-
271
-
272
-
273
-
274
-
275
-
276
-
277
-
278
-
279
-
280
-
281
-
282
-
283
-
284
-
285
-
286
-
287
-
288
-
289
-
290
-
291
-
292
-
293
-
294
-
295
-
296
-
297
-
298
-
299
-
300
-
301
-
302
-
303
-
304
-
305
-
306
-
307
-
308
-
309
-
310
-
311
-
312
-
313
-
314
-
315
-
316
-
317
-
318
-
319
-
320
-
321
-
322
-
323
-
324
-
325
-
326
-
327
-
328
-
329
-
330
-
331
-
332
-
333
-
334
-
335
-
336
-
337
-
338
-
339
-
340
-
341
-
342
-
343
-
344
-
345
-
346
-
347
-
348
-
349
-
350
-
351
-
352
-
353
-
354
-
355
-
356
-
357
-
358
-
359
-
360
-
361
-
362
-
363
-
364
-
365
-
366
-
367
-
368
-
369
-
370
-
371
-
372
-
373
-
374
-
375
-
376
-
377
-
378
-
379
-
380
-
381
-
382
-
383
-
384
-
385
-
386
-
387
-
388
-
389
-
390
 |
 |
