Adobe 22011292 User Guide - Page 80
Zero Crossings
 |
UPC - 883919139081
View all Adobe 22011292 manuals
Add to My Manuals
Save this manual to your list of manuals |
Page 80 highlights
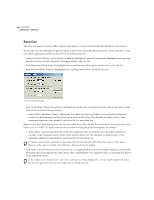
66 CHAPTER 6 Edit Menu - Edit View Find Levels Press this button to scan the waveform (or a highlighted section) to have Adobe Audition automatically determine a good starting point for signal levels. After completing the scan, suggested values are automatically placed in the appropriate boxes. If these values aren't doing the job - say, words or phrases are being chopped off - try lowering the signal level values. Increase the signal level values if not enough silence is being removed. Mark Deletions in Cue List Check this box to have each location where silence is removed added to Adobe Audition's Cue List. Limit Continuous Silence to Enter a value (in milliseconds) in this box to set a minimum amount of silence to keep at all times. • If a silent region of less than this length is found, it's not removed. • If a silent region of more than this length is detected, enough silence is removed so that there's exactly this length of silence left. Setting this value to zero will remove as much silence as possible. When shortening speech segments, a setting of 150 ms or so will leave a more realistic, natural-sounding pause where the larger region of silence was found. Removal of too much silence leads to an artificial sound. Scan for Silence Now Press this button to pre-perform the silence deletion. Instead of actually deleting, it reports how much silence will be removed, as well as how many sections of silence were found. This gives you an idea of what to expect using the current settings when you actually commit to the Delete Silence command. If you have an audio presentation that consists of many cuts separated by silence (such as a reel of several jingles), use Edit > Delete Silence to make sure the duration of silence between each cut is the same. For instance, if the difference between cuts 1 and 2 is 3.2 seconds, the difference between cuts 2 and 3 is 4.1 seconds, and the difference between cuts 3 and 4 is 3.7 seconds, you can use Delete Silence to make the silence duration between all four cuts exactly 3 seconds. Trim Use Trim to get rid of unwanted audio (like silence) on one or both sides of the selected audio. Essentially, Trim is the exact opposite of the Delete Selection command. Everything in the waveform is removed except for the highlighted selection. Note: Remember that the deleted portion(s) aren't copied to the clipboard and can only be retrieved using the Edit > Undo command, or by File > Revert to Saved if you haven't saved the file since trimming. Zero Crossings This command adjusts the starting and ending points of the current selection to the nearest place where the waveform crosses the center line (zero amplitude point).
-
 1
1 -
2
-
3
-
4
-
5
-
6
-
7
-
8
-
9
-
10
-
11
-
12
-
13
-
14
-
15
-
16
-
17
-
18
-
19
-
20
-
21
-
22
-
23
-
24
-
25
-
26
-
27
-
28
-
29
-
30
-
31
-
32
-
33
-
34
-
35
-
36
-
37
-
38
-
39
-
40
-
41
-
42
-
43
-
44
-
45
-
46
-
47
-
48
-
49
-
50
-
51
-
52
-
53
-
54
-
55
-
56
-
57
-
58
-
59
-
60
-
61
-
62
-
63
-
64
-
65
-
66
-
67
-
68
-
69
-
70
-
71
-
72
-
73
-
74
-
 75
75 -
 76
76 -
 77
77 -
 78
78 -
 79
79 -
 80
80 -
 81
81 -
 82
82 -
 83
83 -
 84
84 -
 85
85 -
86
-
87
-
88
-
89
-
90
-
91
-
92
-
93
-
94
-
95
-
96
-
97
-
98
-
99
-
100
-
101
-
102
-
103
-
104
-
105
-
106
-
107
-
108
-
109
-
110
-
111
-
112
-
113
-
114
-
115
-
116
-
117
-
118
-
119
-
120
-
121
-
122
-
123
-
124
-
125
-
126
-
127
-
128
-
129
-
130
-
131
-
132
-
133
-
134
-
135
-
136
-
137
-
138
-
139
-
140
-
141
-
142
-
143
-
144
-
145
-
146
-
147
-
148
-
149
-
150
-
151
-
152
-
153
-
154
-
155
-
156
-
157
-
158
-
159
-
160
-
161
-
162
-
163
-
164
-
165
-
166
-
167
-
168
-
169
-
170
-
171
-
172
-
173
-
174
-
175
-
176
-
177
-
178
-
179
-
180
-
181
-
182
-
183
-
184
-
185
-
186
-
187
-
188
-
189
-
190
-
191
-
192
-
193
-
194
-
195
-
196
-
197
-
198
-
199
-
200
-
201
-
202
-
203
-
204
-
205
-
206
-
207
-
208
-
209
-
210
-
211
-
212
-
213
-
214
-
215
-
216
-
217
-
218
-
219
-
220
-
221
-
222
-
223
-
224
-
225
-
226
-
227
-
228
-
229
-
230
-
231
-
232
-
233
-
234
-
235
-
236
-
237
-
238
-
239
-
240
-
241
-
242
-
243
-
244
-
245
-
246
-
247
-
248
-
249
-
250
-
251
-
252
-
253
-
254
-
255
-
256
-
257
-
258
-
259
-
260
-
261
-
262
-
263
-
264
-
265
-
266
-
267
-
268
-
269
-
270
-
271
-
272
-
273
-
274
-
275
-
276
-
277
-
278
-
279
-
280
-
281
-
282
-
283
-
284
-
285
-
286
-
287
-
288
-
289
-
290
-
291
-
292
-
293
-
294
-
295
-
296
-
297
-
298
-
299
-
300
-
301
-
302
-
303
-
304
-
305
-
306
-
307
-
308
-
309
-
310
-
311
-
312
-
313
-
314
-
315
-
316
-
317
-
318
-
319
-
320
-
321
-
322
-
323
-
324
-
325
-
326
-
327
-
328
-
329
-
330
-
331
-
332
-
333
-
334
-
335
-
336
-
337
-
338
-
339
-
340
-
341
-
342
-
343
-
344
-
345
-
346
-
347
-
348
-
349
-
350
-
351
-
352
-
353
-
354
-
355
-
356
-
357
-
358
-
359
-
360
-
361
-
362
-
363
-
364
-
365
-
366
-
367
-
368
-
369
-
370
-
371
-
372
-
373
-
374
-
375
-
376
-
377
-
378
-
379
-
380
-
381
-
382
-
383
-
384
-
385
-
386
-
387
-
388
-
389
-
390
 |
 |
