Brother International WP1700MDS Owners Manual - English - Page 162
INPUT, Screen
 |
View all Brother International WP1700MDS manuals
Add to My Manuals
Save this manual to your list of manuals |
Page 162 highlights
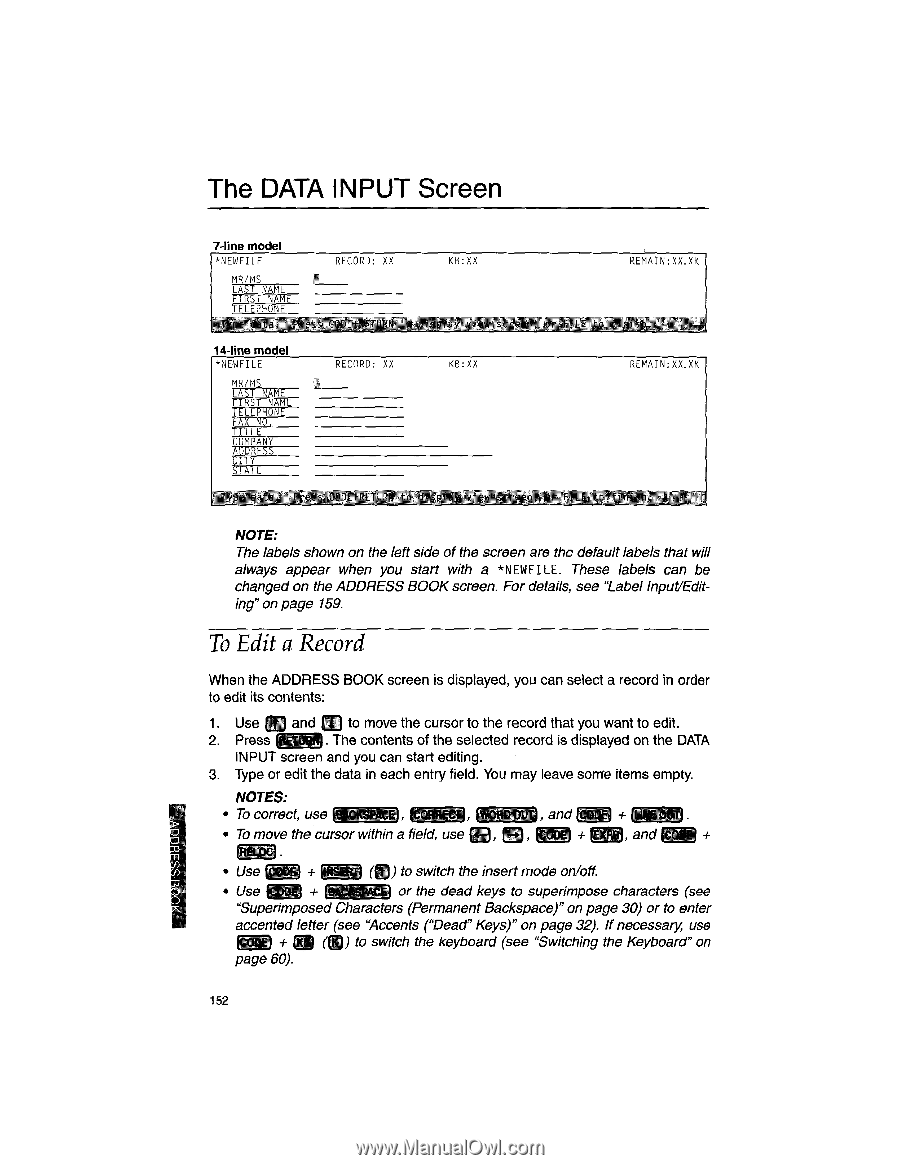
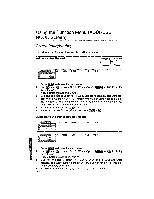
The DATA INPUT Screen 7-line model NEWFILE MR/MS LAST NAME FIRST NAME TELEPHONE RECORD: XX KB:XX REMAIN:XX.XK 14-line model *NEWFILE MR/MS LAST NAME FIRST NAME TELEPHONE FAX NO. ITLE COMPANY AUDESS CITY STATE ILL RECORD: XX A,7 KB:XX REMAIN;XX.XK NOTE: The labels shown on the left side of the screen are the default labels that will always appear when you start with a *NEWFILE. These labels can be changed on the ADDRESS BOOK screen. For details, see "Label Input/Editing" on page 159. To Edit a Record When the ADDRESS BOOK screen is displayed, you can select a record in order to edit its contents: 1. Use in and m to move the cursor to the record that you want to edit. 2. Press . The contents of the selected record is displayed on the DATA INPUT screen and you can start editing. 3. Type or edit the data in each entry field. You may leave some items empty. NOTES: • To correct, use j (WORD ovr1, and g:WI + • To move the cursor within a field, use 0, 0, , and + (gLoc) • Use ( 1 + (MR (0) to switch the insert mode on/off. • Use + pnw.-.-9 or the dead keys to superimpose characters (see "Superimposed Characters (Permanent Backspace)" on page 30) or to enter (@)) accented letter (see "Accents ("Dead" Keys)" on page 32). If necessary, use ( IF) + J to switch the keyboard (see "Switching the Keyboard" on page 60). 152
-
 1
1 -
2
-
3
-
4
-
5
-
6
-
7
-
8
-
9
-
10
-
11
-
12
-
13
-
14
-
15
-
16
-
17
-
18
-
19
-
20
-
21
-
22
-
23
-
24
-
25
-
26
-
27
-
28
-
29
-
30
-
31
-
32
-
33
-
34
-
35
-
36
-
37
-
38
-
39
-
40
-
41
-
42
-
43
-
44
-
45
-
46
-
47
-
48
-
49
-
50
-
51
-
52
-
53
-
54
-
55
-
56
-
57
-
58
-
59
-
60
-
61
-
62
-
63
-
64
-
65
-
66
-
67
-
68
-
69
-
70
-
71
-
72
-
73
-
74
-
75
-
76
-
77
-
78
-
79
-
80
-
81
-
82
-
83
-
84
-
85
-
86
-
87
-
88
-
89
-
90
-
91
-
92
-
93
-
94
-
95
-
96
-
97
-
98
-
99
-
100
-
101
-
102
-
103
-
104
-
105
-
106
-
107
-
108
-
109
-
110
-
111
-
112
-
113
-
114
-
115
-
116
-
117
-
118
-
119
-
120
-
121
-
122
-
123
-
124
-
125
-
126
-
127
-
128
-
129
-
130
-
131
-
132
-
133
-
134
-
135
-
136
-
137
-
138
-
139
-
140
-
141
-
142
-
143
-
144
-
145
-
146
-
147
-
148
-
149
-
150
-
151
-
152
-
153
-
154
-
155
-
156
-
 157
157 -
 158
158 -
 159
159 -
 160
160 -
 161
161 -
 162
162 -
 163
163 -
 164
164 -
 165
165 -
 166
166 -
 167
167 -
168
-
169
-
170
-
171
-
172
-
173
-
174
-
175
-
176
-
177
-
178
-
179
-
180
-
181
-
182
-
183
-
184
-
185
-
186
-
187
-
188
-
189
-
190
-
191
-
192
-
193
-
194
-
195
-
196
-
197
-
198
-
199
-
200
-
201
-
202
-
203
-
204
-
205
-
206
-
207
-
208
-
209
-
210
-
211
-
212
-
213
-
214
-
215
-
216
-
217
-
218
-
219
-
220
-
221
-
222
-
223
-
224
-
225
-
226
-
227
-
228
-
229
-
230
-
231
-
232
-
233
-
234
-
235
-
236
-
237
-
238
-
239
-
240
-
241
-
242
-
243
-
244
-
245
-
246
-
247
-
248
-
249
-
250
-
251
-
252
-
253
-
254
-
255
-
256
-
257
-
258
-
259
-
260
-
261
-
262
-
263
-
264
-
265
-
266
-
267
-
268
-
269
-
270
-
271
-
272
-
273
-
274
-
275
-
276
-
277
-
278
-
279
-
280
-
281
-
282
-
283
-
284
-
285
-
286
-
287
-
288
-
289
-
290
-
291
-
292
-
293
-
294
-
295
-
296
-
297
-
298
-
299
-
300
-
301
-
302
-
303
-
304
-
305
-
306
-
307
-
308
-
309
-
310
-
311
-
312
-
313
-
314
-
315
-
316
 |
 |