Brother International WP1700MDS Owners Manual - English - Page 42
Accents, Automatic, Breaks
 |
View all Brother International WP1700MDS manuals
Add to My Manuals
Save this manual to your list of manuals |
Page 42 highlights
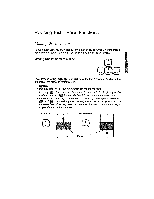
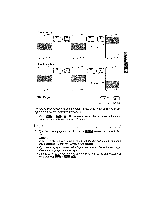
Accents ("Dead" Keys) This word processor's multilingual keyboard supports the accented vowels of such languages as French, German, and Spanish. 1. When typing, you must press + ff§ ( ) to switch the KB indicator on the status line to II (international) or III (symbol). (See "Character Set" on page 60.) 2. When printing, you must have the appropriate daisy wheel. (See "Changing Daisy Wheel Cassette" on page 280.) Remember that the accented charac- O ters and other special characters on the international or symbol keyboards can be printed only if you install the appropriate daisy wheel. In (.1) 3. Only the base character is entered in the text area. The accent is entered 0 next to the indicator DEAD on the status line. If you have ever used a typewriter, you already know the basic procedure: Type the accent and then the base character. Unlike regular keys, the accent keys are "dead" - that is, the cursor does not move afterward so the base character appears under the accent. Make sure that the keyboard is set to KB :II (interna- tional), and try the following example. 1. Type the accent "^". The accent appears next to the indicator DEAD. The cur- sor is reversed and waits for a base character to be input. You are allowed to input a maximum of two dead characters. If you make a mistake, press f l or ;I to delete the dead character(s) and retype. 2. Type the letter "0". The letter with its accent "6" now appears in the text area. NOTES: • With some combinations of accents and base characters (such as Y and A), the base character appears alone and in reverse color in the text area. When you subsequently move the cursor to the base character (press at this point, for example), the accent re-appears next to the DEAD indicator. • To delete an accented character, proceed as you would for a normal charac- ter (use WOW or riri'77- Automatic Page Breaks CODE INS P BREAK,' Q- The word processor automatically breaks your text up into pages according to your specifications. (See "Vertical Layout" on page 62.) The position of these automatic page breaks is flexible and will be re-adjusted for you by the word pro- cessor if you modify the text. You may also decide to force the word processor to start a new page at any point by pressing + ItigaR. This inserts a symbol 4s in the text (and forces any text beyond that paint to the next page).
-
 1
1 -
2
-
3
-
4
-
5
-
6
-
7
-
8
-
9
-
10
-
11
-
12
-
13
-
14
-
15
-
16
-
17
-
18
-
19
-
20
-
21
-
22
-
23
-
24
-
25
-
26
-
27
-
28
-
29
-
30
-
31
-
32
-
33
-
34
-
35
-
36
-
 37
37 -
 38
38 -
 39
39 -
 40
40 -
 41
41 -
 42
42 -
 43
43 -
 44
44 -
 45
45 -
 46
46 -
 47
47 -
48
-
49
-
50
-
51
-
52
-
53
-
54
-
55
-
56
-
57
-
58
-
59
-
60
-
61
-
62
-
63
-
64
-
65
-
66
-
67
-
68
-
69
-
70
-
71
-
72
-
73
-
74
-
75
-
76
-
77
-
78
-
79
-
80
-
81
-
82
-
83
-
84
-
85
-
86
-
87
-
88
-
89
-
90
-
91
-
92
-
93
-
94
-
95
-
96
-
97
-
98
-
99
-
100
-
101
-
102
-
103
-
104
-
105
-
106
-
107
-
108
-
109
-
110
-
111
-
112
-
113
-
114
-
115
-
116
-
117
-
118
-
119
-
120
-
121
-
122
-
123
-
124
-
125
-
126
-
127
-
128
-
129
-
130
-
131
-
132
-
133
-
134
-
135
-
136
-
137
-
138
-
139
-
140
-
141
-
142
-
143
-
144
-
145
-
146
-
147
-
148
-
149
-
150
-
151
-
152
-
153
-
154
-
155
-
156
-
157
-
158
-
159
-
160
-
161
-
162
-
163
-
164
-
165
-
166
-
167
-
168
-
169
-
170
-
171
-
172
-
173
-
174
-
175
-
176
-
177
-
178
-
179
-
180
-
181
-
182
-
183
-
184
-
185
-
186
-
187
-
188
-
189
-
190
-
191
-
192
-
193
-
194
-
195
-
196
-
197
-
198
-
199
-
200
-
201
-
202
-
203
-
204
-
205
-
206
-
207
-
208
-
209
-
210
-
211
-
212
-
213
-
214
-
215
-
216
-
217
-
218
-
219
-
220
-
221
-
222
-
223
-
224
-
225
-
226
-
227
-
228
-
229
-
230
-
231
-
232
-
233
-
234
-
235
-
236
-
237
-
238
-
239
-
240
-
241
-
242
-
243
-
244
-
245
-
246
-
247
-
248
-
249
-
250
-
251
-
252
-
253
-
254
-
255
-
256
-
257
-
258
-
259
-
260
-
261
-
262
-
263
-
264
-
265
-
266
-
267
-
268
-
269
-
270
-
271
-
272
-
273
-
274
-
275
-
276
-
277
-
278
-
279
-
280
-
281
-
282
-
283
-
284
-
285
-
286
-
287
-
288
-
289
-
290
-
291
-
292
-
293
-
294
-
295
-
296
-
297
-
298
-
299
-
300
-
301
-
302
-
303
-
304
-
305
-
306
-
307
-
308
-
309
-
310
-
311
-
312
-
313
-
314
-
315
-
316
 |
 |