Brother International WP1700MDS Owners Manual - English - Page 87
Deleting
 |
View all Brother International WP1700MDS manuals
Add to My Manuals
Save this manual to your list of manuals |
Page 87 highlights
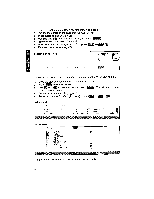
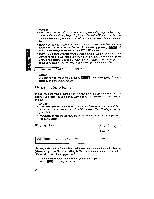
3. Use and appears: to select COPY, and press MI. The following message Insert destination disk and press RETURN. • Accelerator: Instead of (3), type "C". • Short Cut: Instead of (2) and (3), press + Q. 4. You can create this copy on the same diskette or on a different diskette. To copy on to the same diskette, just press MM. If you want to copy the file to another diskette, remove the source (original) diskette and insert the desti- nation diskette and press . The following message appears: Illerame. and pr RETHN_ FILENAME: XXXXXXxx:,IFI 5. Input the new file name and press lirk). If you copy the file on a different diskette, you can use the same file name. The following message is displayed during the copy operation and disappears after completion. The system then returns to the WP INDEX screen, with the block cursor on *NEW FI LE. Copying the file. . . .please wait. NOTE: If the specified new file name already exists on the inserted diskette when you press ME in step (5), the following message appears: ierl FILENAME: XXXXXxxxAMPT NOTE: To overwrite the old file, type a new file name and press MEL or press Ellig without changing the file name. Deleting a File CODE D EXIT COPY ME4ert RENAME CONVERT ALL DELETE PRINT File deletion is useful when the diskette is full and saving cannot be carried out. You can delete unwanted files to make room for your new document. 1. Move the block cursor to the file that you want to delete. 2. Press girl to display the menu. 77
-
 1
1 -
2
-
3
-
4
-
5
-
6
-
7
-
8
-
9
-
10
-
11
-
12
-
13
-
14
-
15
-
16
-
17
-
18
-
19
-
20
-
21
-
22
-
23
-
24
-
25
-
26
-
27
-
28
-
29
-
30
-
31
-
32
-
33
-
34
-
35
-
36
-
37
-
38
-
39
-
40
-
41
-
42
-
43
-
44
-
45
-
46
-
47
-
48
-
49
-
50
-
51
-
52
-
53
-
54
-
55
-
56
-
57
-
58
-
59
-
60
-
61
-
62
-
63
-
64
-
65
-
66
-
67
-
68
-
69
-
70
-
71
-
72
-
73
-
74
-
75
-
76
-
77
-
78
-
79
-
80
-
81
-
 82
82 -
 83
83 -
 84
84 -
 85
85 -
 86
86 -
 87
87 -
 88
88 -
 89
89 -
 90
90 -
 91
91 -
 92
92 -
93
-
94
-
95
-
96
-
97
-
98
-
99
-
100
-
101
-
102
-
103
-
104
-
105
-
106
-
107
-
108
-
109
-
110
-
111
-
112
-
113
-
114
-
115
-
116
-
117
-
118
-
119
-
120
-
121
-
122
-
123
-
124
-
125
-
126
-
127
-
128
-
129
-
130
-
131
-
132
-
133
-
134
-
135
-
136
-
137
-
138
-
139
-
140
-
141
-
142
-
143
-
144
-
145
-
146
-
147
-
148
-
149
-
150
-
151
-
152
-
153
-
154
-
155
-
156
-
157
-
158
-
159
-
160
-
161
-
162
-
163
-
164
-
165
-
166
-
167
-
168
-
169
-
170
-
171
-
172
-
173
-
174
-
175
-
176
-
177
-
178
-
179
-
180
-
181
-
182
-
183
-
184
-
185
-
186
-
187
-
188
-
189
-
190
-
191
-
192
-
193
-
194
-
195
-
196
-
197
-
198
-
199
-
200
-
201
-
202
-
203
-
204
-
205
-
206
-
207
-
208
-
209
-
210
-
211
-
212
-
213
-
214
-
215
-
216
-
217
-
218
-
219
-
220
-
221
-
222
-
223
-
224
-
225
-
226
-
227
-
228
-
229
-
230
-
231
-
232
-
233
-
234
-
235
-
236
-
237
-
238
-
239
-
240
-
241
-
242
-
243
-
244
-
245
-
246
-
247
-
248
-
249
-
250
-
251
-
252
-
253
-
254
-
255
-
256
-
257
-
258
-
259
-
260
-
261
-
262
-
263
-
264
-
265
-
266
-
267
-
268
-
269
-
270
-
271
-
272
-
273
-
274
-
275
-
276
-
277
-
278
-
279
-
280
-
281
-
282
-
283
-
284
-
285
-
286
-
287
-
288
-
289
-
290
-
291
-
292
-
293
-
294
-
295
-
296
-
297
-
298
-
299
-
300
-
301
-
302
-
303
-
304
-
305
-
306
-
307
-
308
-
309
-
310
-
311
-
312
-
313
-
314
-
315
-
316
 |
 |
