Cisco IPS-4255-K9 Installation Guide - Page 197
Advanced Setup
 |
UPC - 746320951096
View all Cisco IPS-4255-K9 manuals
Add to My Manuals
Save this manual to your list of manuals |
Page 197 highlights
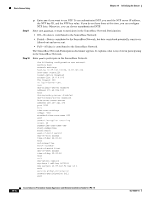
Chapter 10 Initializing the Sensor Advanced Setup [0] Go to the command prompt without saving this config. [1] Return to setup without saving this config. [2] Save this configuration and exit setup. [3] Continue to Advanced setup. Step 11 Enter 2 to save the configuration (or 3 to continue with advanced setup using the CLI, IDM, or IME). Enter your selection[2]: 2 Configuration Saved. Step 12 Step 13 Enter yes to reboot the sensor. After reboot, log in to the sensor, and display the self-signed X.509 certificate (needed by TLS). sensor# show tls fingerprint MD5: C4:BC:F2:92:C2:E2:4D:EB:92:0F:E4:86:53:6A:C6:01 SHA1: 64:9B:AC:DE:21:62:0C:D3:57:2E:9B:E5:3D:04:8F:A7:FD:CD:6F:27 Step 14 Step 15 Write down the certificate fingerprints. You need the fingerprints to check the authenticity of the certificate when using HTTPS to connect to this appliance with a web browser. Apply the most recent service pack and signature update. You are now ready to configure your sensor for intrusion prevention. For More Information • For the procedure for obtaining the most recent IPS software, see Obtaining Cisco IPS Software, page 11-1. • For the procedure for using HTTPS to log in to IDM, refer to Logging In to IDM. • For the procedures for configuring intrusion prevention on your sensor, refer to the following guides: - Installing and Using Cisco Intrusion Prevention System Device Manager 7.0 - Installing and Using Cisco Intrusion Prevention System Manager Express 7.0 - Configuring the Cisco Intrusion Prevention System Sensor Using the Command Line Interface 7.0 Advanced Setup This section describes how to continue with advanced setup in the CLI for the various Cisco IPS platforms. It contains the following sections: • Advanced Setup for the Appliance, page 10-8 • Advanced Setup for the AIM IPS, page 10-13 • Advanced Setup for the AIP SSM, page 10-16 OL-18504-01 Cisco Intrusion Prevention System Appliance and Module Installation Guide for IPS 7.0 10-7
-
 1
1 -
2
-
3
-
4
-
5
-
6
-
7
-
8
-
9
-
10
-
11
-
12
-
13
-
14
-
15
-
16
-
17
-
18
-
19
-
20
-
21
-
22
-
23
-
24
-
25
-
26
-
27
-
28
-
29
-
30
-
31
-
32
-
33
-
34
-
35
-
36
-
37
-
38
-
39
-
40
-
41
-
42
-
43
-
44
-
45
-
46
-
47
-
48
-
49
-
50
-
51
-
52
-
53
-
54
-
55
-
56
-
57
-
58
-
59
-
60
-
61
-
62
-
63
-
64
-
65
-
66
-
67
-
68
-
69
-
70
-
71
-
72
-
73
-
74
-
75
-
76
-
77
-
78
-
79
-
80
-
81
-
82
-
83
-
84
-
85
-
86
-
87
-
88
-
89
-
90
-
91
-
92
-
93
-
94
-
95
-
96
-
97
-
98
-
99
-
100
-
101
-
102
-
103
-
104
-
105
-
106
-
107
-
108
-
109
-
110
-
111
-
112
-
113
-
114
-
115
-
116
-
117
-
118
-
119
-
120
-
121
-
122
-
123
-
124
-
125
-
126
-
127
-
128
-
129
-
130
-
131
-
132
-
133
-
134
-
135
-
136
-
137
-
138
-
139
-
140
-
141
-
142
-
143
-
144
-
145
-
146
-
147
-
148
-
149
-
150
-
151
-
152
-
153
-
154
-
155
-
156
-
157
-
158
-
159
-
160
-
161
-
162
-
163
-
164
-
165
-
166
-
167
-
168
-
169
-
170
-
171
-
172
-
173
-
174
-
175
-
176
-
177
-
178
-
179
-
180
-
181
-
182
-
183
-
184
-
185
-
186
-
187
-
188
-
189
-
190
-
191
-
 192
192 -
 193
193 -
 194
194 -
 195
195 -
 196
196 -
 197
197 -
 198
198 -
 199
199 -
 200
200 -
 201
201 -
 202
202 -
203
-
204
-
205
-
206
-
207
-
208
-
209
-
210
-
211
-
212
-
213
-
214
-
215
-
216
-
217
-
218
-
219
-
220
-
221
-
222
-
223
-
224
-
225
-
226
-
227
-
228
-
229
-
230
-
231
-
232
-
233
-
234
-
235
-
236
-
237
-
238
-
239
-
240
-
241
-
242
-
243
-
244
-
245
-
246
-
247
-
248
-
249
-
250
-
251
-
252
-
253
-
254
-
255
-
256
-
257
-
258
-
259
-
260
-
261
-
262
-
263
-
264
-
265
-
266
-
267
-
268
-
269
-
270
-
271
-
272
-
273
-
274
-
275
-
276
-
277
-
278
-
279
-
280
-
281
-
282
-
283
-
284
-
285
-
286
-
287
-
288
-
289
-
290
-
291
-
292
-
293
-
294
-
295
-
296
-
297
-
298
-
299
-
300
-
301
-
302
-
303
-
304
-
305
-
306
-
307
-
308
-
309
-
310
-
311
-
312
-
313
-
314
-
315
-
316
-
317
-
318
-
319
-
320
-
321
-
322
-
323
-
324
-
325
-
326
-
327
-
328
-
329
-
330
-
331
-
332
-
333
-
334
-
335
-
336
-
337
-
338
-
339
-
340
-
341
-
342
-
343
-
344
-
345
-
346
-
347
-
348
-
349
-
350
-
351
-
352
-
353
-
354
-
355
-
356
-
357
-
358
-
359
-
360
-
361
-
362
-
363
-
364
-
365
-
366
-
367
-
368
-
369
-
370
-
371
-
372
-
373
-
374
-
375
-
376
-
377
-
378
-
379
-
380
-
381
-
382
-
383
-
384
-
385
-
386
-
387
-
388
-
389
-
390
-
391
-
392
-
393
-
394
-
395
-
396
-
397
-
398
-
399
-
400
-
401
-
402
-
403
-
404
-
405
-
406
-
407
-
408
-
409
-
410
-
411
-
412
 |
 |