Cisco IPS-4255-K9 Installation Guide - Page 244
Using the auto-upgrade Command, show statistics host, ssh host-key
 |
UPC - 746320951096
View all Cisco IPS-4255-K9 manuals
Add to My Manuals
Save this manual to your list of manuals |
Page 244 highlights
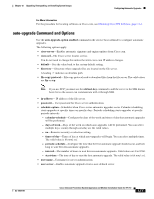
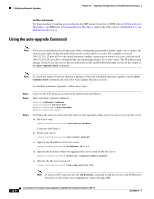
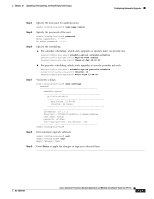
Configuring Automatic Upgrades Chapter 12 Upgrading, Downgrading, and Installing System Images For More Information For the procedure for adding a remote host to the SSH known hosts list, for IDM refer to Defining Known Hosts Keys, for IME refer to Defining Known Host Keys, and for the CLI, refer to Adding Hosts to the SSH Known Hosts List. Using the auto-upgrade Command Note If you get an unauthorized error message while configuring an automatic update, make sure you have the correct ports open on any firewalls between the sensor and Cisco.com. For example, you need 198.133.219.25 port 443 for the initial automatic update connection to www.cisco.com, and you need 198.133.219.243 port 80 to download the chosen package from a Cisco file server. The IP address may change for the Cisco file server, but you can find it in the lastDownloadAttempt section in the output of the show statistics host command. Note To check the status of the last automatic update or the next scheduled automatic update, run the show statistics host command and check the Auto Update Statistics section. To schedule automatic upgrades, follow these steps: Step 1 Step 2 Step 3 Log in to the CLI using an account with administrator privileges. Enter automatic upgrade submode. sensor# configure terminal sensor(config)# service host sensor(config-hos)# auto-upgrade sensor(config-hos-aut)# Configure the sensor to automatically look for new upgrades either on Cisco.com or on your file server. a. On Cisco.com. sensor(config-hos-aut)# cisco-server enabled Continue with Step 4. b. From your server. sensor(config-hos-aut)# user-server enabled c. Specify the IP address of the file server. sensor(config-hos-ena)# ip-address 10.1.1.1 d. Specify the directory where the upgrade files are located on the file server. sensor(config-hos-ena)# directory /tftpboot/sensor_updates e. Specify the file server protocol. sensor(config-hos-ena)# file-copy-protocol ftp Note If you use SCP, you must use the ssh host-key command to add the server to the SSH known hosts list so the sensor can communicate with it through SSH. 12-8 Cisco Intrusion Prevention System Appliance and Module Installation Guide for IPS 7.0 OL-18504-01
-
 1
1 -
2
-
3
-
4
-
5
-
6
-
7
-
8
-
9
-
10
-
11
-
12
-
13
-
14
-
15
-
16
-
17
-
18
-
19
-
20
-
21
-
22
-
23
-
24
-
25
-
26
-
27
-
28
-
29
-
30
-
31
-
32
-
33
-
34
-
35
-
36
-
37
-
38
-
39
-
40
-
41
-
42
-
43
-
44
-
45
-
46
-
47
-
48
-
49
-
50
-
51
-
52
-
53
-
54
-
55
-
56
-
57
-
58
-
59
-
60
-
61
-
62
-
63
-
64
-
65
-
66
-
67
-
68
-
69
-
70
-
71
-
72
-
73
-
74
-
75
-
76
-
77
-
78
-
79
-
80
-
81
-
82
-
83
-
84
-
85
-
86
-
87
-
88
-
89
-
90
-
91
-
92
-
93
-
94
-
95
-
96
-
97
-
98
-
99
-
100
-
101
-
102
-
103
-
104
-
105
-
106
-
107
-
108
-
109
-
110
-
111
-
112
-
113
-
114
-
115
-
116
-
117
-
118
-
119
-
120
-
121
-
122
-
123
-
124
-
125
-
126
-
127
-
128
-
129
-
130
-
131
-
132
-
133
-
134
-
135
-
136
-
137
-
138
-
139
-
140
-
141
-
142
-
143
-
144
-
145
-
146
-
147
-
148
-
149
-
150
-
151
-
152
-
153
-
154
-
155
-
156
-
157
-
158
-
159
-
160
-
161
-
162
-
163
-
164
-
165
-
166
-
167
-
168
-
169
-
170
-
171
-
172
-
173
-
174
-
175
-
176
-
177
-
178
-
179
-
180
-
181
-
182
-
183
-
184
-
185
-
186
-
187
-
188
-
189
-
190
-
191
-
192
-
193
-
194
-
195
-
196
-
197
-
198
-
199
-
200
-
201
-
202
-
203
-
204
-
205
-
206
-
207
-
208
-
209
-
210
-
211
-
212
-
213
-
214
-
215
-
216
-
217
-
218
-
219
-
220
-
221
-
222
-
223
-
224
-
225
-
226
-
227
-
228
-
229
-
230
-
231
-
232
-
233
-
234
-
235
-
236
-
237
-
238
-
 239
239 -
 240
240 -
 241
241 -
 242
242 -
 243
243 -
 244
244 -
 245
245 -
 246
246 -
 247
247 -
 248
248 -
 249
249 -
250
-
251
-
252
-
253
-
254
-
255
-
256
-
257
-
258
-
259
-
260
-
261
-
262
-
263
-
264
-
265
-
266
-
267
-
268
-
269
-
270
-
271
-
272
-
273
-
274
-
275
-
276
-
277
-
278
-
279
-
280
-
281
-
282
-
283
-
284
-
285
-
286
-
287
-
288
-
289
-
290
-
291
-
292
-
293
-
294
-
295
-
296
-
297
-
298
-
299
-
300
-
301
-
302
-
303
-
304
-
305
-
306
-
307
-
308
-
309
-
310
-
311
-
312
-
313
-
314
-
315
-
316
-
317
-
318
-
319
-
320
-
321
-
322
-
323
-
324
-
325
-
326
-
327
-
328
-
329
-
330
-
331
-
332
-
333
-
334
-
335
-
336
-
337
-
338
-
339
-
340
-
341
-
342
-
343
-
344
-
345
-
346
-
347
-
348
-
349
-
350
-
351
-
352
-
353
-
354
-
355
-
356
-
357
-
358
-
359
-
360
-
361
-
362
-
363
-
364
-
365
-
366
-
367
-
368
-
369
-
370
-
371
-
372
-
373
-
374
-
375
-
376
-
377
-
378
-
379
-
380
-
381
-
382
-
383
-
384
-
385
-
386
-
387
-
388
-
389
-
390
-
391
-
392
-
393
-
394
-
395
-
396
-
397
-
398
-
399
-
400
-
401
-
402
-
403
-
404
-
405
-
406
-
407
-
408
-
409
-
410
-
411
-
412
 |
 |