Cisco IPS-4255-K9 Installation Guide - Page 242
Configuring Automatic Upgrades, Automatic Upgrades
 |
UPC - 746320951096
View all Cisco IPS-4255-K9 manuals
Add to My Manuals
Save this manual to your list of manuals |
Page 242 highlights
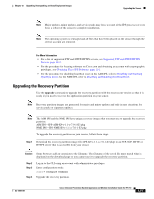
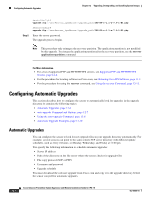
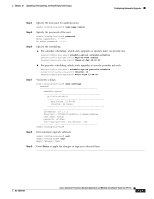
Configuring Automatic Upgrades Chapter 12 Upgrading, Downgrading, and Installing System Images Step 5 sensor(config)# upgrade scp://user@server_ipaddress//upgrade_path/IPS-K9-r-1.1-a-7.0-1-E3.pkg sensor(config)# upgrade ftp://user@server_ipaddress//upgrade_path/IPS-K9-r-1.1-a-7.0-1-E3.pkg Enter the server password. The upgrade process begins. Note This procedure only reimages the recovery partition. The application partition is not modified by this upgrade. To reimage the application partition after the recovery partition, use the recover application-partition command. For More Information • For a list of supported FTP and HTTP/HTTPS servers, see Supported FTP and HTTP/HTTPS Servers, page 12-2. • For the procedure for locating software on Cisco.com, see Obtaining Cisco IPS Software, page 11-1. • For the procedure for using the recover command, see Using the recover Command, page 12-12. Configuring Automatic Upgrades This section describes how to configure the sensor to automatically look for upgrades in the upgrade directory. It contains the following topics: • Automatic Upgrades, page 12-6 • auto-upgrade Command and Options, page 12-7 • Using the auto-upgrade Command, page 12-8 • Automatic Upgrade Examples, page 12-10 Automatic Upgrades You can configure the sensor to look for new upgrade files in your upgrade directory automatically. For example, several sensors can point to the same remote FTP server directory with different update schedules, such as every 24 hours, or Monday, Wednesday, and Friday at 11:00 pm. You specify the following information to schedule automatic upgrades: • Server IP address • Path of the directory on the file server where the sensor checks for upgrade files • File copy protocol (SCP or FTP) • Username and password • Upgrade schedule You must download the software upgrade from Cisco.com and copy it to the upgrade directory before the sensor can poll for automatic upgrades. 12-6 Cisco Intrusion Prevention System Appliance and Module Installation Guide for IPS 7.0 OL-18504-01
-
 1
1 -
2
-
3
-
4
-
5
-
6
-
7
-
8
-
9
-
10
-
11
-
12
-
13
-
14
-
15
-
16
-
17
-
18
-
19
-
20
-
21
-
22
-
23
-
24
-
25
-
26
-
27
-
28
-
29
-
30
-
31
-
32
-
33
-
34
-
35
-
36
-
37
-
38
-
39
-
40
-
41
-
42
-
43
-
44
-
45
-
46
-
47
-
48
-
49
-
50
-
51
-
52
-
53
-
54
-
55
-
56
-
57
-
58
-
59
-
60
-
61
-
62
-
63
-
64
-
65
-
66
-
67
-
68
-
69
-
70
-
71
-
72
-
73
-
74
-
75
-
76
-
77
-
78
-
79
-
80
-
81
-
82
-
83
-
84
-
85
-
86
-
87
-
88
-
89
-
90
-
91
-
92
-
93
-
94
-
95
-
96
-
97
-
98
-
99
-
100
-
101
-
102
-
103
-
104
-
105
-
106
-
107
-
108
-
109
-
110
-
111
-
112
-
113
-
114
-
115
-
116
-
117
-
118
-
119
-
120
-
121
-
122
-
123
-
124
-
125
-
126
-
127
-
128
-
129
-
130
-
131
-
132
-
133
-
134
-
135
-
136
-
137
-
138
-
139
-
140
-
141
-
142
-
143
-
144
-
145
-
146
-
147
-
148
-
149
-
150
-
151
-
152
-
153
-
154
-
155
-
156
-
157
-
158
-
159
-
160
-
161
-
162
-
163
-
164
-
165
-
166
-
167
-
168
-
169
-
170
-
171
-
172
-
173
-
174
-
175
-
176
-
177
-
178
-
179
-
180
-
181
-
182
-
183
-
184
-
185
-
186
-
187
-
188
-
189
-
190
-
191
-
192
-
193
-
194
-
195
-
196
-
197
-
198
-
199
-
200
-
201
-
202
-
203
-
204
-
205
-
206
-
207
-
208
-
209
-
210
-
211
-
212
-
213
-
214
-
215
-
216
-
217
-
218
-
219
-
220
-
221
-
222
-
223
-
224
-
225
-
226
-
227
-
228
-
229
-
230
-
231
-
232
-
233
-
234
-
235
-
236
-
 237
237 -
 238
238 -
 239
239 -
 240
240 -
 241
241 -
 242
242 -
 243
243 -
 244
244 -
 245
245 -
 246
246 -
 247
247 -
248
-
249
-
250
-
251
-
252
-
253
-
254
-
255
-
256
-
257
-
258
-
259
-
260
-
261
-
262
-
263
-
264
-
265
-
266
-
267
-
268
-
269
-
270
-
271
-
272
-
273
-
274
-
275
-
276
-
277
-
278
-
279
-
280
-
281
-
282
-
283
-
284
-
285
-
286
-
287
-
288
-
289
-
290
-
291
-
292
-
293
-
294
-
295
-
296
-
297
-
298
-
299
-
300
-
301
-
302
-
303
-
304
-
305
-
306
-
307
-
308
-
309
-
310
-
311
-
312
-
313
-
314
-
315
-
316
-
317
-
318
-
319
-
320
-
321
-
322
-
323
-
324
-
325
-
326
-
327
-
328
-
329
-
330
-
331
-
332
-
333
-
334
-
335
-
336
-
337
-
338
-
339
-
340
-
341
-
342
-
343
-
344
-
345
-
346
-
347
-
348
-
349
-
350
-
351
-
352
-
353
-
354
-
355
-
356
-
357
-
358
-
359
-
360
-
361
-
362
-
363
-
364
-
365
-
366
-
367
-
368
-
369
-
370
-
371
-
372
-
373
-
374
-
375
-
376
-
377
-
378
-
379
-
380
-
381
-
382
-
383
-
384
-
385
-
386
-
387
-
388
-
389
-
390
-
391
-
392
-
393
-
394
-
395
-
396
-
397
-
398
-
399
-
400
-
401
-
402
-
403
-
404
-
405
-
406
-
407
-
408
-
409
-
410
-
411
-
412
 |
 |