Cisco IPS-4255-K9 Installation Guide - Page 321
Verifying the Interfaces and Directions on the Network Device
 |
UPC - 746320951096
View all Cisco IPS-4255-K9 manuals
Add to My Manuals
Save this manual to your list of manuals |
Page 321 highlights
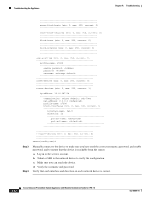
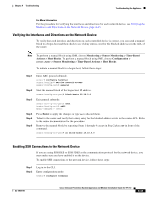
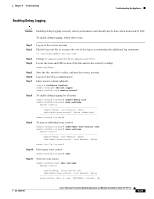
Chapter A Troubleshooting Troubleshooting the Appliance For More Information For the procedure for verifying the interfaces and directions for each network device, see Verifying the Interfaces and Directions on the Network Device, page A-43. Verifying the Interfaces and Directions on the Network Device To verify that each interface and direction on each controlled device is correct, you can send a manual block to a bogus host and then check to see if deny entries exist for the blocked addresses in the ACL of the router. Note To perform a manual block using IDM, choose Monitoring > Sensor Monitoring > Time-Based Actions > Host Blocks. To perform a manual block using IME, choose Configuration > sensor_name > Sensor Monitoring > Time-Based Actions > Host Blocks. To initiate a manual block to a bogus host, follow these steps: Step 1 Step 2 Step 3 Step 4 Step 5 Step 6 Enter ARC general submode. sensor# configure terminal sensor(config)# service network-access sensor(config-net)# general Start the manual block of the bogus host IP address. sensor(config-net-gen)# block-hosts 10.16.0.0 Exit general submode. sensor(config-net-gen)# exit sensor(config-net)# exit Apply Changes:? [yes]: Press Enter to apply the changes or type no to discard them. Telnet to the router and verify that a deny entry for the blocked address exists in the router ACL. Refer to the router documentation for the procedure. Remove the manual block by repeating Steps 1 through 4 except in Step 2 place no in front of the command. sensor(config-net-gen)# no block-hosts 10.16.0.0 Enabling SSH Connections to the Network Device If you are using SSH-DES or SSH-3DES as the communication protocol for the network device, you must make sure you have enabled it on the device. To enable SSH connections to the network device, follow these steps: Step 1 Step 2 Log in to the CLI. Enter configuration mode: sensor# configure terminal OL-18504-01 Cisco Intrusion Prevention System Appliance and Module Installation Guide for IPS 7.0 A-43
-
 1
1 -
2
-
3
-
4
-
5
-
6
-
7
-
8
-
9
-
10
-
11
-
12
-
13
-
14
-
15
-
16
-
17
-
18
-
19
-
20
-
21
-
22
-
23
-
24
-
25
-
26
-
27
-
28
-
29
-
30
-
31
-
32
-
33
-
34
-
35
-
36
-
37
-
38
-
39
-
40
-
41
-
42
-
43
-
44
-
45
-
46
-
47
-
48
-
49
-
50
-
51
-
52
-
53
-
54
-
55
-
56
-
57
-
58
-
59
-
60
-
61
-
62
-
63
-
64
-
65
-
66
-
67
-
68
-
69
-
70
-
71
-
72
-
73
-
74
-
75
-
76
-
77
-
78
-
79
-
80
-
81
-
82
-
83
-
84
-
85
-
86
-
87
-
88
-
89
-
90
-
91
-
92
-
93
-
94
-
95
-
96
-
97
-
98
-
99
-
100
-
101
-
102
-
103
-
104
-
105
-
106
-
107
-
108
-
109
-
110
-
111
-
112
-
113
-
114
-
115
-
116
-
117
-
118
-
119
-
120
-
121
-
122
-
123
-
124
-
125
-
126
-
127
-
128
-
129
-
130
-
131
-
132
-
133
-
134
-
135
-
136
-
137
-
138
-
139
-
140
-
141
-
142
-
143
-
144
-
145
-
146
-
147
-
148
-
149
-
150
-
151
-
152
-
153
-
154
-
155
-
156
-
157
-
158
-
159
-
160
-
161
-
162
-
163
-
164
-
165
-
166
-
167
-
168
-
169
-
170
-
171
-
172
-
173
-
174
-
175
-
176
-
177
-
178
-
179
-
180
-
181
-
182
-
183
-
184
-
185
-
186
-
187
-
188
-
189
-
190
-
191
-
192
-
193
-
194
-
195
-
196
-
197
-
198
-
199
-
200
-
201
-
202
-
203
-
204
-
205
-
206
-
207
-
208
-
209
-
210
-
211
-
212
-
213
-
214
-
215
-
216
-
217
-
218
-
219
-
220
-
221
-
222
-
223
-
224
-
225
-
226
-
227
-
228
-
229
-
230
-
231
-
232
-
233
-
234
-
235
-
236
-
237
-
238
-
239
-
240
-
241
-
242
-
243
-
244
-
245
-
246
-
247
-
248
-
249
-
250
-
251
-
252
-
253
-
254
-
255
-
256
-
257
-
258
-
259
-
260
-
261
-
262
-
263
-
264
-
265
-
266
-
267
-
268
-
269
-
270
-
271
-
272
-
273
-
274
-
275
-
276
-
277
-
278
-
279
-
280
-
281
-
282
-
283
-
284
-
285
-
286
-
287
-
288
-
289
-
290
-
291
-
292
-
293
-
294
-
295
-
296
-
297
-
298
-
299
-
300
-
301
-
302
-
303
-
304
-
305
-
306
-
307
-
308
-
309
-
310
-
311
-
312
-
313
-
314
-
315
-
 316
316 -
 317
317 -
 318
318 -
 319
319 -
 320
320 -
 321
321 -
 322
322 -
 323
323 -
 324
324 -
 325
325 -
 326
326 -
327
-
328
-
329
-
330
-
331
-
332
-
333
-
334
-
335
-
336
-
337
-
338
-
339
-
340
-
341
-
342
-
343
-
344
-
345
-
346
-
347
-
348
-
349
-
350
-
351
-
352
-
353
-
354
-
355
-
356
-
357
-
358
-
359
-
360
-
361
-
362
-
363
-
364
-
365
-
366
-
367
-
368
-
369
-
370
-
371
-
372
-
373
-
374
-
375
-
376
-
377
-
378
-
379
-
380
-
381
-
382
-
383
-
384
-
385
-
386
-
387
-
388
-
389
-
390
-
391
-
392
-
393
-
394
-
395
-
396
-
397
-
398
-
399
-
400
-
401
-
402
-
403
-
404
-
405
-
406
-
407
-
408
-
409
-
410
-
411
-
412
 |
 |
