Samsung SM-N900R4 User Manual Us Cellular Sm-n900r4 Galaxy Note 3 Jb English U - Page 173
Wi-Fi settings, WPS Push Button, WPS PIN Entry, Settings, Connections, Wi-Fi, Advanced, WPS available
 |
View all Samsung SM-N900R4 manuals
Add to My Manuals
Save this manual to your list of manuals |
Page 173 highlights
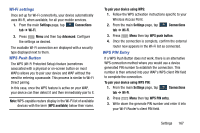
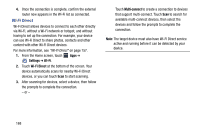
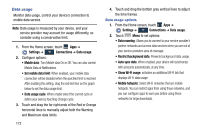
Wi-Fi settings Once set up for Wi-Fi connectivity, your device automatically uses Wi-Fi, when available, for all your mobile services. 1. From the main Settings page, tap Connections Connections tab ➔ Wi-Fi. 2. Press Menu and then tap Advanced. Configure the settings as desired. The available Wi-Fi connection are displayed with a security type displayed next to them. WPS Push Button The WPS (Wi-Fi Protected Setup) feature (sometimes associated with a physical or on-screen button on most WAPs) allows you to pair your device and WAP without the need for entering a passcode. This process is similar to Wi-Fi Direct pairing. In this case, once the WPS feature is active on your WAP, your device can then detect it and then immediately pair to it. Note: WPS-capable routers display in the Wi-Fi list of available devices with the term (WPS available) below their name. To pair your device using WPS: 1. Follow the WPS activation instructions specific to your Wireless Access Point. 2. From the main Settings page, tap Connections Connections tab ➔ Wi-Fi. 3. Press Menu then tap WPS push button. 4. Once the connection is complete, confirm the external router now appears in the Wi-Fi list as connected. WPS PIN Entry If a WPS Push Button does not work, there is an alternative WPS connection method where you would use a device generated PIN number to establish the connection. This number is then entered into your WAP's WPS client PIN field to complete the connection. To pair your device using WPS PIN: 1. From the main Settings page, tap Connections Connections tab ➔ Wi-Fi. 2. Press Menu then tap WPS PIN entry. 3. Write down the generate PIN number and enter it into your Wi-Fi Router's client PIN field. Settings 167
-
 1
1 -
2
-
3
-
4
-
5
-
6
-
7
-
8
-
9
-
10
-
11
-
12
-
13
-
14
-
15
-
16
-
17
-
18
-
19
-
20
-
21
-
22
-
23
-
24
-
25
-
26
-
27
-
28
-
29
-
30
-
31
-
32
-
33
-
34
-
35
-
36
-
37
-
38
-
39
-
40
-
41
-
42
-
43
-
44
-
45
-
46
-
47
-
48
-
49
-
50
-
51
-
52
-
53
-
54
-
55
-
56
-
57
-
58
-
59
-
60
-
61
-
62
-
63
-
64
-
65
-
66
-
67
-
68
-
69
-
70
-
71
-
72
-
73
-
74
-
75
-
76
-
77
-
78
-
79
-
80
-
81
-
82
-
83
-
84
-
85
-
86
-
87
-
88
-
89
-
90
-
91
-
92
-
93
-
94
-
95
-
96
-
97
-
98
-
99
-
100
-
101
-
102
-
103
-
104
-
105
-
106
-
107
-
108
-
109
-
110
-
111
-
112
-
113
-
114
-
115
-
116
-
117
-
118
-
119
-
120
-
121
-
122
-
123
-
124
-
125
-
126
-
127
-
128
-
129
-
130
-
131
-
132
-
133
-
134
-
135
-
136
-
137
-
138
-
139
-
140
-
141
-
142
-
143
-
144
-
145
-
146
-
147
-
148
-
149
-
150
-
151
-
152
-
153
-
154
-
155
-
156
-
157
-
158
-
159
-
160
-
161
-
162
-
163
-
164
-
165
-
166
-
167
-
 168
168 -
 169
169 -
 170
170 -
 171
171 -
 172
172 -
 173
173 -
 174
174 -
 175
175 -
 176
176 -
 177
177 -
 178
178 -
179
-
180
-
181
-
182
-
183
-
184
-
185
-
186
-
187
-
188
-
189
-
190
-
191
-
192
-
193
-
194
-
195
-
196
-
197
-
198
-
199
-
200
-
201
-
202
-
203
-
204
-
205
-
206
-
207
-
208
-
209
-
210
-
211
-
212
-
213
-
214
-
215
-
216
-
217
-
218
-
219
-
220
-
221
-
222
-
223
-
224
-
225
-
226
-
227
-
228
-
229
-
230
-
231
-
232
-
233
-
234
-
235
-
236
-
237
-
238
-
239
-
240
-
241
-
242
-
243
-
244
-
245
-
246
-
247
-
248
-
249
-
250
-
251
-
252
-
253
-
254
-
255
-
256
-
257
-
258
-
259
-
260
-
261
-
262
-
263
-
264
-
265
-
266
-
267
-
268
-
269
-
270
 |
 |