Samsung SM-N900R4 User Manual Us Cellular Sm-n900r4 Galaxy Note 3 Jb English U - Page 193
from: Tiny, Extra small, Small, Medium, Large, Extra, Easy touch mode
 |
View all Samsung SM-N900R4 manuals
Add to My Manuals
Save this manual to your list of manuals |
Page 193 highlights
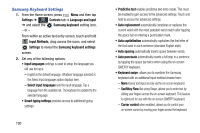
Note: The Lock automatically function is only available if your device is already using the screen lock feature. 5. Tap Speak passwords so the device will read out password information. 6. Select Answering/ending calls to select the methods used to answer and end a call. 7. Tap Easy touch mode to stop snooze alarms, calendar events and timers, and accept/reject incoming calls when you tap the device. 8. Tap Show shortcut allows you to press and hold the Power/End key to use the accessibility shortcut under the Device options screen. 9. Tap Manage accessibility to save and update your accessibility settings or share them with another device. You can export settings, import a previously saved file, or share your file with another device. 10. Tap TalkBack to activate the feature. When installed and enabled, speaks feedback to help blind and low-vision users. Important! TalkBack can collect all of the text you enter, except passwords, including personal data and credit card numbers. It may also log your user interface interactions with the device. 11. Tap the Font size to change the size of the fonts used on the device in menus, options, and more. Choose from: Tiny, Extra small, Small, Medium, Large, Extra large, and Huge. 12. Enable Magnification gestures to use exaggerated gestures such as triple-tapping, double pinching, and dragging two fingers across the screen. 13. Tap the Negative colors to reverse the display of on-screen colors from White text on a Black background to Black text on a White background. 14. Select Color adjustment to allow you to adjust the display colors if you are color blind and have difficulty reading the display because of the colors. Touch and slide the slider to the right to turn it on. Follow the on-screen instructions. Settings 187
-
 1
1 -
2
-
3
-
4
-
5
-
6
-
7
-
8
-
9
-
10
-
11
-
12
-
13
-
14
-
15
-
16
-
17
-
18
-
19
-
20
-
21
-
22
-
23
-
24
-
25
-
26
-
27
-
28
-
29
-
30
-
31
-
32
-
33
-
34
-
35
-
36
-
37
-
38
-
39
-
40
-
41
-
42
-
43
-
44
-
45
-
46
-
47
-
48
-
49
-
50
-
51
-
52
-
53
-
54
-
55
-
56
-
57
-
58
-
59
-
60
-
61
-
62
-
63
-
64
-
65
-
66
-
67
-
68
-
69
-
70
-
71
-
72
-
73
-
74
-
75
-
76
-
77
-
78
-
79
-
80
-
81
-
82
-
83
-
84
-
85
-
86
-
87
-
88
-
89
-
90
-
91
-
92
-
93
-
94
-
95
-
96
-
97
-
98
-
99
-
100
-
101
-
102
-
103
-
104
-
105
-
106
-
107
-
108
-
109
-
110
-
111
-
112
-
113
-
114
-
115
-
116
-
117
-
118
-
119
-
120
-
121
-
122
-
123
-
124
-
125
-
126
-
127
-
128
-
129
-
130
-
131
-
132
-
133
-
134
-
135
-
136
-
137
-
138
-
139
-
140
-
141
-
142
-
143
-
144
-
145
-
146
-
147
-
148
-
149
-
150
-
151
-
152
-
153
-
154
-
155
-
156
-
157
-
158
-
159
-
160
-
161
-
162
-
163
-
164
-
165
-
166
-
167
-
168
-
169
-
170
-
171
-
172
-
173
-
174
-
175
-
176
-
177
-
178
-
179
-
180
-
181
-
182
-
183
-
184
-
185
-
186
-
187
-
 188
188 -
 189
189 -
 190
190 -
 191
191 -
 192
192 -
 193
193 -
 194
194 -
 195
195 -
 196
196 -
 197
197 -
 198
198 -
199
-
200
-
201
-
202
-
203
-
204
-
205
-
206
-
207
-
208
-
209
-
210
-
211
-
212
-
213
-
214
-
215
-
216
-
217
-
218
-
219
-
220
-
221
-
222
-
223
-
224
-
225
-
226
-
227
-
228
-
229
-
230
-
231
-
232
-
233
-
234
-
235
-
236
-
237
-
238
-
239
-
240
-
241
-
242
-
243
-
244
-
245
-
246
-
247
-
248
-
249
-
250
-
251
-
252
-
253
-
254
-
255
-
256
-
257
-
258
-
259
-
260
-
261
-
262
-
263
-
264
-
265
-
266
-
267
-
268
-
269
-
270
 |
 |