Samsung SM-N900R4 User Manual Us Cellular Sm-n900r4 Galaxy Note 3 Jb English U - Page 54
Creating Contacts, Add to contacts
 |
View all Samsung SM-N900R4 manuals
Add to My Manuals
Save this manual to your list of manuals |
Page 54 highlights
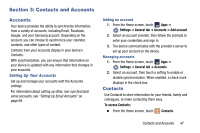
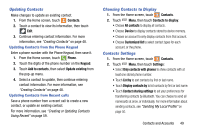
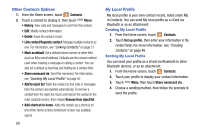
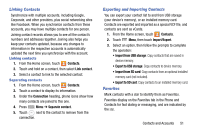
Creating Contacts 1. From the Home screen, touch Contacts ➔ Create contact. 2. Use the drop-down menu to select a save location (Device, Samsung account, Google, or Microsoft Exchange ActiveSync). 3. Tap the Name field and enter a name for this contact using the displayed keypad. • Tap to access additional name entries such as: Name prefix, First name, Middle name, Last name, and Name suffix. 4. Tap the image icon and select a photo for this contact. Selections are: Image, Pictures by people, Take picture, or S Note. 5. Tap the label button next to the Phone field and scroll through the list to select a category such as Mobile, Home, Work, Work Fax, Home Fax, Pager, Other, Callback or Custom,. 6. Enter a phone number in the Phone number field. 7. Enter additional information such as: Email, Groups, Ringtone, Message alert, Vibration pattern or tap Add another field to input additional category information. 48 8. Tap Save to complete and store the new entry. - or - Tap Cancel to delete the current entry. Creating Contacts from Recent calls Save a phone number from a recent call to create a new contact, or update an existing contact. For more information, see "Creating or Updating Contacts Using Recent" on page 59. Creating Contacts from the Phone Keypad Enter a phone number with the Phone Keypad, then save it. 1. From the Home screen, touch Phone. 2. Touch the digits of the phone number on the Keypad. 3. Touch Add to contacts, then select Create contact from the pop-up menu. 4. Continue entering contact information. For more information, see "Creating Contacts" on page 48. Tip: While entering a phone number, you can add waits or pauses. Enter the number up to the pause or wait, then touch Menu to select Add 2-sec pause or Add wait.
-
 1
1 -
2
-
3
-
4
-
5
-
6
-
7
-
8
-
9
-
10
-
11
-
12
-
13
-
14
-
15
-
16
-
17
-
18
-
19
-
20
-
21
-
22
-
23
-
24
-
25
-
26
-
27
-
28
-
29
-
30
-
31
-
32
-
33
-
34
-
35
-
36
-
37
-
38
-
39
-
40
-
41
-
42
-
43
-
44
-
45
-
46
-
47
-
48
-
 49
49 -
 50
50 -
 51
51 -
 52
52 -
 53
53 -
 54
54 -
 55
55 -
 56
56 -
 57
57 -
 58
58 -
 59
59 -
60
-
61
-
62
-
63
-
64
-
65
-
66
-
67
-
68
-
69
-
70
-
71
-
72
-
73
-
74
-
75
-
76
-
77
-
78
-
79
-
80
-
81
-
82
-
83
-
84
-
85
-
86
-
87
-
88
-
89
-
90
-
91
-
92
-
93
-
94
-
95
-
96
-
97
-
98
-
99
-
100
-
101
-
102
-
103
-
104
-
105
-
106
-
107
-
108
-
109
-
110
-
111
-
112
-
113
-
114
-
115
-
116
-
117
-
118
-
119
-
120
-
121
-
122
-
123
-
124
-
125
-
126
-
127
-
128
-
129
-
130
-
131
-
132
-
133
-
134
-
135
-
136
-
137
-
138
-
139
-
140
-
141
-
142
-
143
-
144
-
145
-
146
-
147
-
148
-
149
-
150
-
151
-
152
-
153
-
154
-
155
-
156
-
157
-
158
-
159
-
160
-
161
-
162
-
163
-
164
-
165
-
166
-
167
-
168
-
169
-
170
-
171
-
172
-
173
-
174
-
175
-
176
-
177
-
178
-
179
-
180
-
181
-
182
-
183
-
184
-
185
-
186
-
187
-
188
-
189
-
190
-
191
-
192
-
193
-
194
-
195
-
196
-
197
-
198
-
199
-
200
-
201
-
202
-
203
-
204
-
205
-
206
-
207
-
208
-
209
-
210
-
211
-
212
-
213
-
214
-
215
-
216
-
217
-
218
-
219
-
220
-
221
-
222
-
223
-
224
-
225
-
226
-
227
-
228
-
229
-
230
-
231
-
232
-
233
-
234
-
235
-
236
-
237
-
238
-
239
-
240
-
241
-
242
-
243
-
244
-
245
-
246
-
247
-
248
-
249
-
250
-
251
-
252
-
253
-
254
-
255
-
256
-
257
-
258
-
259
-
260
-
261
-
262
-
263
-
264
-
265
-
266
-
267
-
268
-
269
-
270
 |
 |