Brother International PEDESIGN 7.0 Users Manual - English - Page 134
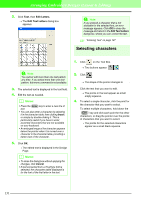
Selecting text attributes
 |
View all Brother International PEDESIGN 7.0 manuals
Add to My Manuals
Save this manual to your list of manuals |
Page 134 highlights
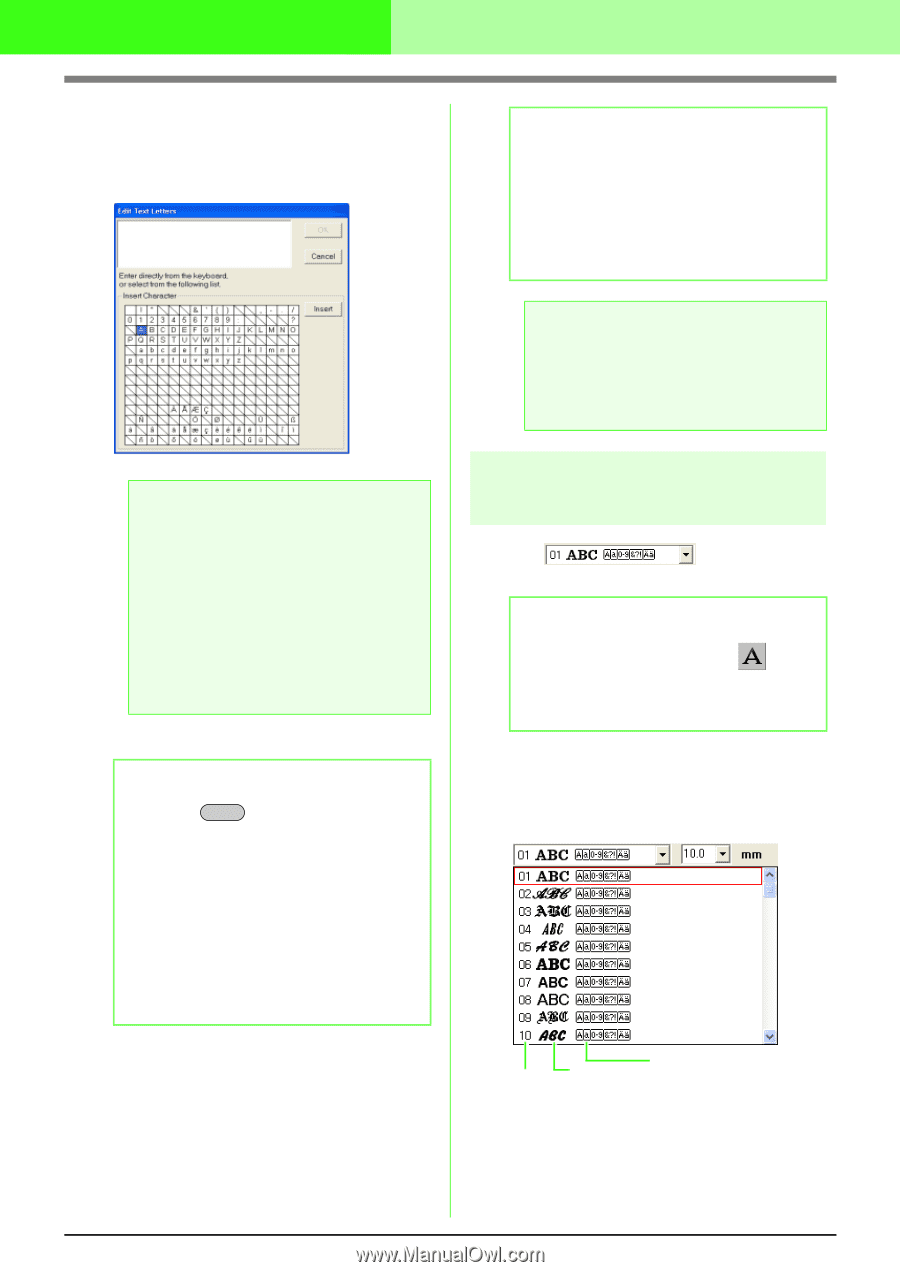
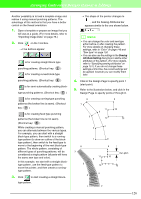
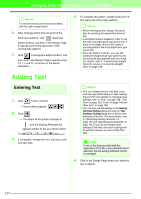
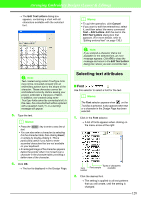
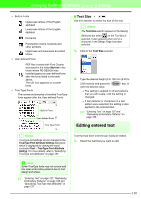
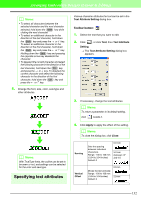
Arranging Embroidery Designs (Layout & Editing) → The Edit Text Letters dialog box appears, containing a chart with all characters available with the selected font. b Memo: • To quit the operation, click Cancel. • If you want to edit the entered text, select it, and then select the menu command Text - Edit Letters. Edit the text in the Edit Text Letters dialog box that appears. (For more details, refer to "Editing entered text" on page 130.) a Note: If you entered a character that is not available for the selected font, an error message appears. Click OK to close the message and return to the Edit Text Letters dialog box, where you can correct the text. a Note: Text created using certain TrueType fonts may not be converted correctly into an embroidery pattern due to the shape of the character. These characters cannot be embroidered correctly. Before sewing your project, embroider a trial piece of fabric. In addition, text created using some TrueType fonts cannot be converted at all. In this case, the converted text will be replaced with a question mark (?), or a warning message will appear. 5. Type the text. b Memo: • Press the Enter key to enter a new line of text. • You can also enter a character by selecting it in the character table, then clicking Insert, or simply by double-clicking it. This is particularly useful if you have to enter accented characters that are not available on your keyboard. • An enlarged image of the character appears below the pointer when it is moved over a character in the character table, providing a better view of the character. 6. Click OK. → The text is displayed in the Design Page. Selecting text attributes I Font Use this selector to select a font for the text. b Memo: The Font selector appears when on the Tool Box is selected. It also appears when text or a character in the Design Page has been selected. 1. Click in the Font selector. → A list of fonts appears when clicking on the menu arrow at the right. Types of characters Font Font sample available number 2. Click the desired font. → The setting is applied to all text patterns that you will create, until the setting is changed. 128
-
 1
1 -
2
-
3
-
4
-
5
-
6
-
7
-
8
-
9
-
10
-
11
-
12
-
13
-
14
-
15
-
16
-
17
-
18
-
19
-
20
-
21
-
22
-
23
-
24
-
25
-
26
-
27
-
28
-
29
-
30
-
31
-
32
-
33
-
34
-
35
-
36
-
37
-
38
-
39
-
40
-
41
-
42
-
43
-
44
-
45
-
46
-
47
-
48
-
49
-
50
-
51
-
52
-
53
-
54
-
55
-
56
-
57
-
58
-
59
-
60
-
61
-
62
-
63
-
64
-
65
-
66
-
67
-
68
-
69
-
70
-
71
-
72
-
73
-
74
-
75
-
76
-
77
-
78
-
79
-
80
-
81
-
82
-
83
-
84
-
85
-
86
-
87
-
88
-
89
-
90
-
91
-
92
-
93
-
94
-
95
-
96
-
97
-
98
-
99
-
100
-
101
-
102
-
103
-
104
-
105
-
106
-
107
-
108
-
109
-
110
-
111
-
112
-
113
-
114
-
115
-
116
-
117
-
118
-
119
-
120
-
121
-
122
-
123
-
124
-
125
-
126
-
127
-
128
-
 129
129 -
 130
130 -
 131
131 -
 132
132 -
 133
133 -
 134
134 -
 135
135 -
 136
136 -
 137
137 -
 138
138 -
 139
139 -
140
-
141
-
142
-
143
-
144
-
145
-
146
-
147
-
148
-
149
-
150
-
151
-
152
-
153
-
154
-
155
-
156
-
157
-
158
-
159
-
160
-
161
-
162
-
163
-
164
-
165
-
166
-
167
-
168
-
169
-
170
-
171
-
172
-
173
-
174
-
175
-
176
-
177
-
178
-
179
-
180
-
181
-
182
-
183
-
184
-
185
-
186
-
187
-
188
-
189
-
190
-
191
-
192
-
193
-
194
-
195
-
196
-
197
-
198
-
199
-
200
-
201
-
202
-
203
-
204
-
205
-
206
-
207
-
208
-
209
-
210
-
211
-
212
-
213
-
214
-
215
-
216
-
217
-
218
-
219
-
220
-
221
-
222
-
223
-
224
-
225
-
226
-
227
-
228
-
229
-
230
-
231
-
232
-
233
-
234
-
235
-
236
-
237
-
238
-
239
-
240
-
241
-
242
-
243
-
244
-
245
-
246
-
247
-
248
-
249
-
250
-
251
-
252
-
253
-
254
-
255
-
256
-
257
-
258
-
259
-
260
-
261
-
262
-
263
-
264
-
265
-
266
-
267
-
268
-
269
-
270
-
271
-
272
-
273
-
274
-
275
-
276
-
277
-
278
-
279
-
280
-
281
-
282
-
283
-
284
-
285
-
286
-
287
-
288
-
289
-
290
-
291
-
292
-
293
-
294
-
295
-
296
-
297
-
298
-
299
-
300
-
301
-
302
-
303
-
304
-
305
-
306
-
307
-
308
-
309
-
310
-
311
-
312
-
313
-
314
-
315
-
316
-
317
-
318
-
319
-
320
-
321
-
322
-
323
-
324
-
325
-
326
-
327
-
328
-
329
-
330
-
331
-
332
-
333
-
334
-
335
-
336
-
337
-
338
-
339
-
340
-
341
-
342
-
343
-
344
-
345
-
346
-
347
-
348
-
349
-
350
-
351
-
352
-
353
-
354
-
355
-
356
-
357
-
358
-
359
-
360
-
361
 |
 |