Brother International PEDESIGN 7.0 Users Manual - English - Page 207
Specifying the Design
 |
View all Brother International PEDESIGN 7.0 manuals
Add to My Manuals
Save this manual to your list of manuals |
Page 207 highlights
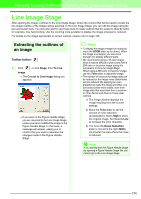
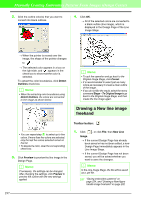
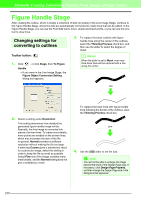
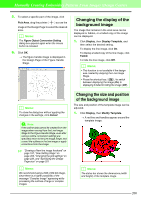
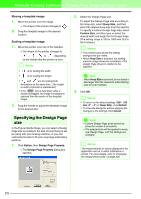
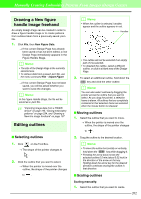
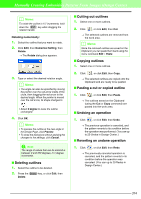
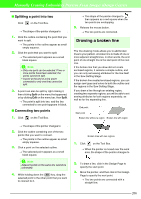
Manually Creating Embroidery Patterns From Images (Design Center) Moving a template image: 1. Move the pointer over the image. → The shape of the pointer changes to . 2. Drag the template image to the desired location. Scaling a template image: 1. Move the pointer over one of the handles. → The shape of the pointer changes to , , or , depending on the handle that the pointer is over. b Memo: • is for scaling the width. • is for scaling the height. • and are for scaling both dimensions at the same time. (The heightto-width proportion is maintained.) • If the Shift key is held down while a handle is dragged, the image is enlarged or reduced from the center of the template image. 2. Drag the handle to adjust the template image to the desired size. Specifying the Design Page size In the Figure Handle Stage, you can select a Design Page size according to the size of hoop that you will be using with your sewing machine, or you can customize the size to fit even very large embroidery patterns. 1. Click Option, then Design Page Property. → The Design Page Property dialog box appears. 2. Select the Design Page size. To adjust the Design Page size according to the hoop size, select Hoop Size, and then select the desired hoop size from the selector. To specify a custom Design Page size, select Custom Size, and then type or select the desired width and height for the Design Page. (The setting range is 100 to 1000 mm (3.9 to 39.4 inches).) b Memo: • The preview area shows the setting changes that you make. • When Hoop Size is selected, the sewing machine image shows the orientation of the Design Page (hoop) in relation to the machine. a Note: When Hoop Size is selected, do not select a size larger than the maximum embroidering area for your machine. 3. Click OK. b Memo: • To return to the default settings (100 × 100 mm (4" × 4") of Hoop Size), click Default. • To close the dialog box without applying the changes to the settings, click Cancel. a Note: • Custom Design Page sizes cannot be saved for version 5 and earlier. • The selected size will be applied to every new Design Page, until the settings are changed. b Memo: The measurements for values displayed in the application can be in either millimeters or inches. For more details, refer to "Changing the measurement units" on page 236. 201
-
 1
1 -
2
-
3
-
4
-
5
-
6
-
7
-
8
-
9
-
10
-
11
-
12
-
13
-
14
-
15
-
16
-
17
-
18
-
19
-
20
-
21
-
22
-
23
-
24
-
25
-
26
-
27
-
28
-
29
-
30
-
31
-
32
-
33
-
34
-
35
-
36
-
37
-
38
-
39
-
40
-
41
-
42
-
43
-
44
-
45
-
46
-
47
-
48
-
49
-
50
-
51
-
52
-
53
-
54
-
55
-
56
-
57
-
58
-
59
-
60
-
61
-
62
-
63
-
64
-
65
-
66
-
67
-
68
-
69
-
70
-
71
-
72
-
73
-
74
-
75
-
76
-
77
-
78
-
79
-
80
-
81
-
82
-
83
-
84
-
85
-
86
-
87
-
88
-
89
-
90
-
91
-
92
-
93
-
94
-
95
-
96
-
97
-
98
-
99
-
100
-
101
-
102
-
103
-
104
-
105
-
106
-
107
-
108
-
109
-
110
-
111
-
112
-
113
-
114
-
115
-
116
-
117
-
118
-
119
-
120
-
121
-
122
-
123
-
124
-
125
-
126
-
127
-
128
-
129
-
130
-
131
-
132
-
133
-
134
-
135
-
136
-
137
-
138
-
139
-
140
-
141
-
142
-
143
-
144
-
145
-
146
-
147
-
148
-
149
-
150
-
151
-
152
-
153
-
154
-
155
-
156
-
157
-
158
-
159
-
160
-
161
-
162
-
163
-
164
-
165
-
166
-
167
-
168
-
169
-
170
-
171
-
172
-
173
-
174
-
175
-
176
-
177
-
178
-
179
-
180
-
181
-
182
-
183
-
184
-
185
-
186
-
187
-
188
-
189
-
190
-
191
-
192
-
193
-
194
-
195
-
196
-
197
-
198
-
199
-
200
-
201
-
 202
202 -
 203
203 -
 204
204 -
 205
205 -
 206
206 -
 207
207 -
 208
208 -
 209
209 -
 210
210 -
 211
211 -
 212
212 -
213
-
214
-
215
-
216
-
217
-
218
-
219
-
220
-
221
-
222
-
223
-
224
-
225
-
226
-
227
-
228
-
229
-
230
-
231
-
232
-
233
-
234
-
235
-
236
-
237
-
238
-
239
-
240
-
241
-
242
-
243
-
244
-
245
-
246
-
247
-
248
-
249
-
250
-
251
-
252
-
253
-
254
-
255
-
256
-
257
-
258
-
259
-
260
-
261
-
262
-
263
-
264
-
265
-
266
-
267
-
268
-
269
-
270
-
271
-
272
-
273
-
274
-
275
-
276
-
277
-
278
-
279
-
280
-
281
-
282
-
283
-
284
-
285
-
286
-
287
-
288
-
289
-
290
-
291
-
292
-
293
-
294
-
295
-
296
-
297
-
298
-
299
-
300
-
301
-
302
-
303
-
304
-
305
-
306
-
307
-
308
-
309
-
310
-
311
-
312
-
313
-
314
-
315
-
316
-
317
-
318
-
319
-
320
-
321
-
322
-
323
-
324
-
325
-
326
-
327
-
328
-
329
-
330
-
331
-
332
-
333
-
334
-
335
-
336
-
337
-
338
-
339
-
340
-
341
-
342
-
343
-
344
-
345
-
346
-
347
-
348
-
349
-
350
-
351
-
352
-
353
-
354
-
355
-
356
-
357
-
358
-
359
-
360
-
361
 |
 |